This article will help you understand how to setup Google Analytics to track visitors, page views, and checkout behavioral analysis on your WooCommerce site.
From our experience the WooCommerce Google Analytics Pro plugin is one of the better “set-it and forget-it” plugins around. Capable of tracking customer tendencies and purchasing patterns, this plugin provides a lot of crucial information.
Are you ready to learn about setting up the Google Analytics Pro plugin on WooCommerce?
Let’s dive in!
Step 1. Enable Ecommerce Settings through Google Analytics
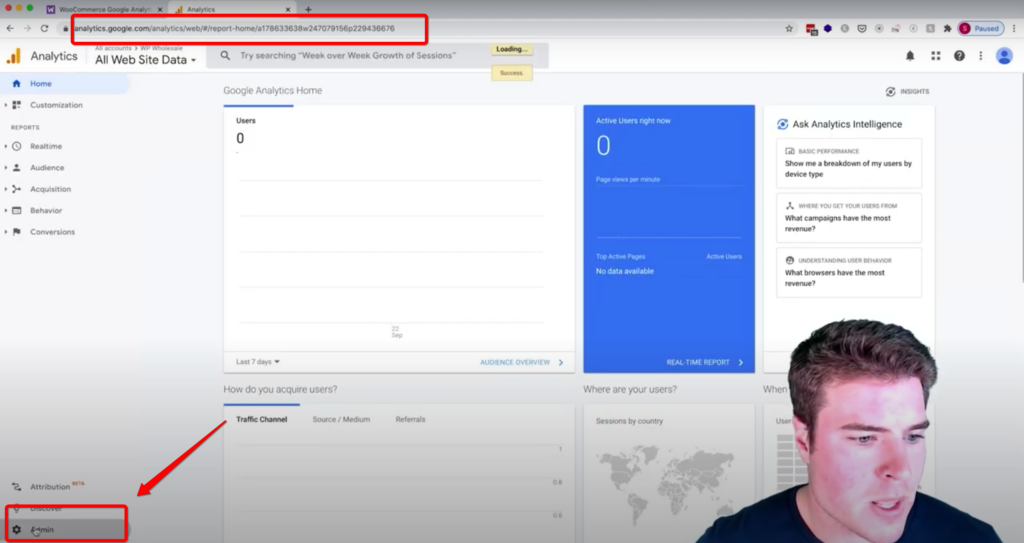
In order to begin you’ll have to visit your Google Analytics account to ensure that all of the necessary Ecommerce settings are enabled. Click on the ‘Admin’ button in the bottom left hand corner of your screen as shown below:
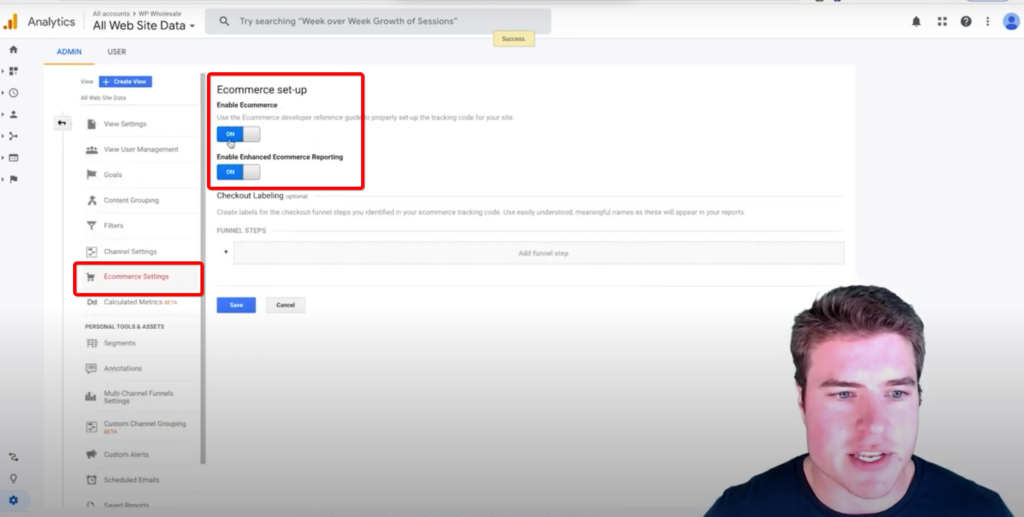
Under the Admin tab, select Ecommerce Settings and then ensure that your Ecommerce set-up settings are both enabled as shown below. Both switches should be in the ON position.
Step 2: Purchase the WooCommerce Google Analytics Pro plugin and Install
If you have not already purchased and downloaded the WooCommerce Google Analytics Pro plugin you can do some from this link.
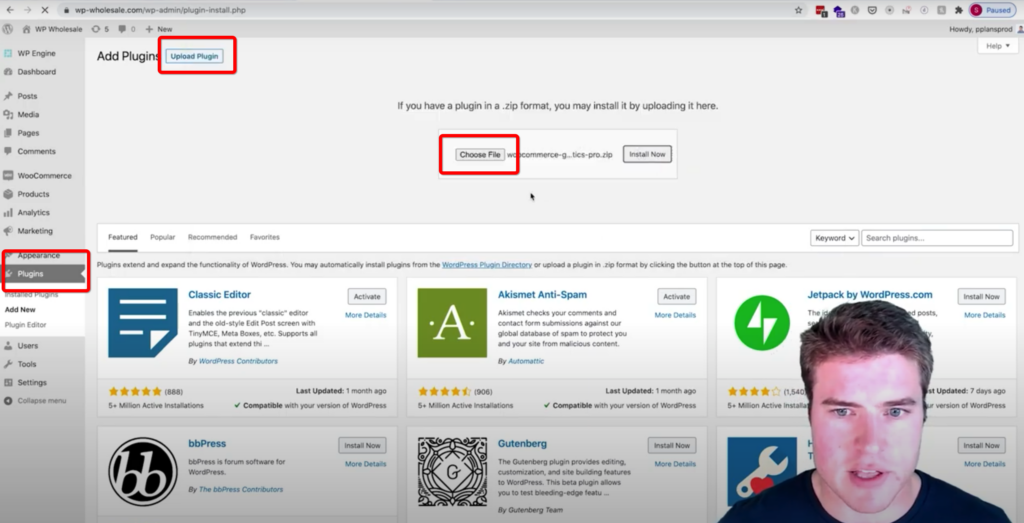
Once the plugin has been purchased and downloaded head to your WooCommerce store, click on Plugins, Upload Plugin and then Choose File. See below for the locations of these tabs.
You’ll be taken to the next screen where you’ll need to click Activate Plugin. Once activated you should see the WooCommerce Google Analytics Pro with the option to be configured, see below:
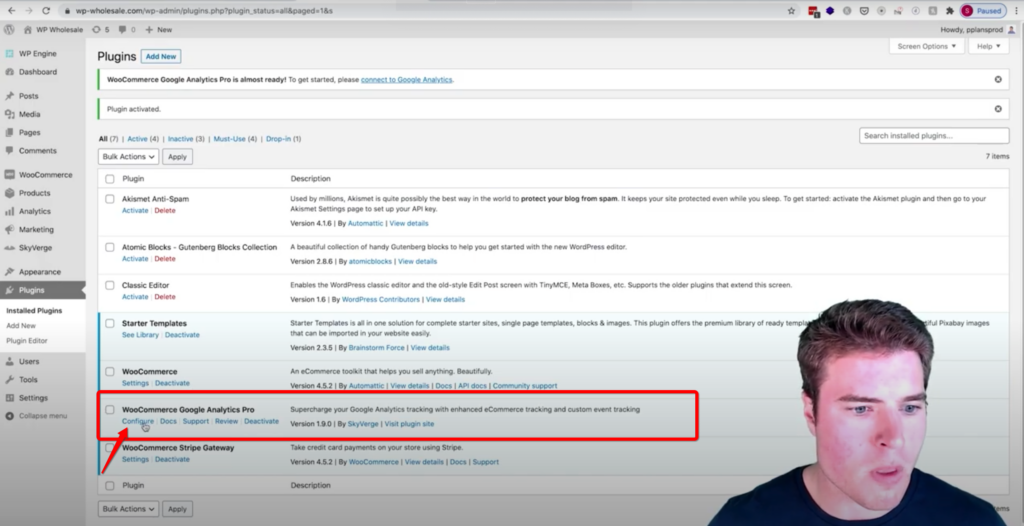
On the Configure page you’ll want to check the Enable Google Analytics tracking box as well as Authenticate Google Analytics with your Google account.
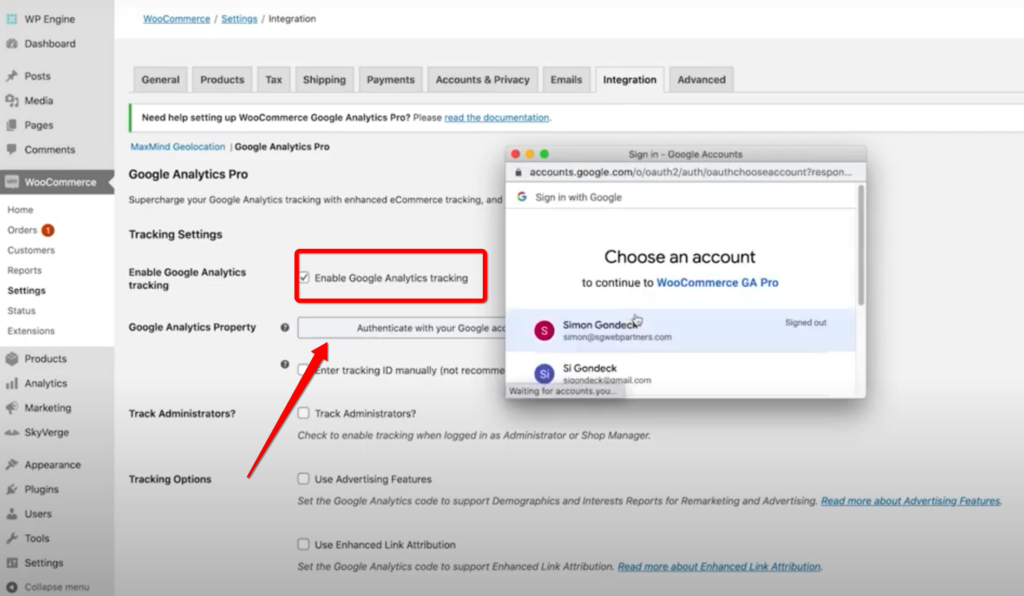
As you can see above, there is also an option to enter your tracking ID manually but authenticating through your Google account is typically much faster.
Once your authentication process is complete, be sure to select your Google Analytics property. If you have multiple properties be sure to double check so that you are selecting the correct one.
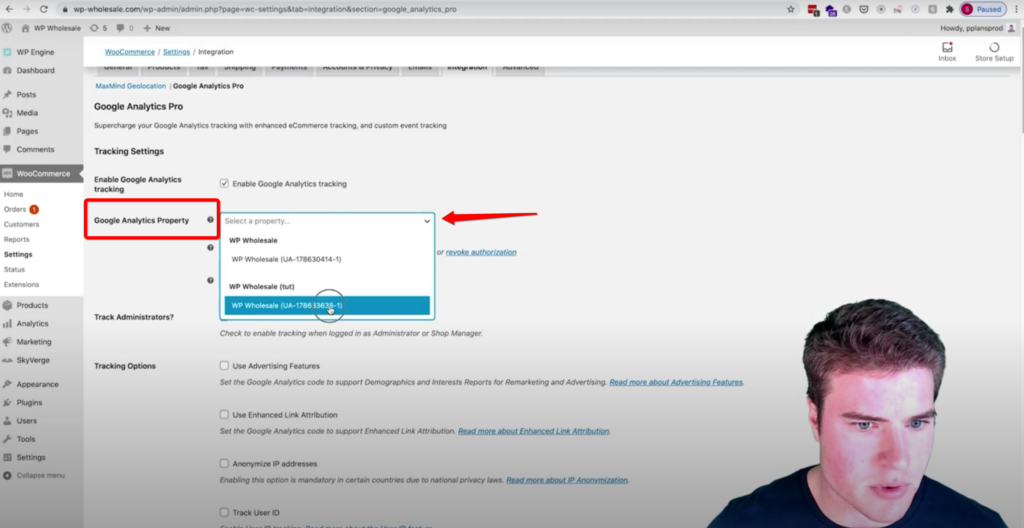
Save changes so that you do not lose any of this work that you’ve done!
As far as the other Integration settings you can see below how I usually configure mine although these are entirely up to you.
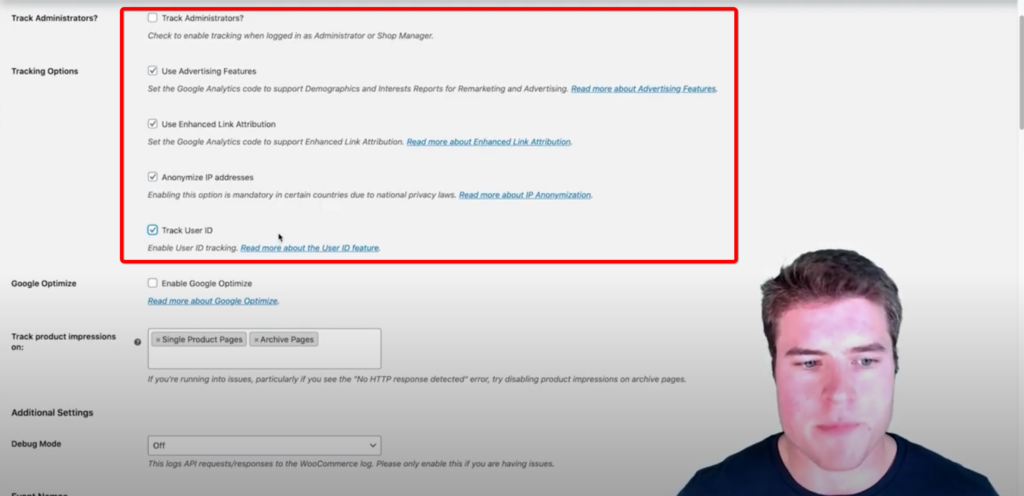
You can also see that I have selected to track product impressions on both Single Product Pages as well as Archives Pages which I do highly recommend.
When you’re done selecting settings, give everything a quick save using the Save Changes button at the bottom of your page.
Step 3: Testing the WooCommerce Google Analytics Pro plugin
In order to properly test your WooCommerce Google Analytics Pro plugin, you’ll want to clear your caches by clicking on the Purge All Caches shown below under General Settings.
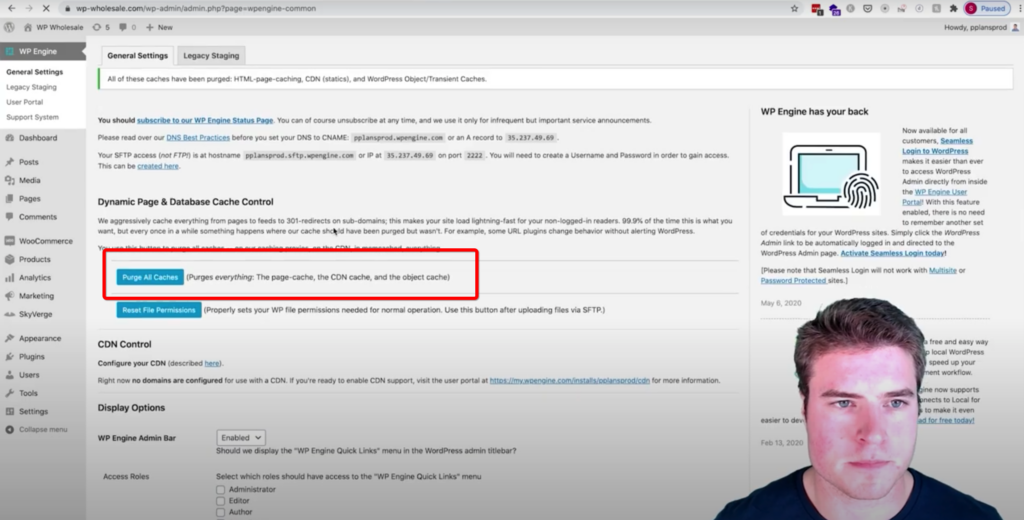
After your Caches have been cleared, open up a test store and place an order. In the tutorial video you’ll see that I check out with two beanies. Be sure to update the quantities or browse amongst other items to see the full potential of Google Analytics Pro.
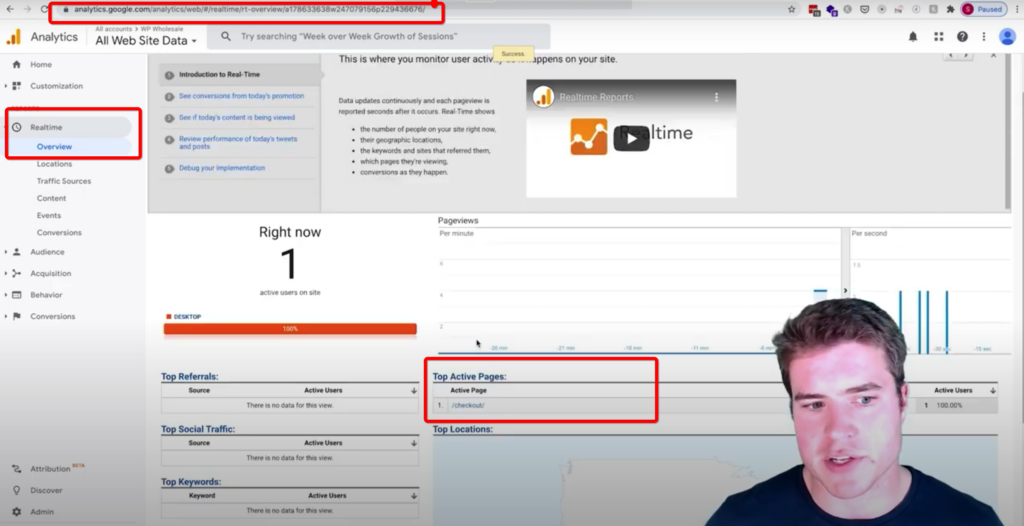
As shown below, back on the Google Analytics page even before you’ve completed the checkout process you’ll be able to see in Realtime that there are active users on the checkout page!
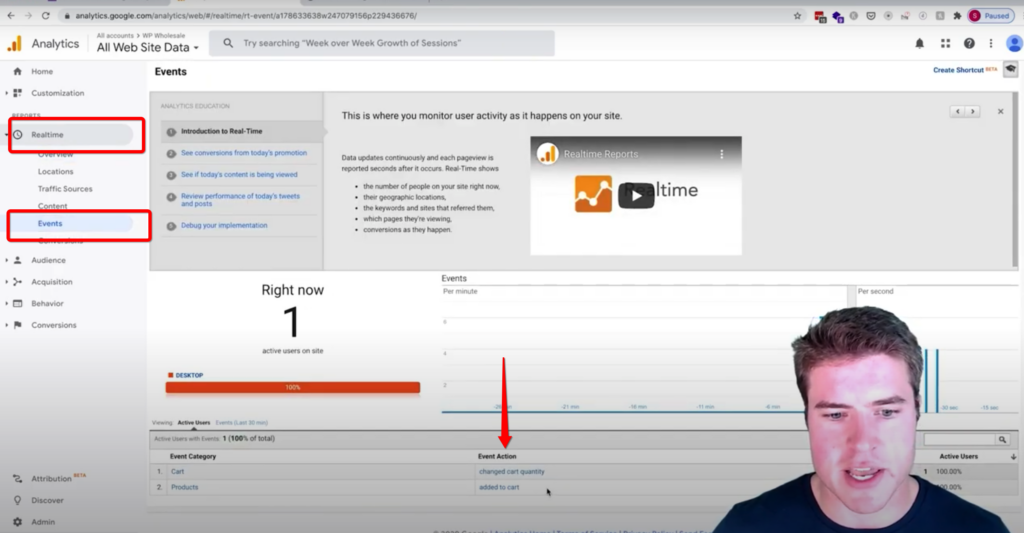
Under Realtime and then Events you’ll also be able to see any actions that have been taken by customers. In this particular example we are able to see that the quantities were changed and that someone has added a product to their cart.
Please note that under the Conversions/Ecommerce tab shown below it may take 24 hours for your results to update.
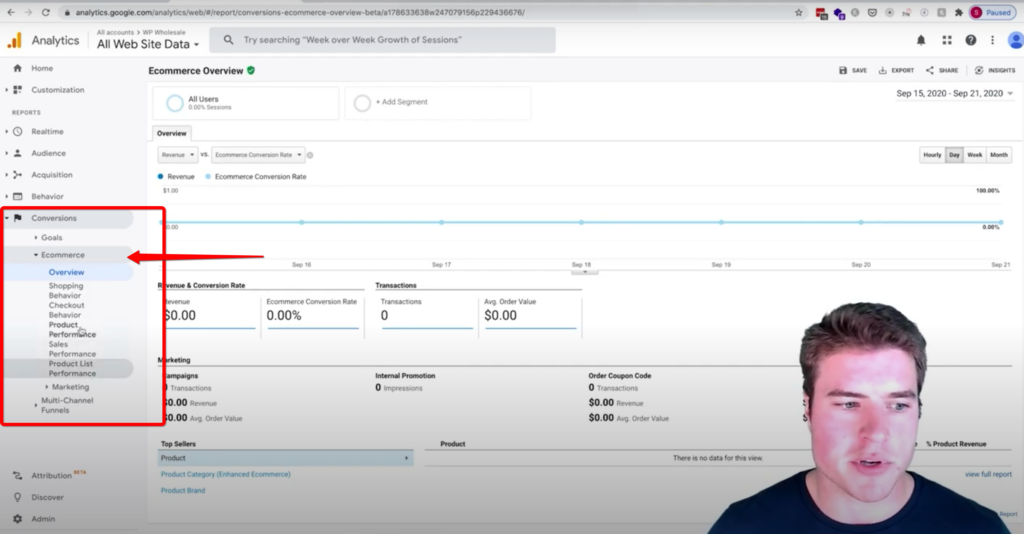
For examples of the Checkout Behavior Analysis or the Shopping Behavior Analysis’ available through this Google Analytics Pro plugin please be sure to check out our tutorial video below!
You’re now ready to get started with the WooCommerce Google Analytics Pro plugin!
If you’re still having any issues tracking your sales analytics through WooCommerce or sick and tired of using outdated plugins be sure to check out the WooCommerce Google Analytics Pro plugin.
Video Tutorials
Google Analytics Pro
Google Analytics
