In this guide, you will learn how to set up Zapier on your WooCommerce store through the WooCommerce Zapier plugin so that you can create automated actions called Zaps based on events in WooCommerce, such as new orders, new customers, new subscriptions, order status changes, and subscription renewals.
Zapier lets you connect your WooCommerce store events to an almost limitless range of third party web services, from Dropbox, Twilio, and Google Docs to Mailchimp, Campaign Monitor, and Zendesk.
Using WooCommerce Zapier integration lets you Zap customer data, order data, shipping methods, and more wherever you need it, letting you streamline your eCommerce business so you can spend more time on strategy and less time on busywork!
If you are more of a visual learner, feel free to instead follow along with my video tutorial at the end of this post, where I outline everything described below.
Let’s get to it!
How to set up Zapier on WooCommerce?
- Download, Install and Activate the Zapier Plugin
- Create a Zap
- Add a Zapier Feed in Your WooCommerce Site
- Complete and Test Your Zap
- Video Tutorial
- Additional Resources
Step 1: Download, Install and Activate the Zapier WordPress Plugin
The first thing that you need to do is purchase and download the WooCommerce Zapier plugin from the WooCommerce extensions store.
Once you’ve downloaded the WooCommerce Zapier extension, go to your WordPress Dashboard, select the Plugins option and click Add New.
Then, from the Add Plugin page, click the Upload Plugin button and select the file that you just downloaded. When this file displays on the page, click the Install Now button beside it.
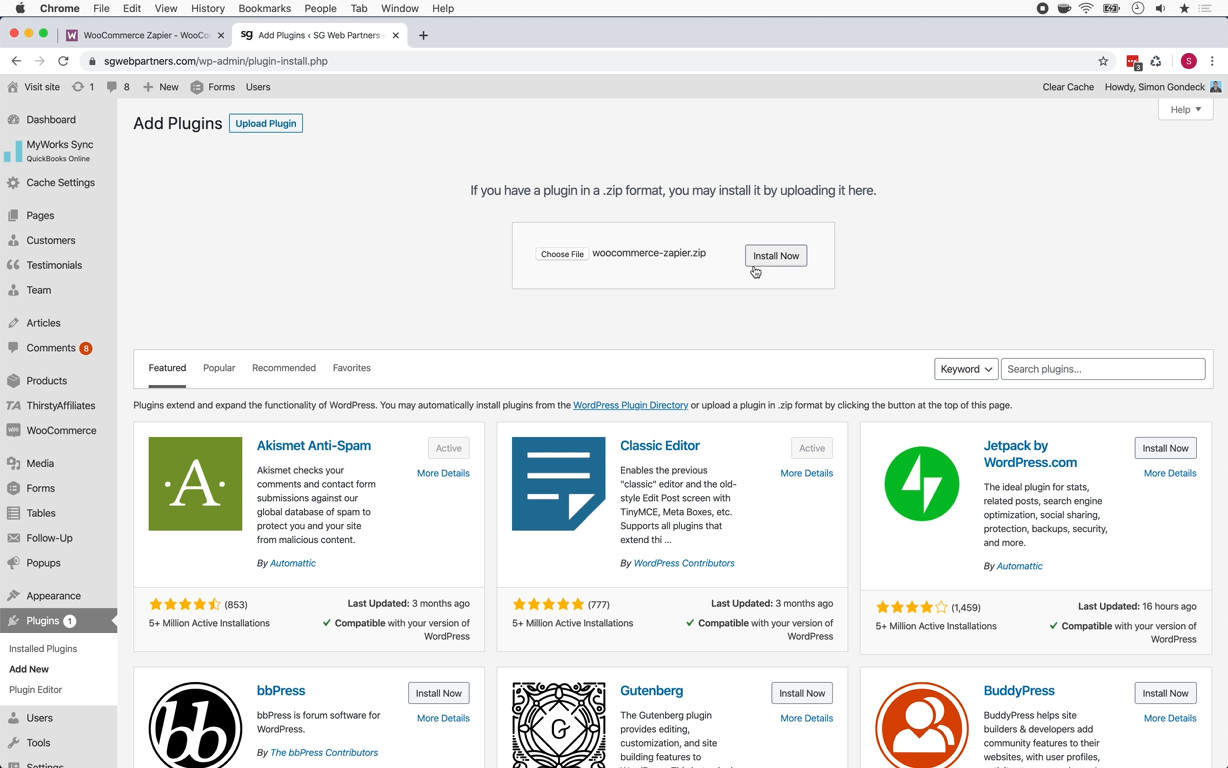
Finally, you must activate the plugin by clicking the Activate Plugin button.
Step 2: Create a Zap
Now that you have added and activated the plugin in WooCommerce, you are ready to create your first Zap. To do this, open a new tab in your web browser and go to www.zapier.com. If you have not yet created a Zapier account, do this now. Otherwise, log into your account.
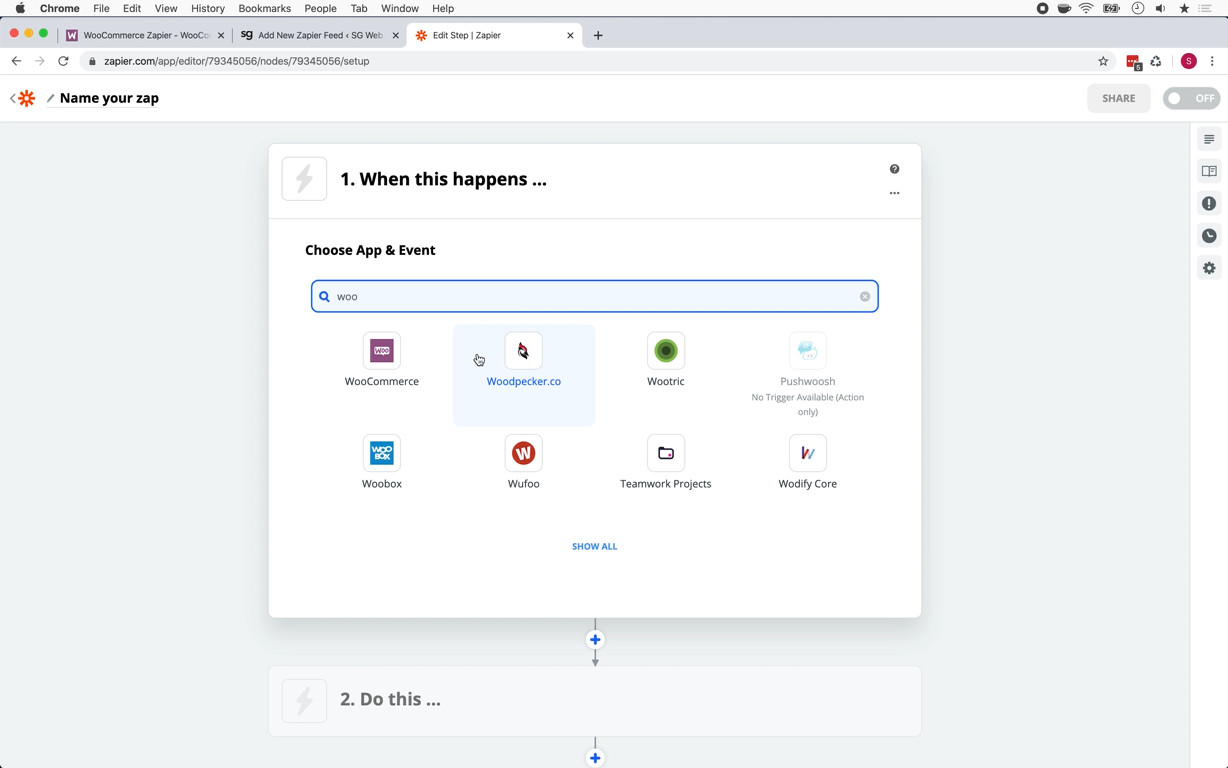
Once you’ve logged in, click on the + button to add a new Zap. The next thing that you will have to do is choose an app for this Zap. In the search bar, start typing “WooCommerce” until you see its app icon display. Then, click the icon.
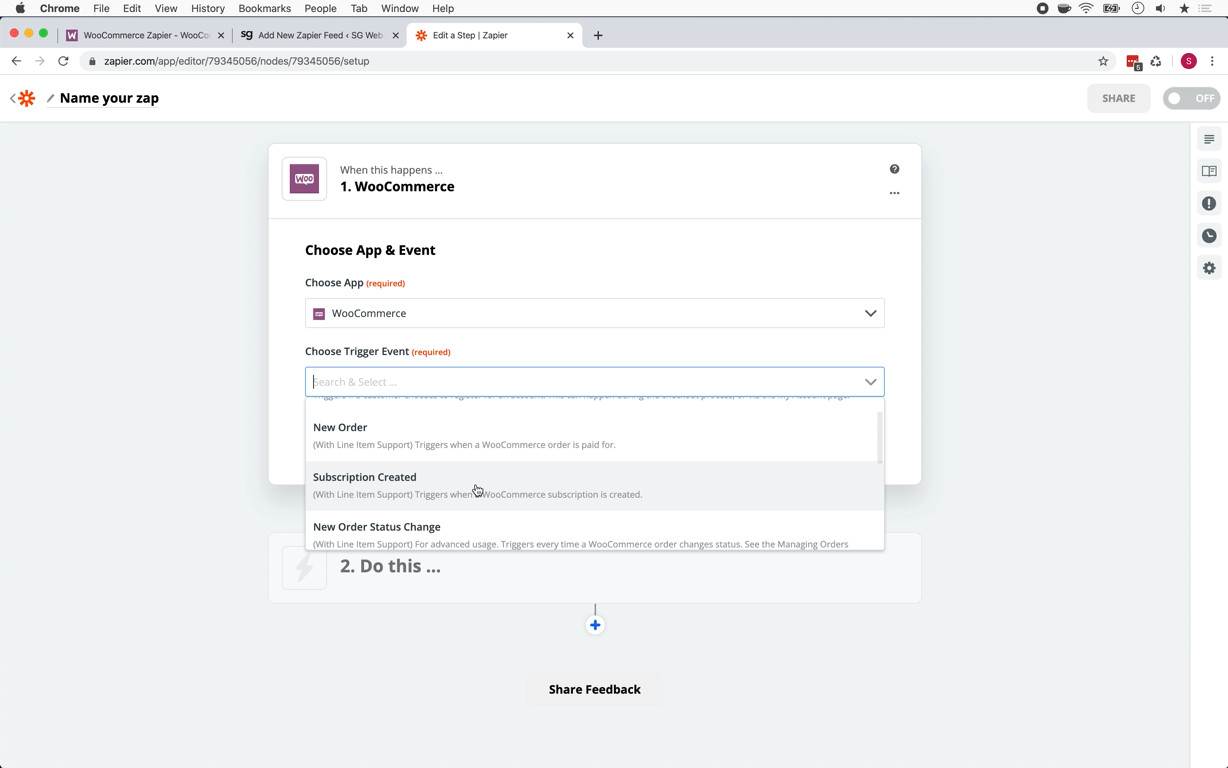
You afterward must select a trigger event, which is what will cause an action to run. In the example that we will use in this guide, which assumes that you have installed WooCommerce Subscriptions, we are going to choose Subscription Created from the Choose Trigger Event dropdown list. But there are many other types of triggers that you can choose, which are associated with common events that occur during the running of your site. You can base triggers on everything from subscription data to checkout fields, and even zap information to/from your store’s payment gateways.
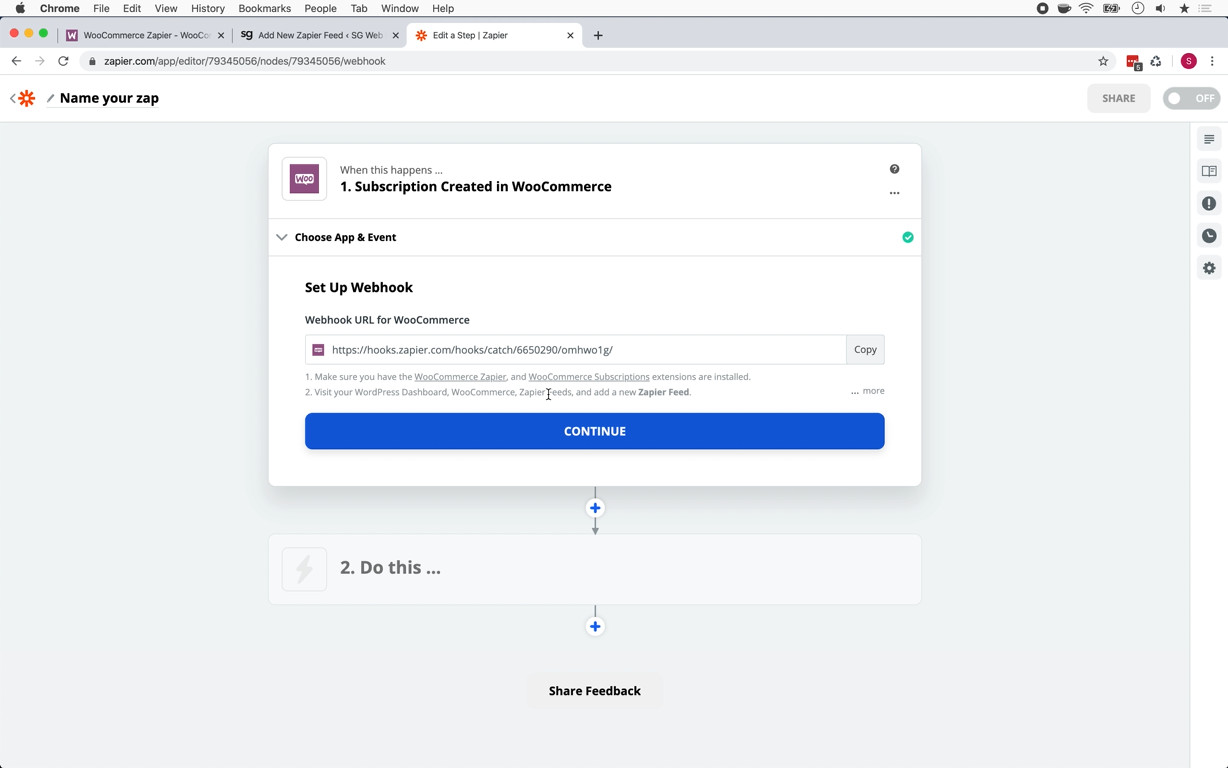
After clicking the Continue button, you next have to grab the WooCommerce webhook, which you will use when adding a Zapier feed to your WooCommerce site. You do this by clicking the Copy button next to the webhook URL.
Step 3: Add a Zapier Feed in Your WooCommerce Site
Once you have copied the WooCommerce webhook to your clipboard, return to the browser tab with your WordPress Dashboard. There, select WooCommerce and click Zapier Feeds. From the Zapier Feeds page, then click the Add Feed button, which will take you to the Add Zapier Feed page.
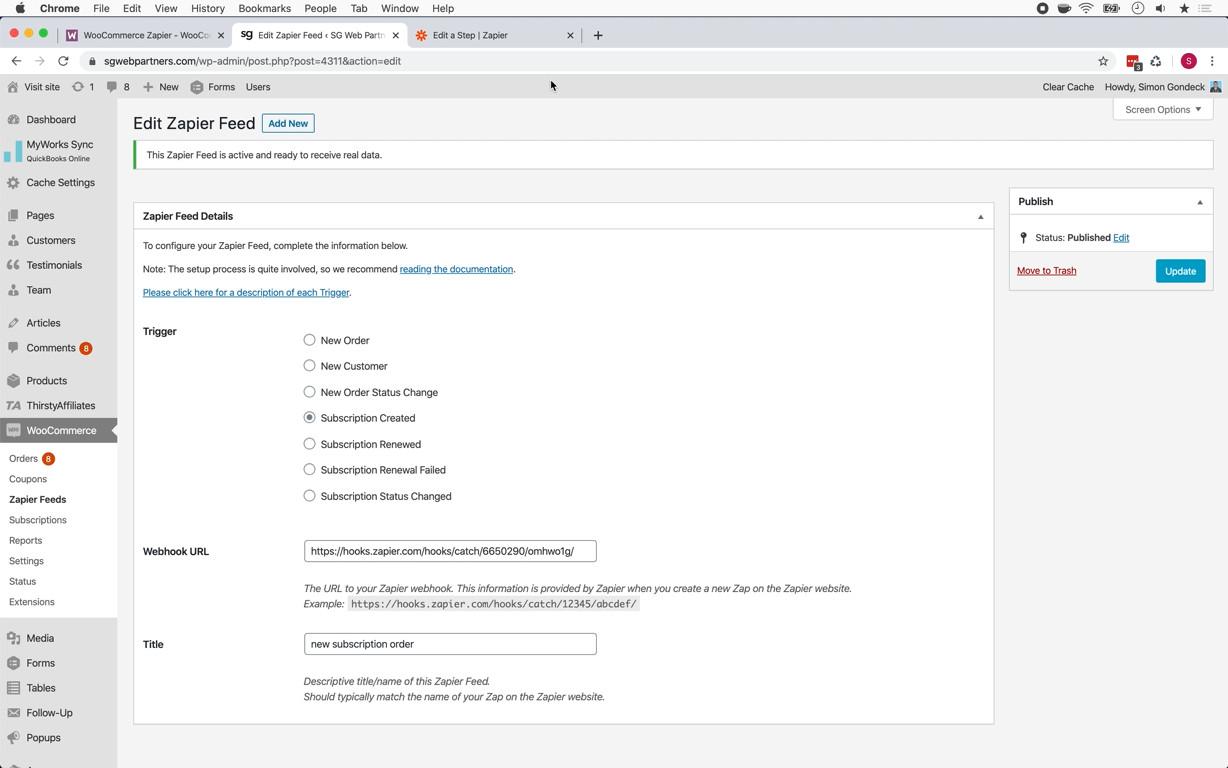
In the Trigger field, you should choose the trigger event that you selected for your Zap. In our example, we will select Subscription Created.
In the Webhook URL field, paste the contents of your clipboard.
Finally, you will also want to give this feed a title. In this example, we will enter “new subscription order” in the Title field.
Step 4: Complete and Test Your Zap
Now, you are ready to finish and test your Zap. So, go back to the browser tab with the Zap editor. There click the Continue button.
Next, we will test a connection between the Zap and your WooCommerce site. To do this, click Test & Continue.
Then, select your trigger. In this case, it is 1. Subscription Created in WooCommerce. This will fill in both the Choose App & Event and the Set Up Webhook fields. In the Find Data field, you should see a list of subscription records that you have created in your WooCommerce site.
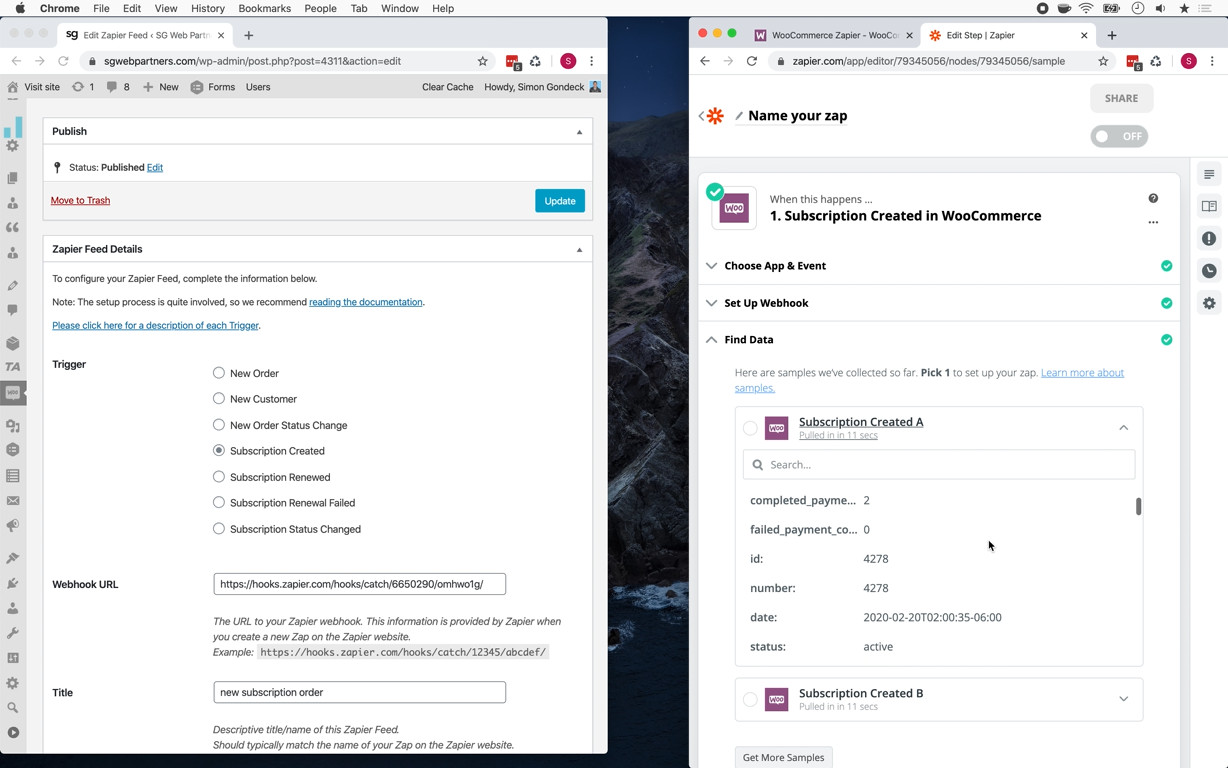
Select a test record and click the Done Editing button.
Now, you have to choose an action that you want taken when a subscription WooCommerce order is created. In a real-world situation, you might want to have an invoice created in your cloud-based accounting system – Freshbooks, Quickbooks, Xero, or something similar – when the customer completes their checkout. But in this example, we are going to do something really simple: create a worksheet in a Google Sheets file when a subscription is created.
To do this, click 2. Do this … Then, in the Choose App & Event field type “Google Sheets” until its app icon displays. After selecting this icon, from the Choose Action Event dropdown list, select “Create Worksheet” and click the Continue button.
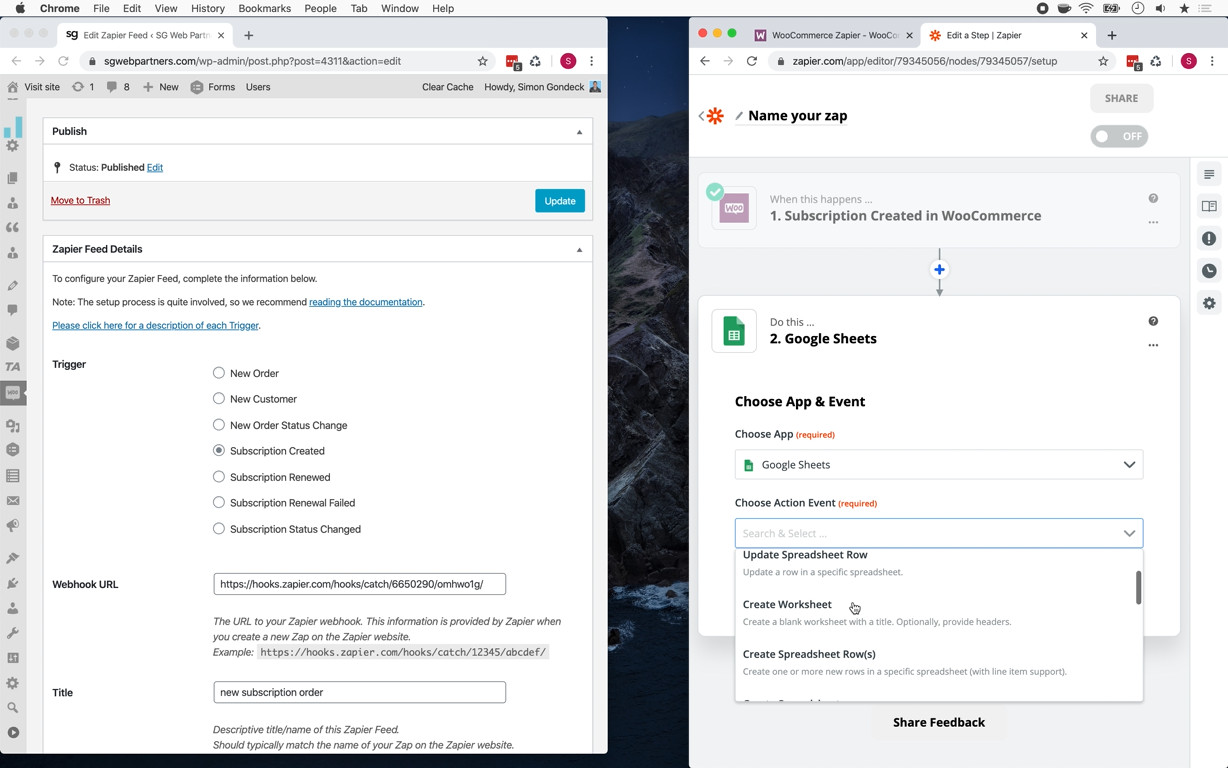
You will then have to sign into your Google account after clicking on Sign in to Google Sheets.
Once you have signed in, click the Continue button.
Now, you need to customize the worksheet. You do this by providing Zapier with a set of information. First, select the Google Drive where the spreadsheet exists in the Drive field. Then, choose the spreadsheet in the Spreadsheet field. In the Title and Header fields, select the title of the worksheet and the data that you want to add to it. Finally, specify whether or not you want the worksheet overwritten in the Overwrite? field.
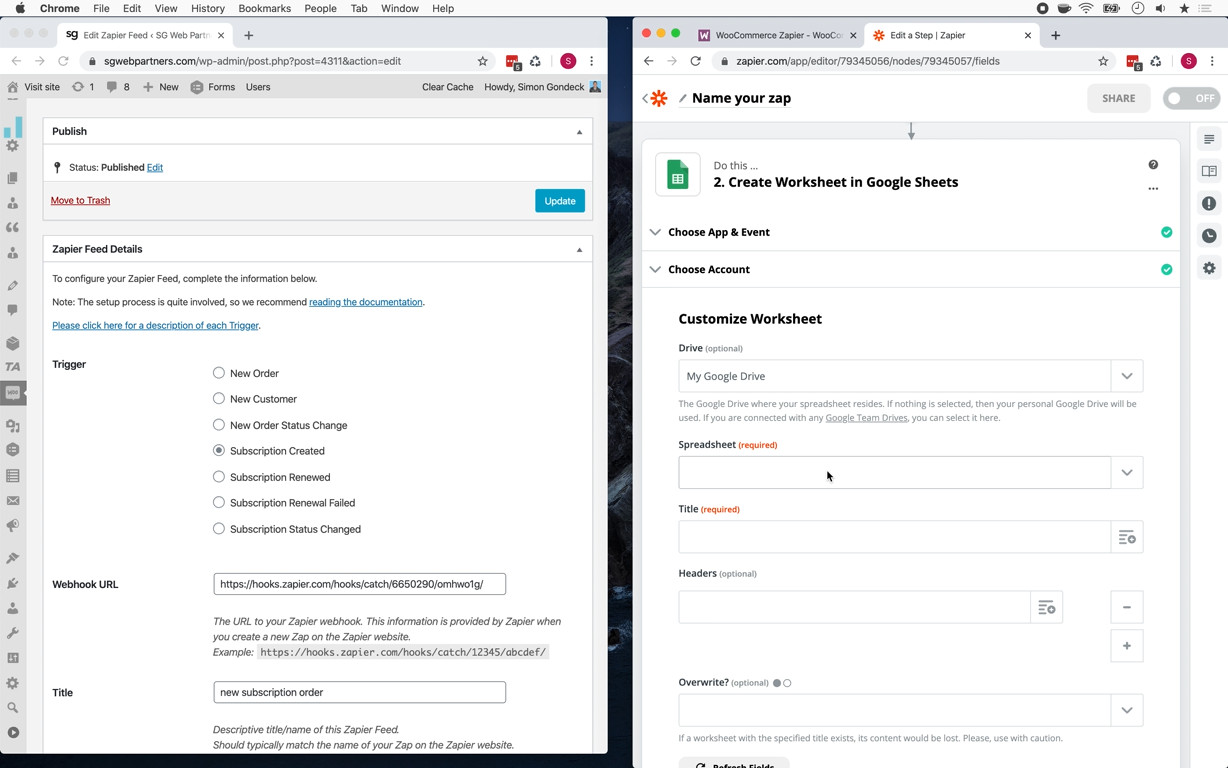
After clicking the Continue button, next click the Test & Continue button, which will send test data to the spreadsheet. Once this has completed, if you go to the spreadsheet, you should see the test record that you added.
