In this tutorial we go over how to add a prepaid subscription product that bills yearly (but ships monthly) with WooCommerce Subscriptions!
For example, a customer pays $120 every year for a cleaning package subscription but the cleaning package is shipped to them every month.
In this article, I will take you through the steps of how to do this in WooCommerce by using a combination of WooCommerce Subscriptions and AutomateWoo.
If you are more of a visual learner, feel free to watch my tutorial video below.
Let’s jump into it!
1. Set up a Subscription Product in WooCommerce
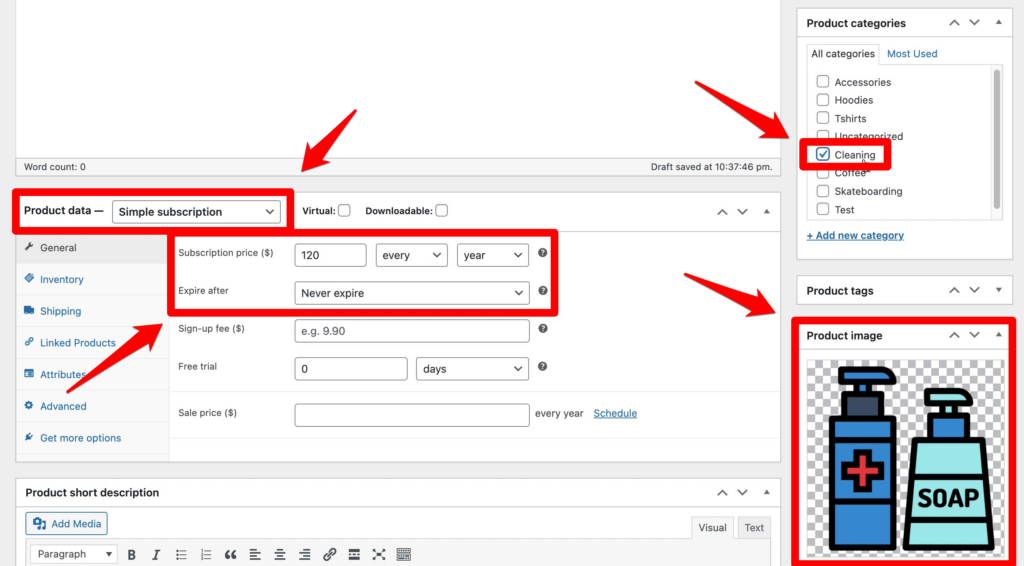
The first step in the process is to set up your subscription product in WooCommerce. To do this, click Products > Add New from the WordPress Dashboard. Then, from the Product data dropdown list, select Simple Subscription.
Quick note: we assume you have already purchased, installed and set up WooCommerce Subscriptions. If you haven’t, you can find instructions on how to do this here.
In our example, we will name our product Cool Cleaning Product. We will further set the Subscription price to $120 every year, and leave Expire after to Never expire. Finally, we will add a Product Image, set the Category to Cleaning and click Publish.
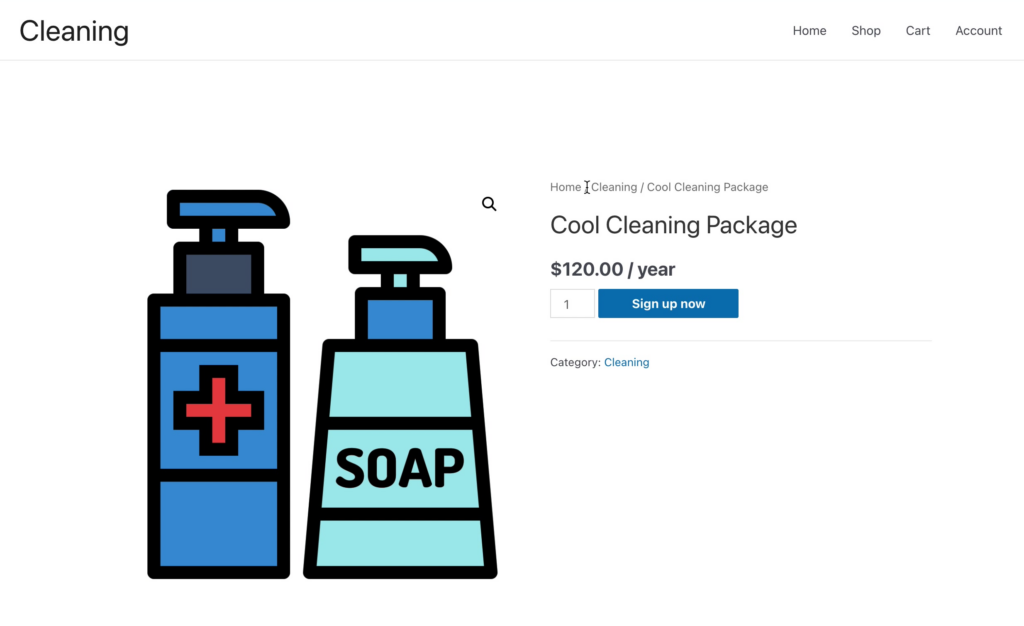
When we look at the Product page for this, we will see the following:
2. Install and Set Up AutomateWoo
The next thing that you need to do is purchase and download AutomateWoo. Afterward, you install it by first clicking Plugins from the WordPress Dashboard. Then, click Add New before clicking Upload Plugin. Finally, click Choose File and select the file that you previously downloaded.
You must further activate the plugin on the Plugins page. I also suggest that you go to AutomateWoo > Settings > General and do the following:
- Set Customer opt-in mode to Opt-out.
- Turn Enable session tracking off.
- Turn Automatically delete expired coupons off.


3. Create AutomateWoo Workflows To Process the Prepaid Subscription
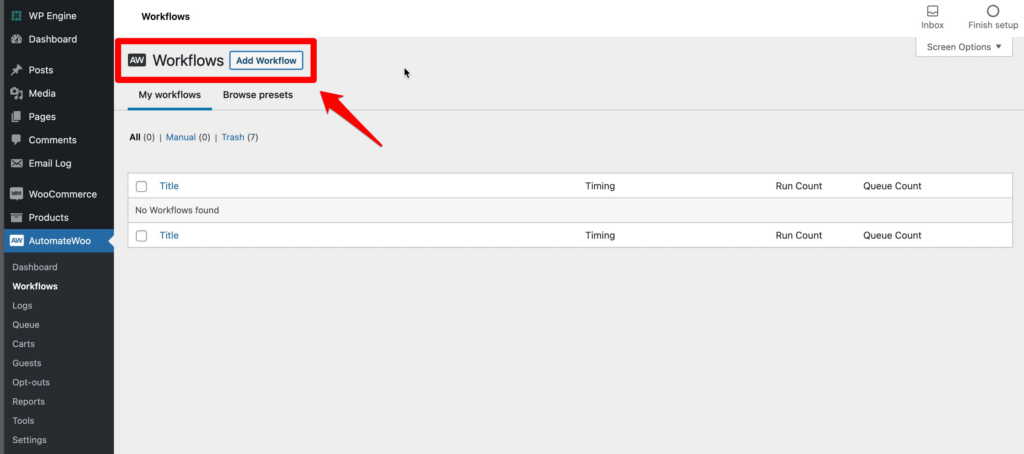
To process the prepaid subscription, we will create three workflows in AutomateWoo. You create a workflow by going to AutomateWoo > Workflow and clicking Add Workflow.
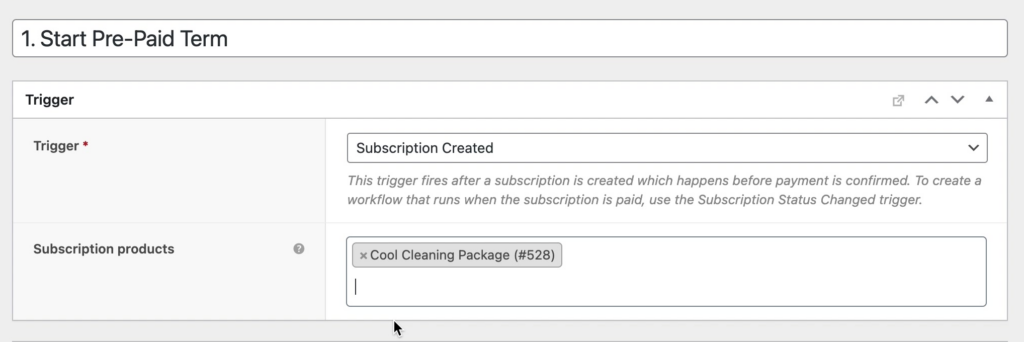
On the Add New Workflow page, we will create our first workflow, which will trigger when your customer orders a subscription. We will name this workflow 1. Start Pre-Paid Term. Then, from the Trigger dropdown list, we will select Subscription Created. We will also input the subscription product that we created in the previous step in Subscription products.
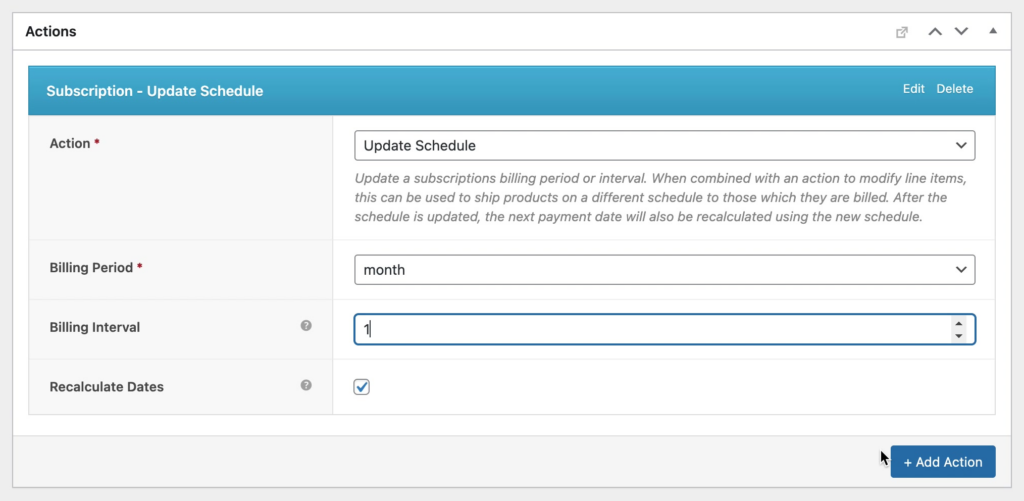
Next, in the Actions pane, we will add an action that will update the subscription schedule monthly. To do this, click Add Action. Then, select Update Schedule from the Actions dropdown list, month from the Billing Period dropdown list, and set Billing Interval to 1.
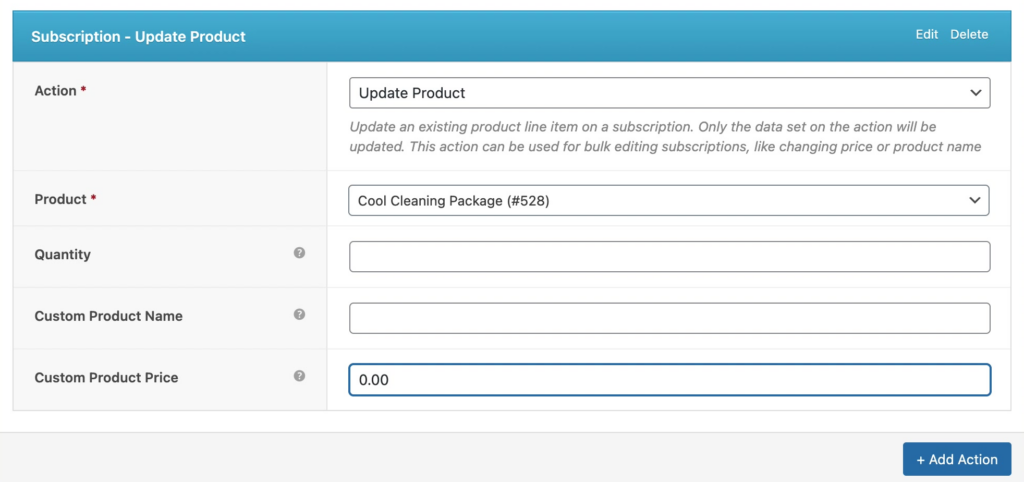
Next, add a second action that will recalculate the dates by again clicking on Add Action. Here, select Update Product from the Action dropdown list, input the subscription product that we created in the previous step in Product, and set Custom Product Price to $0.00.
Finally, at the top of the page, click Save.
Now, we will add a second workflow to renew the subscription at a specific time by again clicking Add Workflow. We’ll call this 2. Renew Pre-Paid Subscription. Here, set the Trigger to Subscription Renewal Payment Complete and input the subscription product that we created in the previous step in Subscription products.

Next, in the Rules pane, we will add a rule to renew the subscription yearly by clicking Add Rule Group. In the three input boxes, do the following:
- Select Subscription – Payment Count from the list.
- Select is a multiple of from the list.
- Input 12.

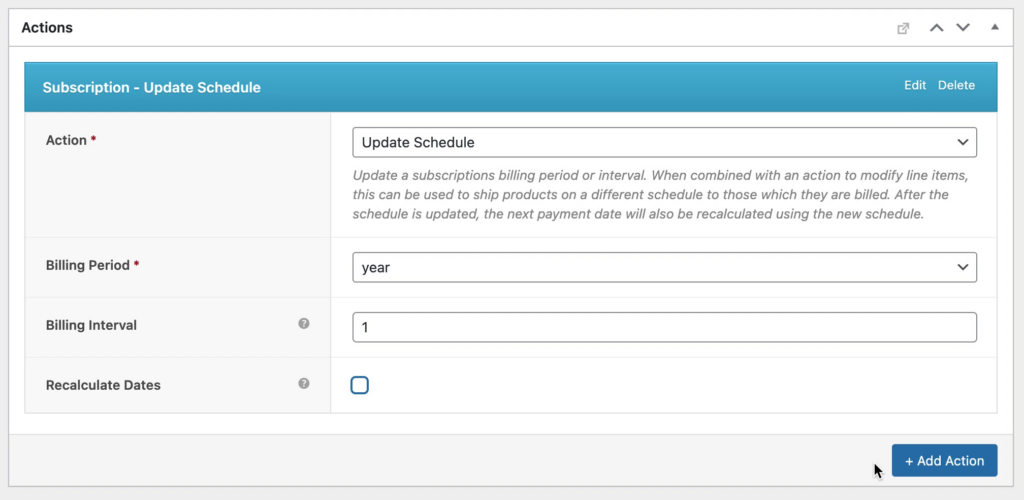
Next, in the Actions pane, add a new action by clicking Add Action. Then, select Update Schedule from the Actions dropdown list, year from the Billing Period dropdown list, and set Billing Interval to 1, Also, turn off Recalculate Dates.
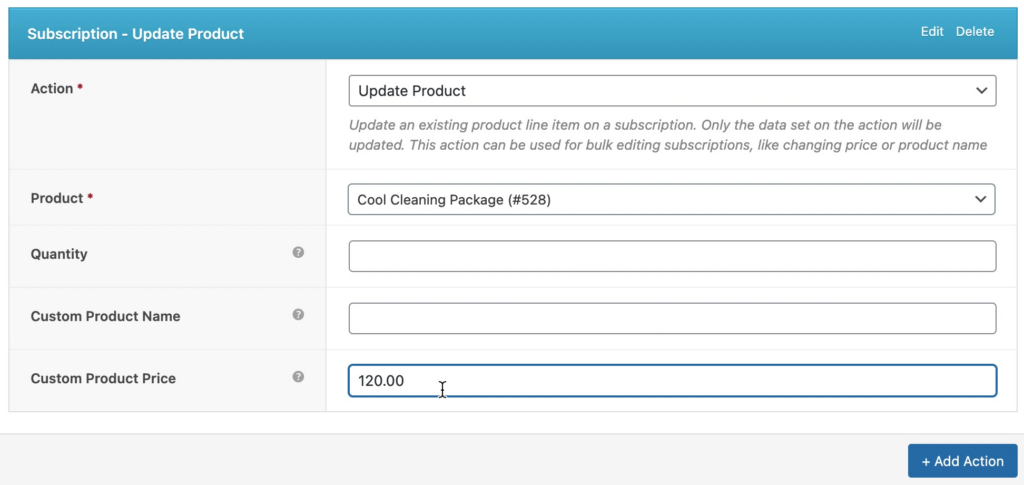
Next, add a second action that will update the product price by clicking on Add Action. Here, select Update Product from the Action dropdown list, input the subscription product that we created in the previous step in Product, and set Custom Product Price to $120.00.
Finally, at the top of the page, click Save.
Now, we will add a third workflow to resume the subscription term by again clicking Add Workflow. We’ll call this 3. Resume Pre-Paid Term. Here, set the Trigger to Subscription Renewal Payment Complete and input the subscription product that we created in the previous step in Subscription products.

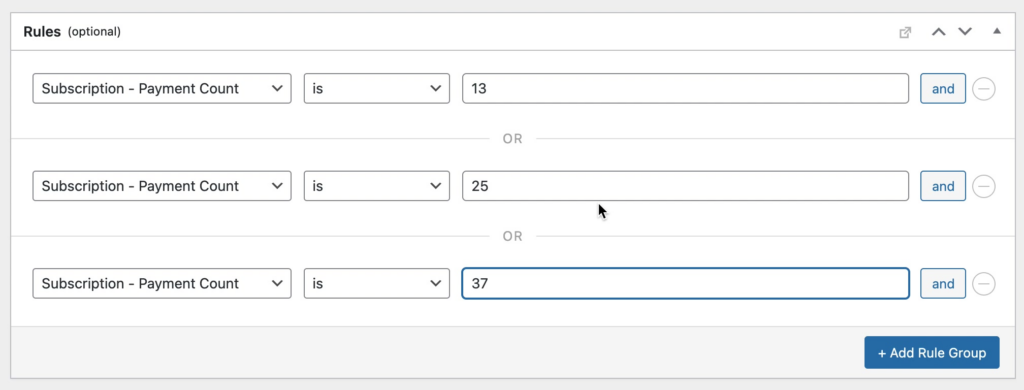
Next, in the Rules pane, we will add a rule to renew the subscription yearly by clicking Add Rule Group. In the three input boxes, do the following:
- Select Subscription – Payment Count from the list.
- Select is from the list.
- Input 13.
We will also add a second rule by again clicking Add Rule Group. In the three input boxes, do the following:
- Select Subscription – Payment Count from the list.
- Select is from the list.
- Input 25.
Repeat this last set of steps for as many years as you would like the subscription to exist, by adding a new rule and changing the third input box to 37, 49, 61, and so forth.
Next, we will add the same two actions that we added to our first workflow.


Finally, at the top of the page, click Save.
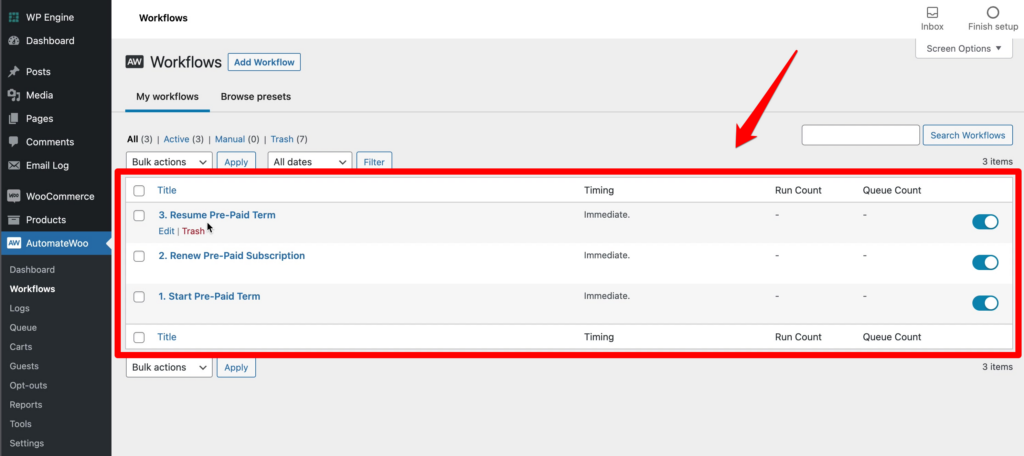
Now, you should have the following three workflows on your Workflows page:
4. Test the Workflows
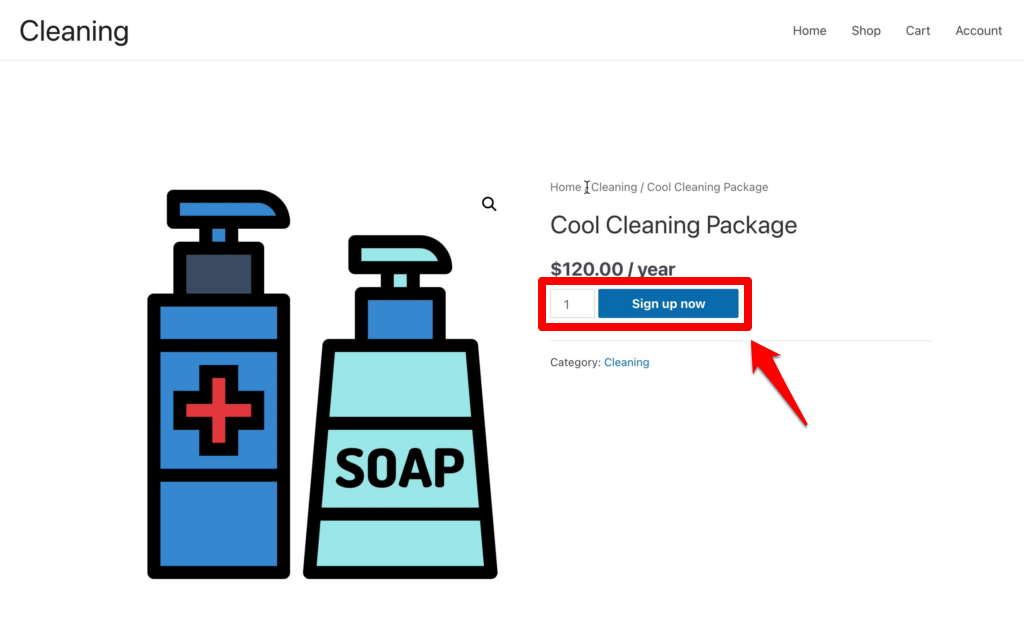
To test our workflows, we will open our site in an incognito window and find the cleaning product that we added. We will also click Sign up now.
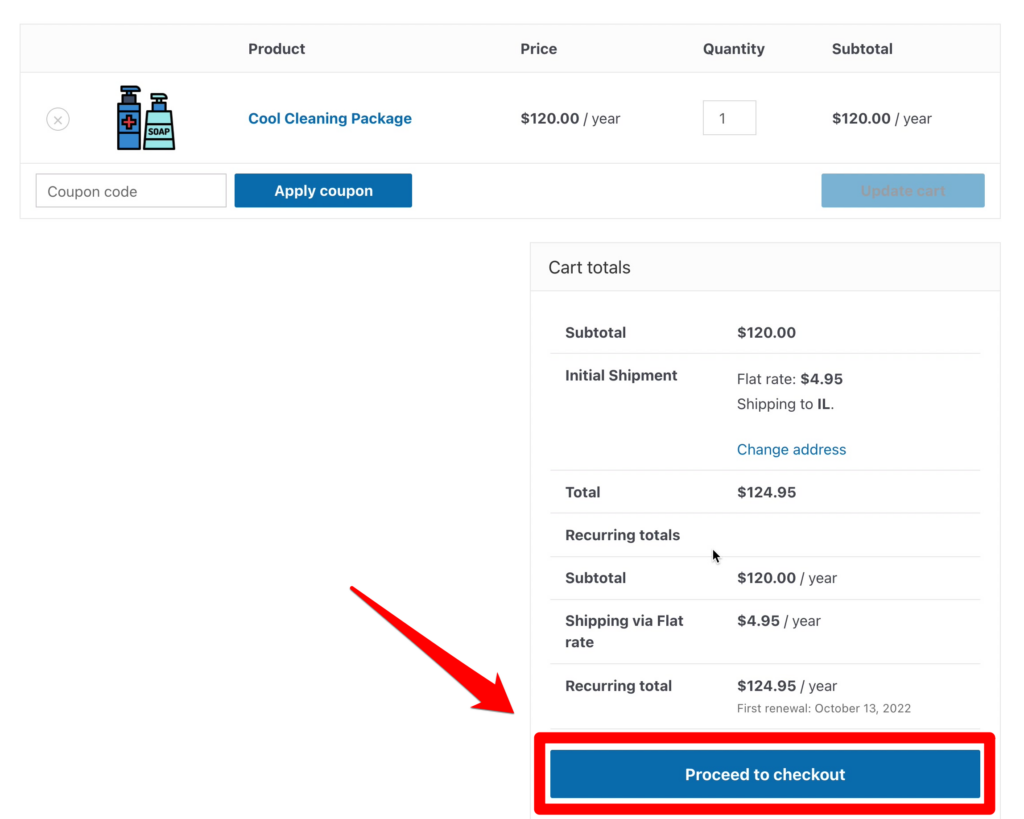
Then, on the Cart page, click Proceed to checkout.
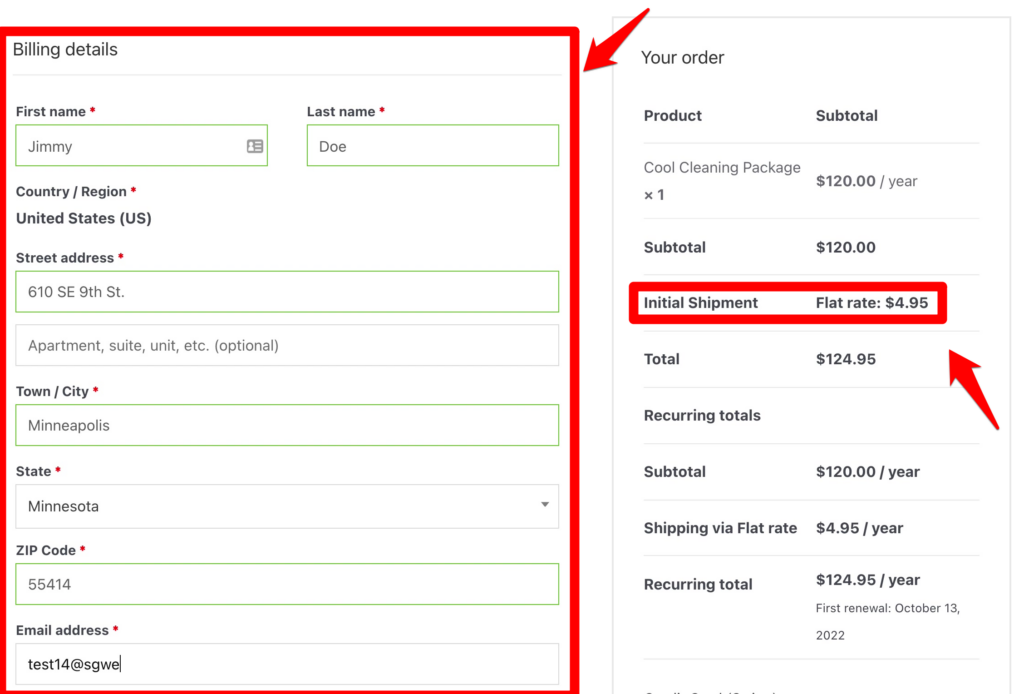
Next, on the Checkout page, add a dummy customer and a test credit card account.
Note: the shipping rate has been set to $4.95.
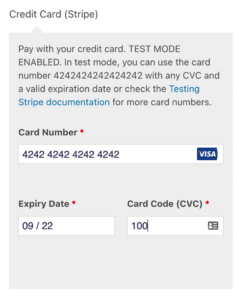
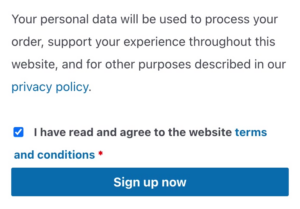
Next, click Sign up now at the bottom of the page.
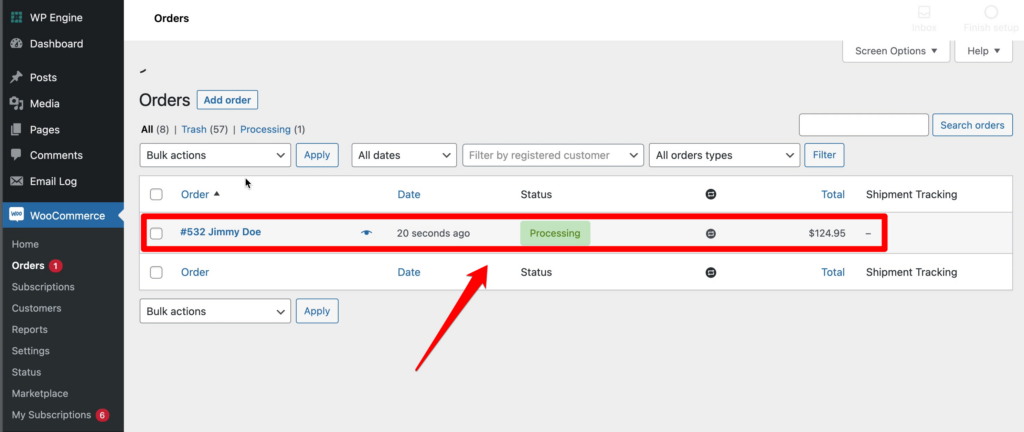
Next, go to the Orders page by selecting WooCommerce > Orders from the WordPress dashboard and click on the order that you just created.
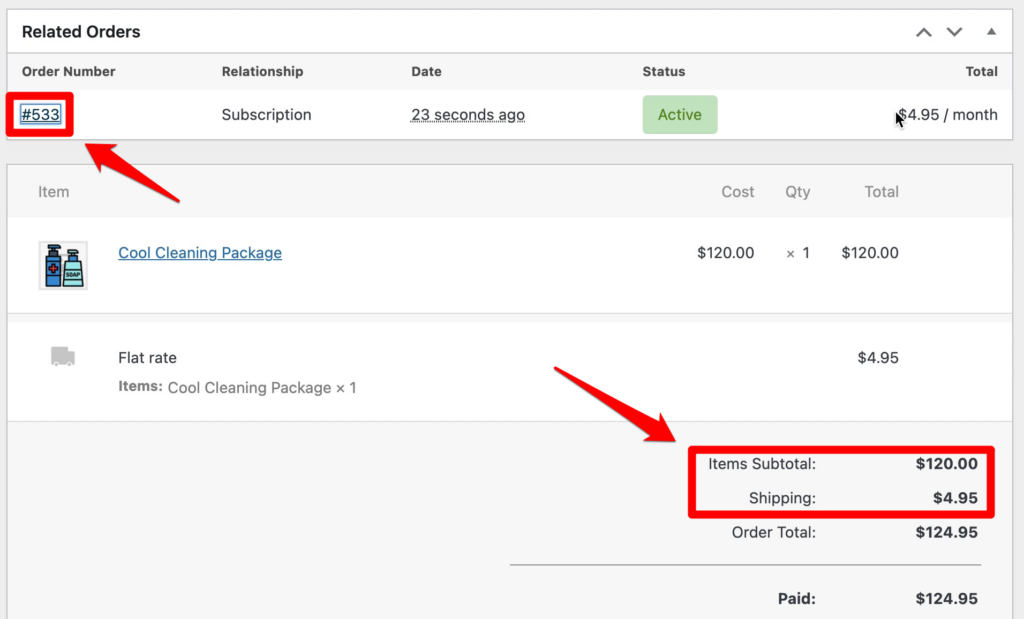
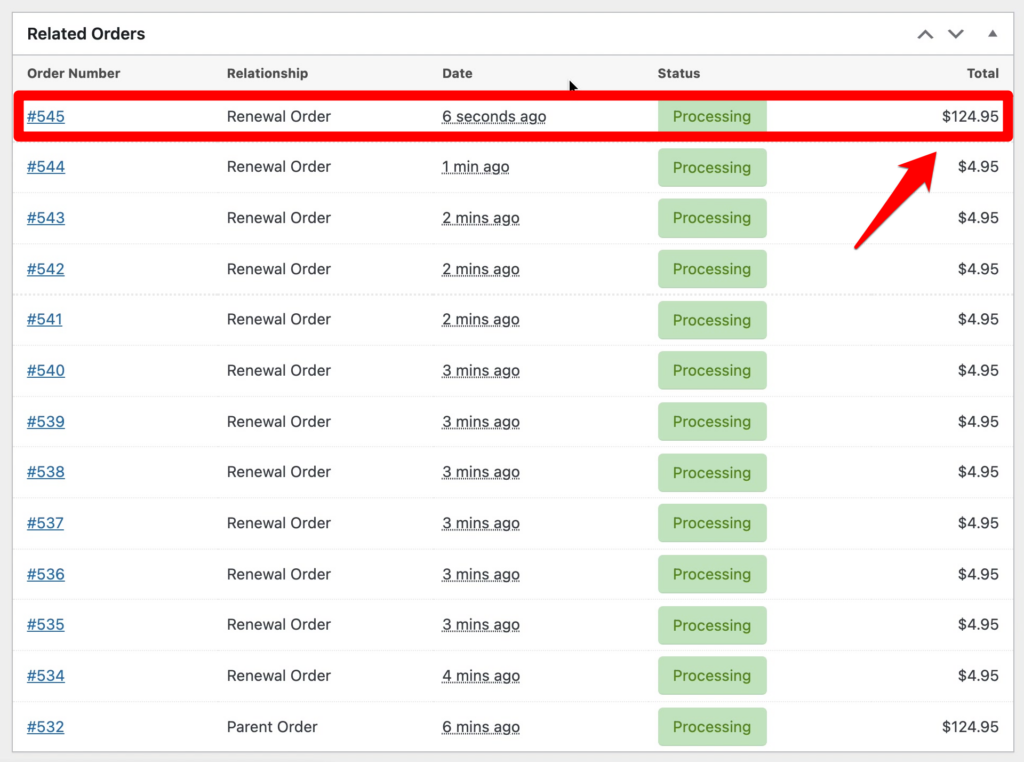
Next, on the Edit Order page, click on the subscription Order Number in the Related Orders pane. You will see our yearly subscription for $120, with the next month’s payment only containing a shipping cost of $4.95.
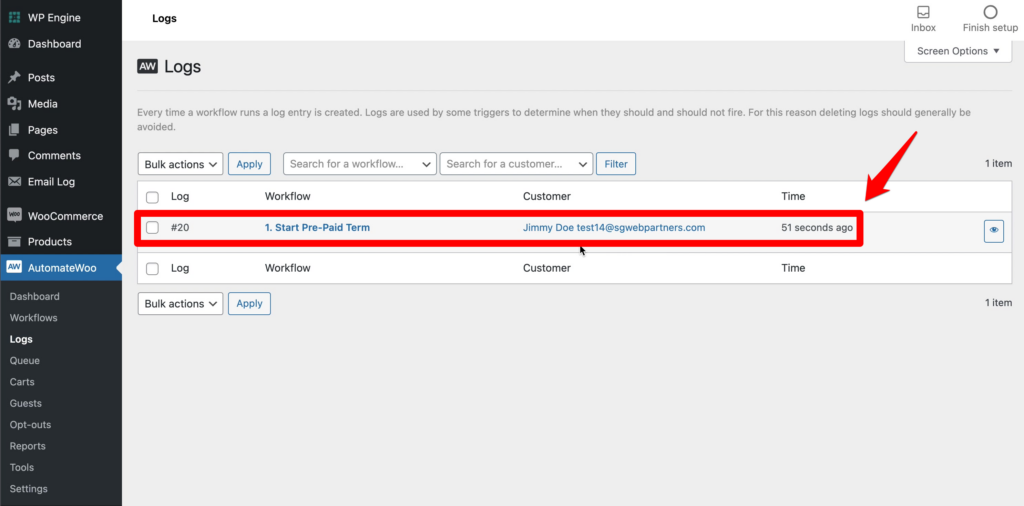
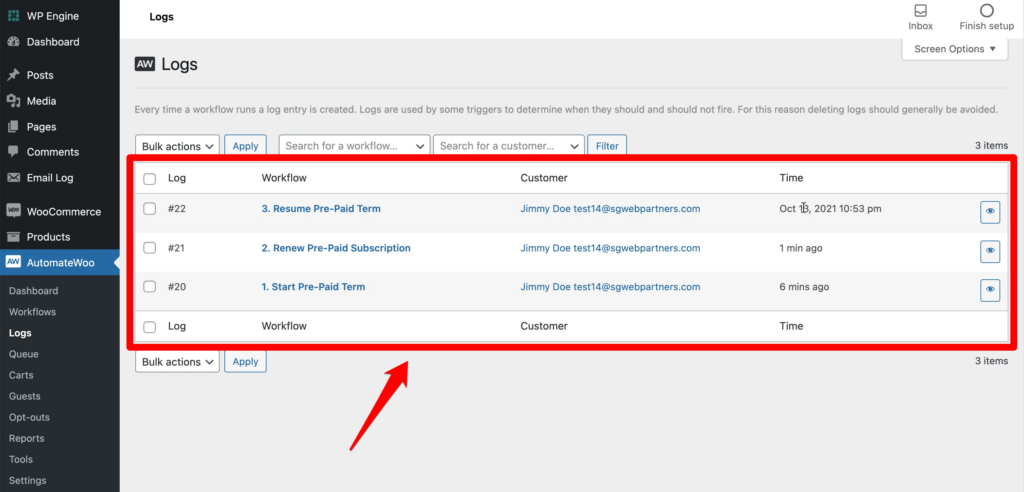
You can also check the AutomateWoo logs by selecting AutomateWoo > Logs. Here, you can see that the first workflow ran for the order that you just created.
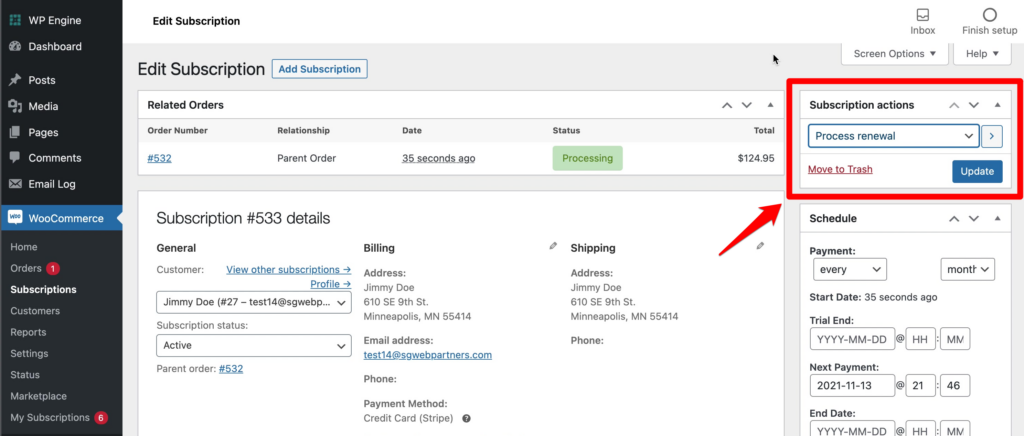
Next, we will test processing our renewal. To do this, select WooCommerce > Subscriptions from the WordPress dashboard and edit the subscription that you just created. Then, select Process renewal from the Subscriptions actions dropdown list and click Update.
Finally, repeat this process another 11 times, so that we have 12 total payments.
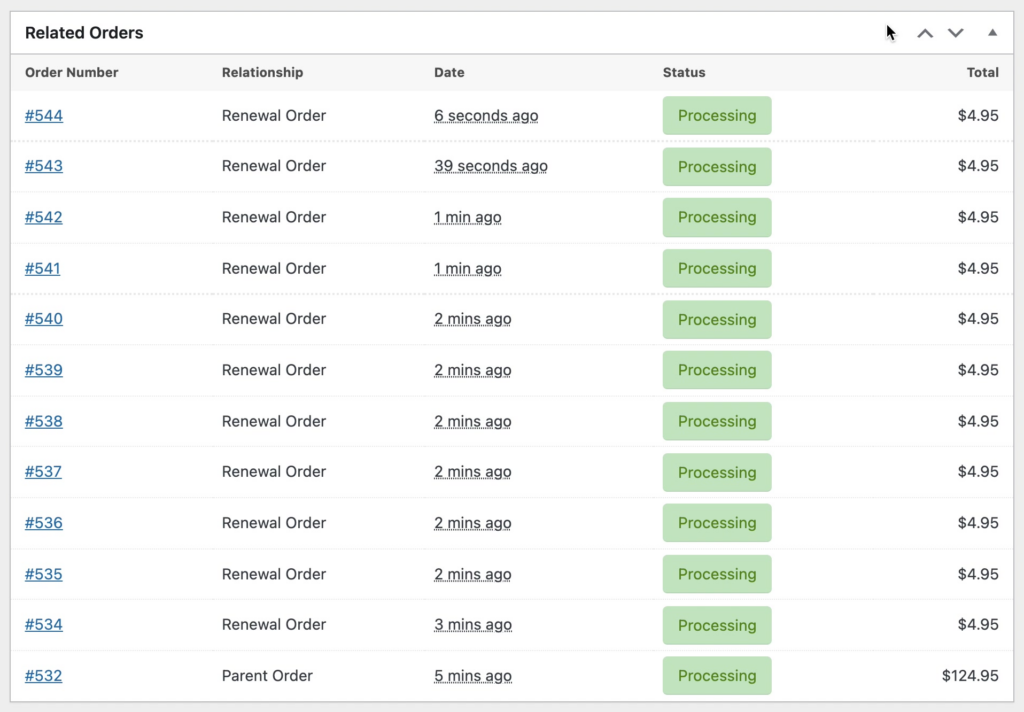
Next, clear your cache if you have one, and add a thirteenth renewal. Now, you will see that our annual subscription has renewed.
In the logs, you can also see that our three workflows ran.
Video
Summary
AutomateWoo is great for automating all sorts of tasks in WooCommerce. But it’s especially great for setting up prepaid subscriptions.

So after the 12 month cycle on the test, the next year cylce still doesnt revert back to the initial yearly price.
I’ve checked everything 4 times and is all exactly the same as yours.
Im targetting a variation subscription, thats the only difference
And also workflow 3 never runs
Perfect.
Thank you very much.