Marketing your WooCommerce store is never easy.
But it is an essential task if you want to grow your business.
Fortunately, there is a great plugin that makes marketing your WooCommerce site a whole lot easier: AutomateWoo.
This software lets you automate many important marketing tasks, such as adding new customers to your mailing list and sending your customers and prospects email based on actions that they have taken.
In this article, I will show you how to install, set up and use AutomateWoo.
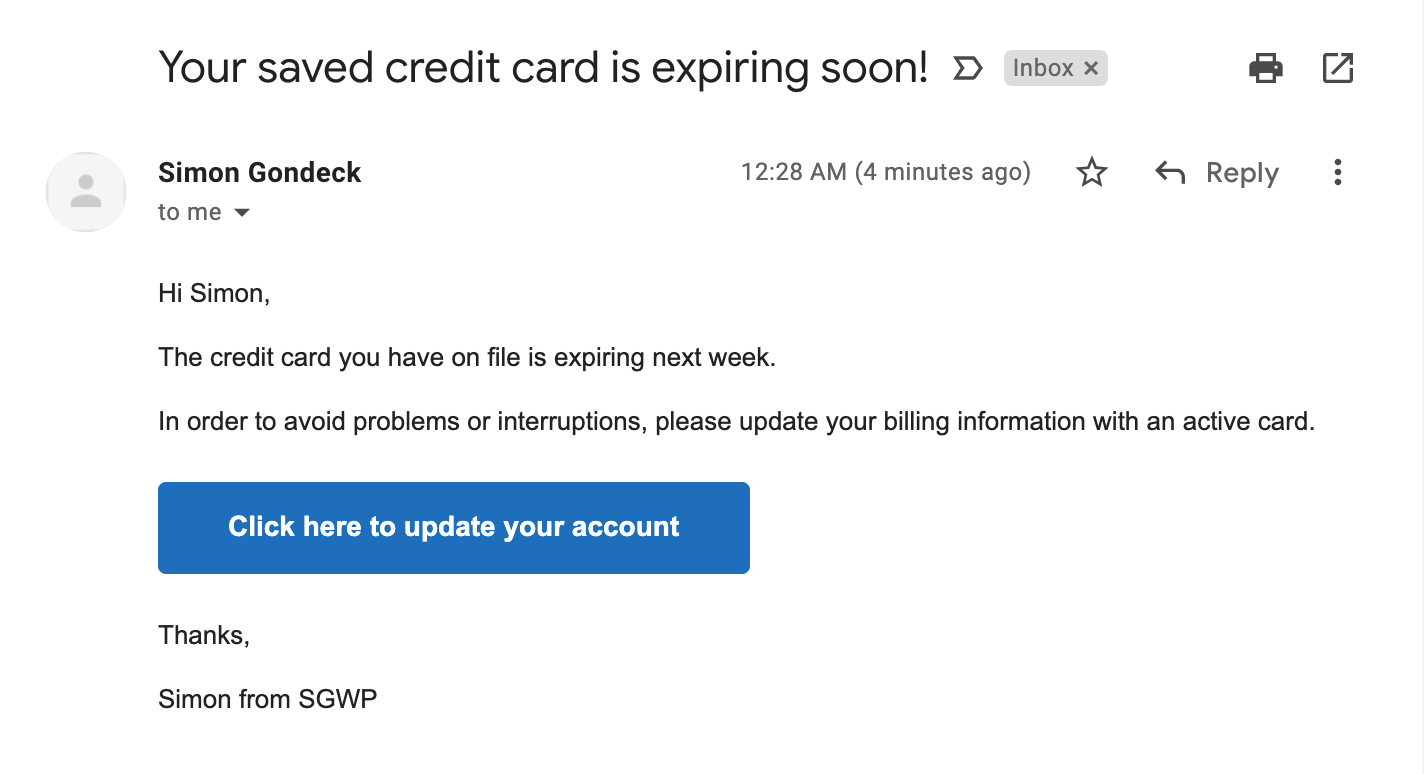
For example, you want to setup an workflow to email customers when their credit card is about to expire…
But if you are more of a visual learner, feel free to watch my tutorial video instead.
Let’s jump into it!
- Sending an Email When a Customer’s Credit Card Is Expiring
- Sending an Email When a Prospect Abandons Their Shopping Cart
- Creating a Custom Workflow
- Configuring MailChimp in AutomateWoo
- Video
Sending an Email When a Customer’s Credit Card Is Expiring
Another common workflow that you may want to set up for your business is to automatically send an email to your customers to notify them when their credit cards are expiring.
You do this much like how we set up the workflow for sending an email in response to an abandoned cart, by using one of the presets that come with AutomateWoo.
This time, from the Browse presets, click the Create workflow button beside the item Credit cards: Expiry reminder.
The Edit Workflow page will then display for the credit card expiry reminder preset:
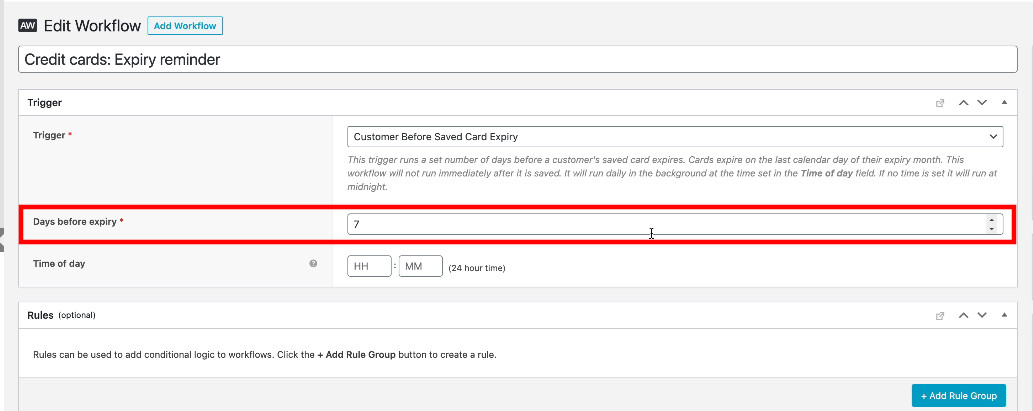
The default behavior of the workflow is to send the email 7 days before a credit card expires. If you want to change this time frame, enter the number of days in the Days before expiry field.
To activate the workflow, change its status from Disabled to Active and click the Save button.
Then, when the Confirm activate workflow dialog box displays, click Confirm.
You can preview this email and send to yourself to see what it looks like.

Sending an Email When a Prospect Abandons Their Shopping Cart
While AutomateWoo allows you to create custom workflows, it includes many useful preset workflows right out of the box.
One of the best of these is a workflow that lets you send an email to prospects who have added products to your site’s shopping cart but for some reason haven’t initiated the purchase.
To set up this workflow, from the AutomateWoo menu in the dashboard, select Dashboard.
Then, click Workflows from the menu. The Workflows page will afterward display, and to see all workflow presets available, click Browse presets.
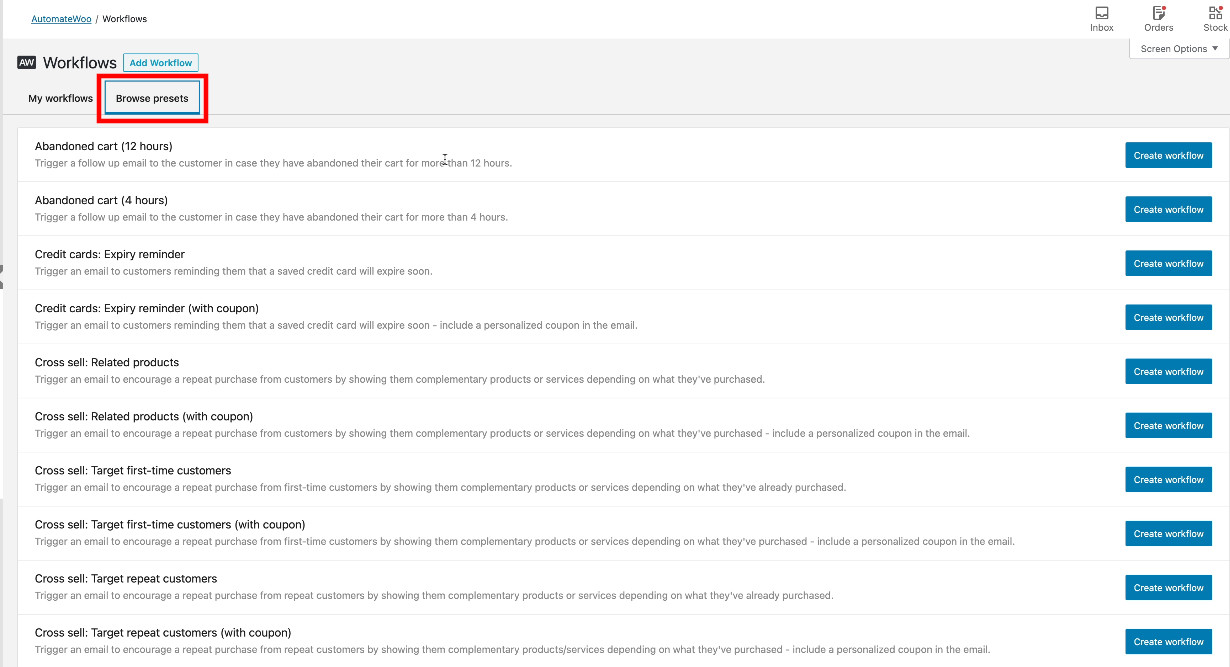
Next, click the Create workflow button beside the item Abandoned Cart (12 hours). The Edit Workflow page will display for the abandoned cart preset:
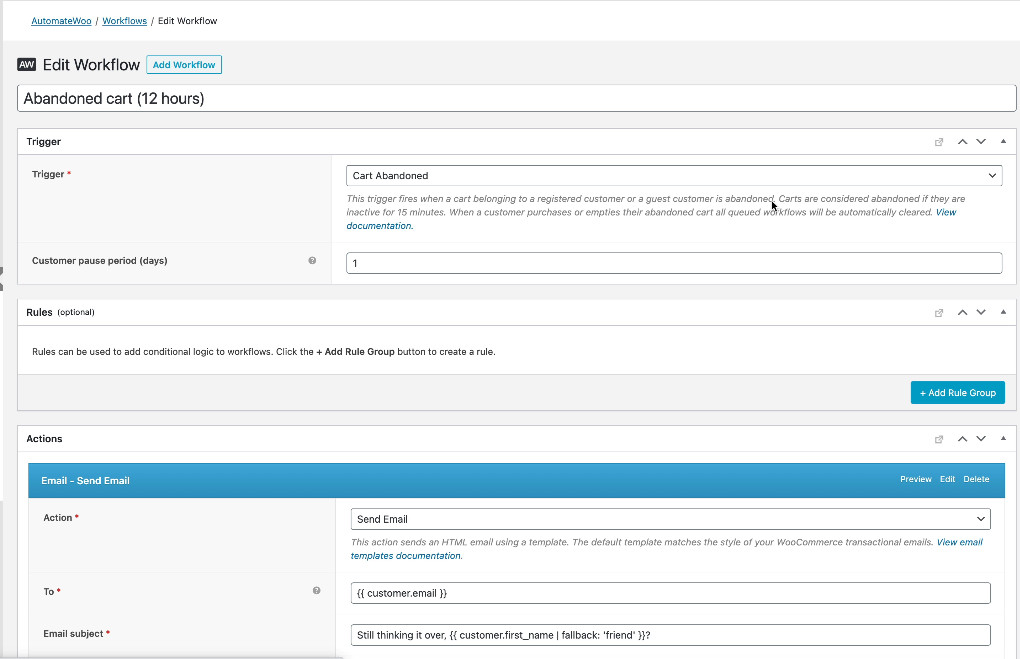
To activate the workflow, change its status from Disabled to Active and click the Save button.
Then, when the Confirm activate workflow dialog box displays, click Confirm.
Create a Custom Workflow
While AutomateWoo comes with lots of useful preset workflows, there are times in which you want to create a custom workflow.
In this example, I will set up a workflow for a coffee store that I’ve created for demonstration purposes, which will send an email that provides useful tips about making coffee to any customer who buys coffee from the site.
To set up this workflow, from the Workflows page, click Add Workflow. The Add New Workflow page will then display:
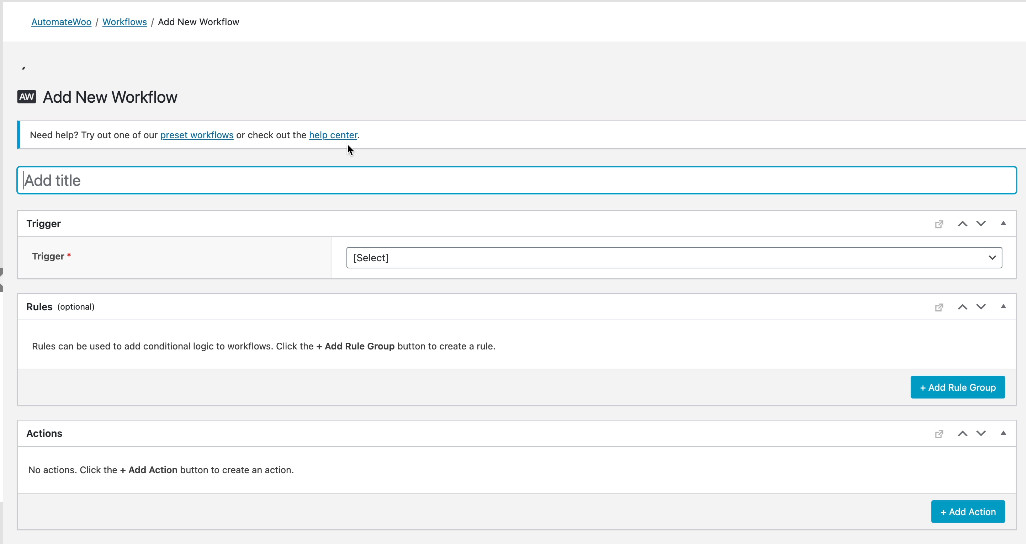
The first thing that you should do here is add a descriptive Title for the workflow, such as “Send welcome email to coffee customers.”
Next, for the Trigger, select the type of action that triggers the workflow from the dropdown list. In our example, we will select Order Created.
You afterward want to add a rule by clicking + Add Rule Group in the Rules section of the page. Here you will create the rule that will trigger the email. First, you need to select a rule from the Select Rule dropdown box.
In our example, we will choose Order – Items, but there are many other options to choose from. Next, you have to choose the item that, when purchased, will trigger the email. In our example, we will choose a particular type of coffee from the Items dropdown box.
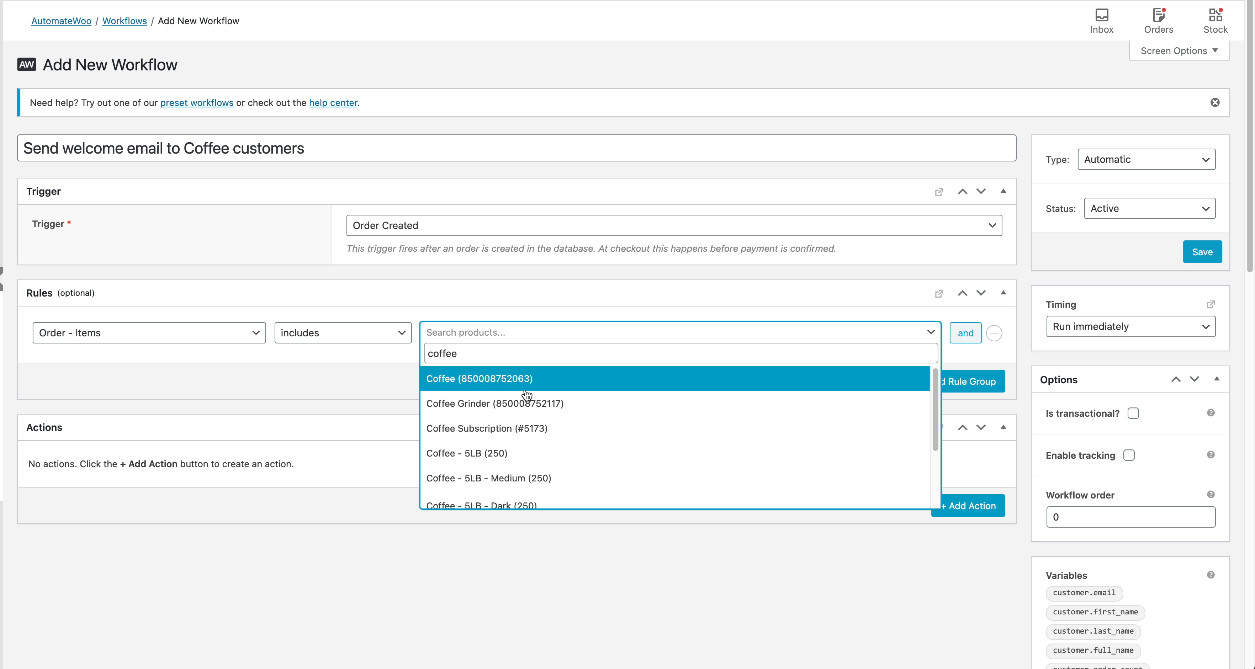
Note: you can create compound rules by clicking the Add button and adding an additional rule.
Next, you need to specify the actions taken when your rule gets triggered. You do this by clicking + Add Action in the Actions section of the page.
In our example, we will select Send Email as the action triggered from the dropdown box, but there are many other actions to choose from.
For the To field, we will select customer.email from the Variables list on the right-hand side of the screen and click Copy to clipboard before pasting the clipboard into the field. For the Email subject and Email heading fields, we will use the same text: “Get the most out of your coffee!” For the Template field, we will select WooCommerce Default, but you can use None if you just want to send a plain-text email. Finally, for the Email content field, you will craft the email that your site will send to your customer. In addition to text, you can add the following to the body of your email:
- variables
- links
- buttons
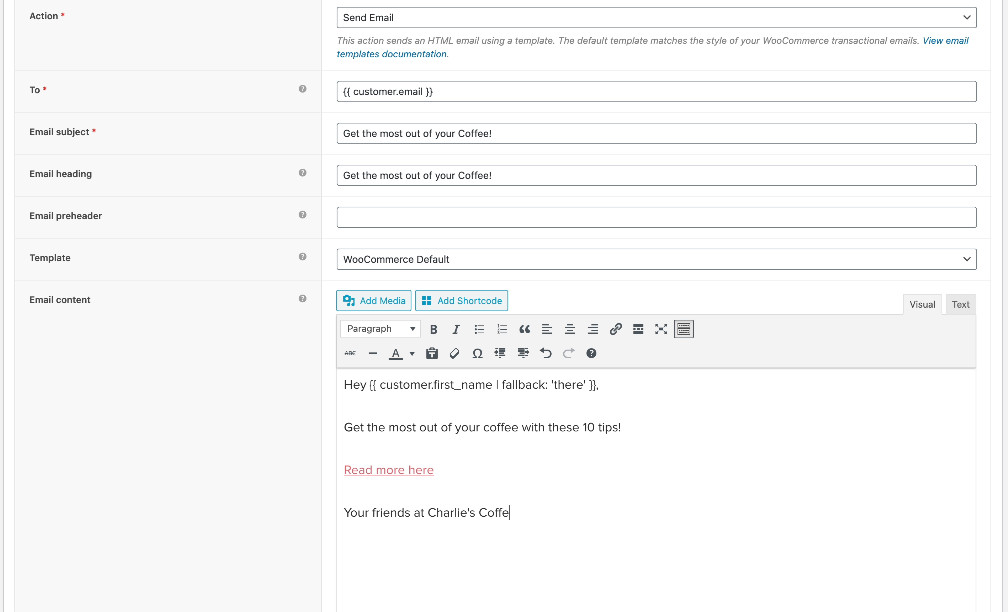
Note: you can create compound actions for the triggered rules by simply adding another action.
While you can have the email sent at the time of the order, it is often better to send it after some time has passed. You can do this by choosing Delayed from the Timing dropdown box near the top of the screen and then entering the number of days in the Length of the delay fields underneath.
After you have finished adding the workflow, click the Save button near the top of the screen.
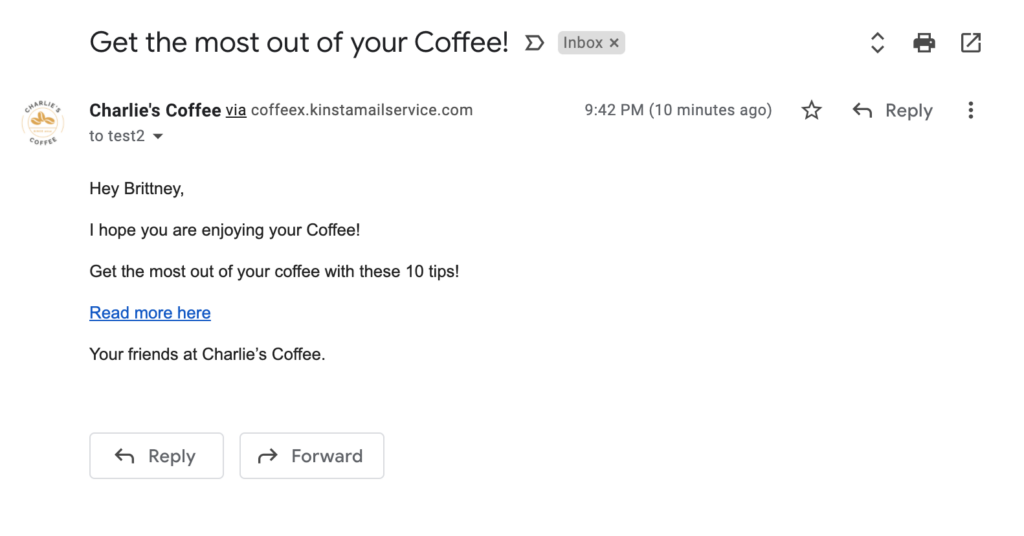
Here is an example of how the email shows in my Gmail account!
Configuring MailChimp in AutomateWoo
One of the most powerful features of AutomateWoo is its ability to automatically manage your mailing lists. In this section, I will specifically describe how to configure the plugin for MailChimp.
To do this, from the AutomateWoo menu in the dashboard, select Settings and click on the MailChimp tab.
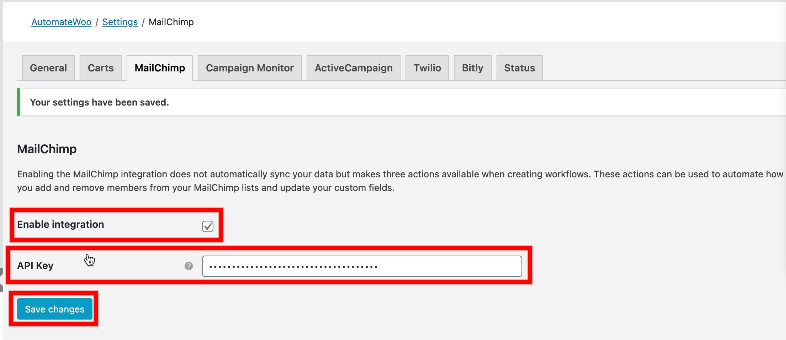
Then, click on Enable Integration and enter your API Key, and afterward click the Save Changes button.
Now, you can add MailChimp-related workflows. One of the most common ones is automatically adding new customers to your MailChimp mailing list.
To do this, create a custom workflow as described above by clicking Add Workflow from the Workflows page.
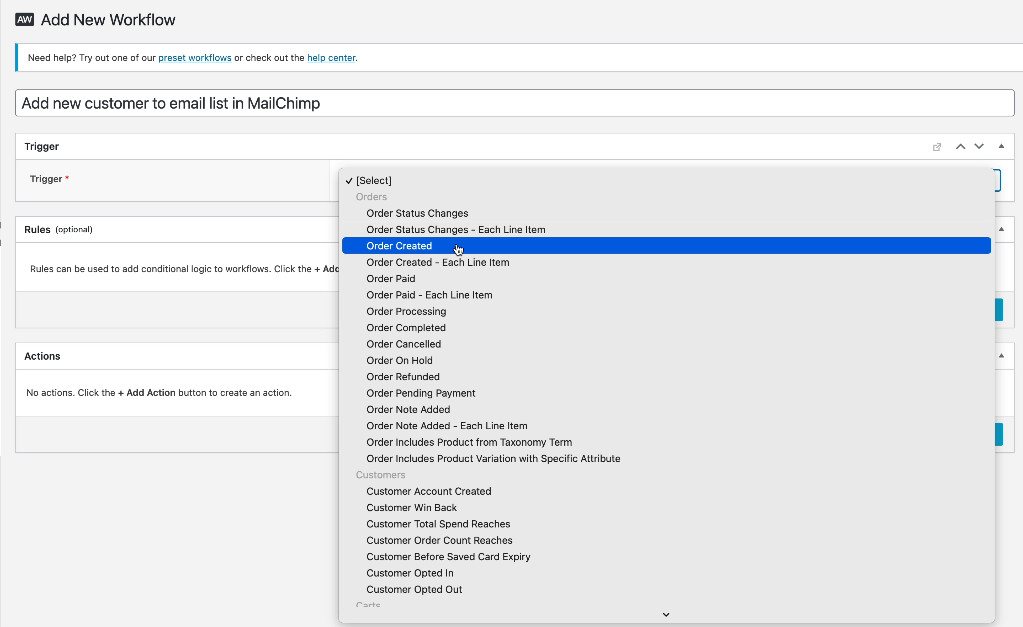
Then, add a description for the workflow, such as “Add new customer to email list in MailChimp” and select Order Created from the dropdown box as the Trigger.
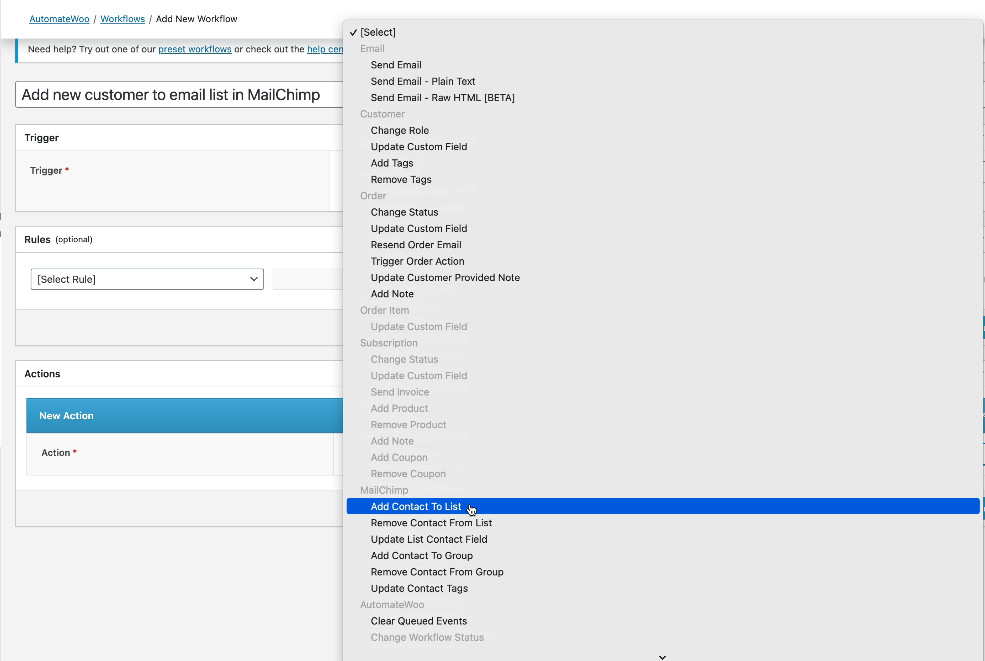
For the Action, select Add Contact To List from the dropdown box.
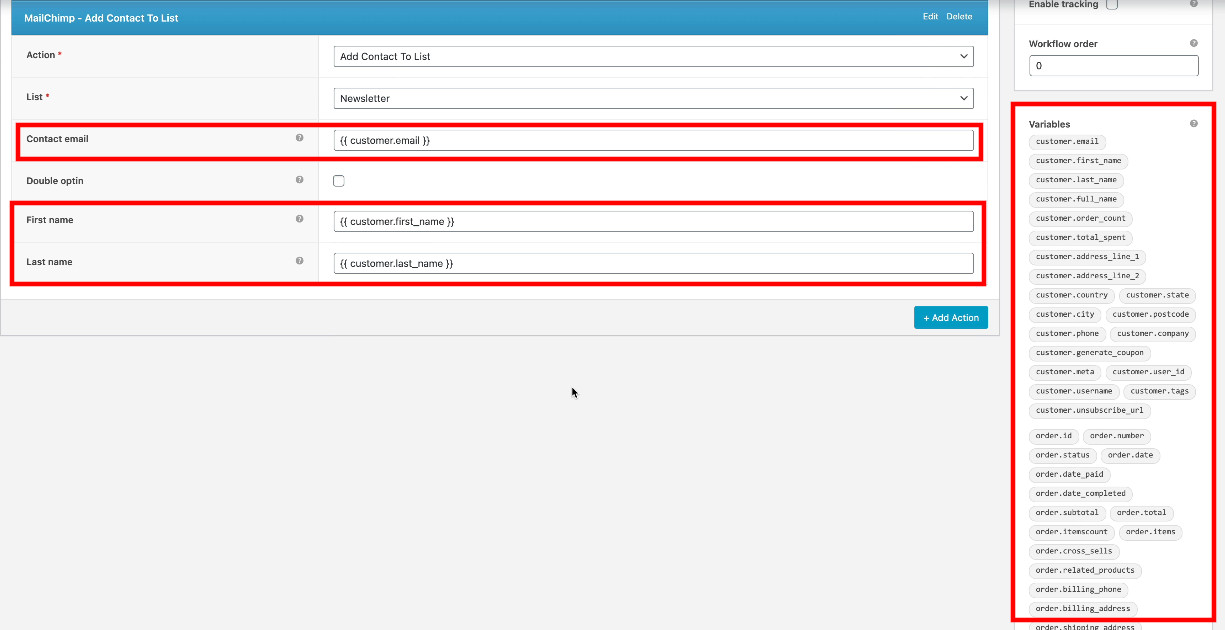
Then, select Newsletter from the List dropdown box and enter the Contact email, First name and Last name from the Variables list on the right-hand side of the screen.
After you have finished adding the workflow, click the Save button near the top of the screen.
Final Words
If you are looking to improve your marketing capabilities and grow your online business, AutomateWoo is a must-have tool.
Once you install it and begin using it, you’ll wonder how you got by without it.
If you have any questions about the plugin that weren’t answered here, please feel free to ask them in the comment section below. Also feel free to add any pertinent comments that you have about the plugin.

Hi,
I set up cart abandonned workflow and this workflow doesn’t run. I do not not why. It’s in automatic, run immediately and action is to send email to a customer, but it’s not run, not execute. how could you help me ? thx
Hi Simon, thank you for the video — very clear and easy to follow. Can we send over booking details from Foo Events through AutomateWoo to MailChimp? Would appreciate any direction on this. Thank you!
Great tutorial!
How about adding an email trigger for a custom order status?
I use Woocommerce Order Status Manager and have additional order status in place which need a trigger in Automatewoo for sending specific emails.
Thanks!
How about old customer?
If I install Automate woo now, what is going to happen to old customers?
They will be included in the list?
In AutomateWoo, you have the option to rescan orders to include past customers if you would like.
I misspoke. You could setup a manual workflow with AutomateWoo to scan past orders or subscriptions to do a specific action. For example, run a manual workflow to scan all past subscription orders that included X product where the product cost was Y. You then could update the bulk update the product price. There is a lot of things you could do with manual workflows but this differs from the Follow Ups plugin “Rescan Customer Orders”.