In this guide, learn how to setup Amazon Pay on your WooCommerce store.
Let’s get started!
If you are more of a visual learner, check out the video I created below that goes over everything step by step.
Step 1
Download the free Amazon Pay plugin.
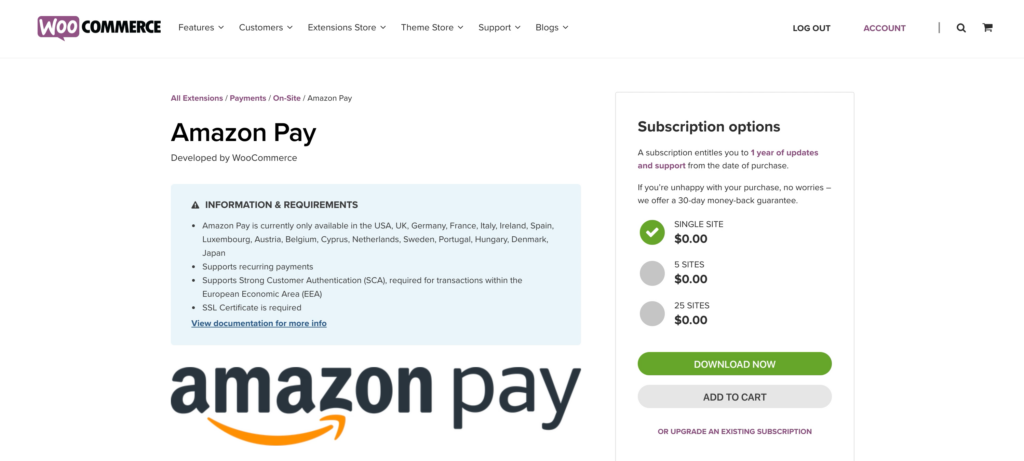
Next, upload the plugin .zip file to your site. Activate the plugin.

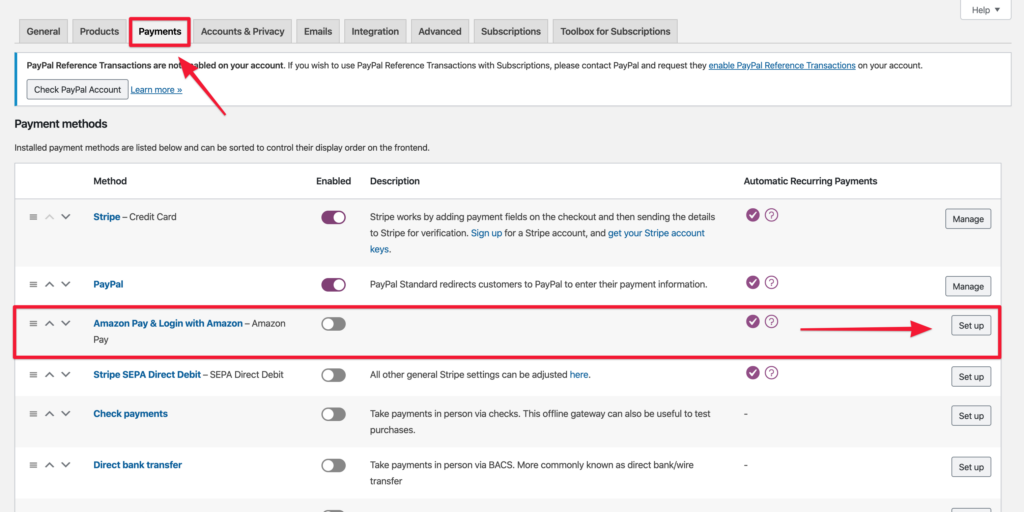
Then, go to WooCommerce > Settings > Payments. Click “Setup” on Amazon Pay.
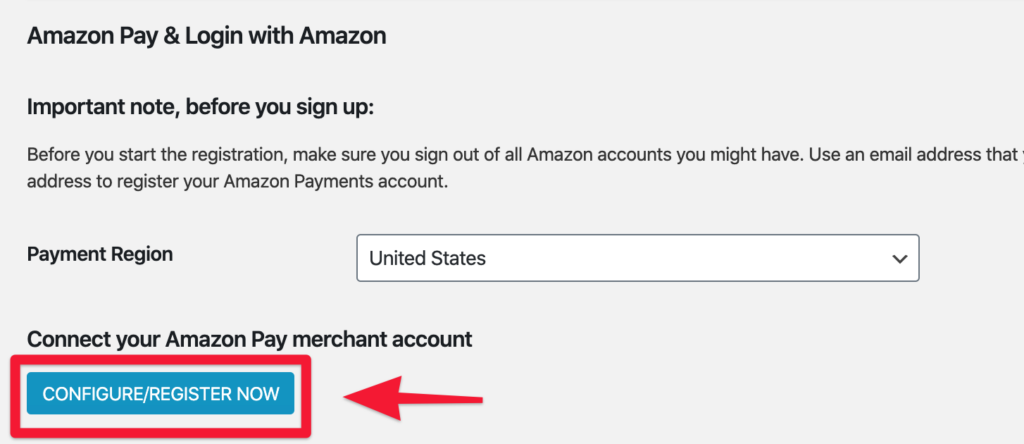
Finally, click “CONFIGURE/REGISTER NOW” and sign in to Amazon.
Step 2
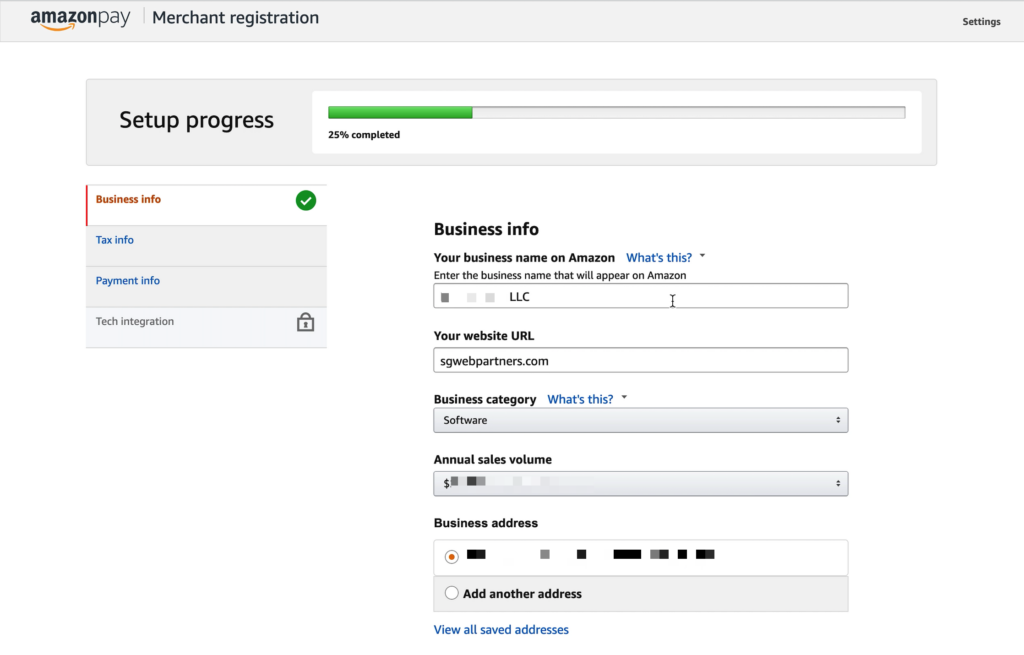
Follow the steps to enter in your business info, tax info, and payment info.
You will be required to provide your business name, website url, business address, business type, tax ID number, tax mailing address, and payment info.
On the Tech Integration tab, add the domain(s) you will be using and Privacy policy URL.
For example, add both your live site and test site.
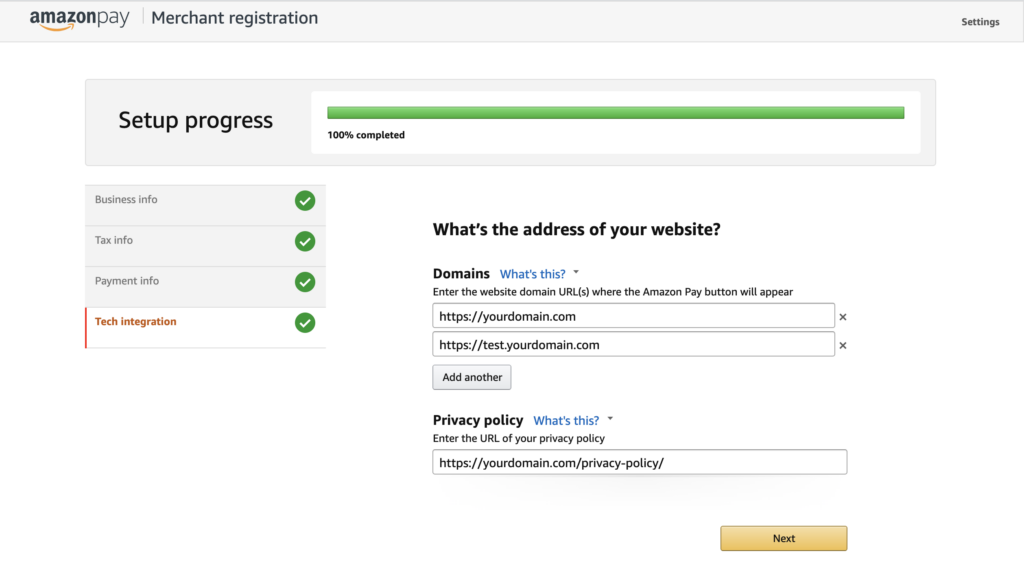
Click “Next”.
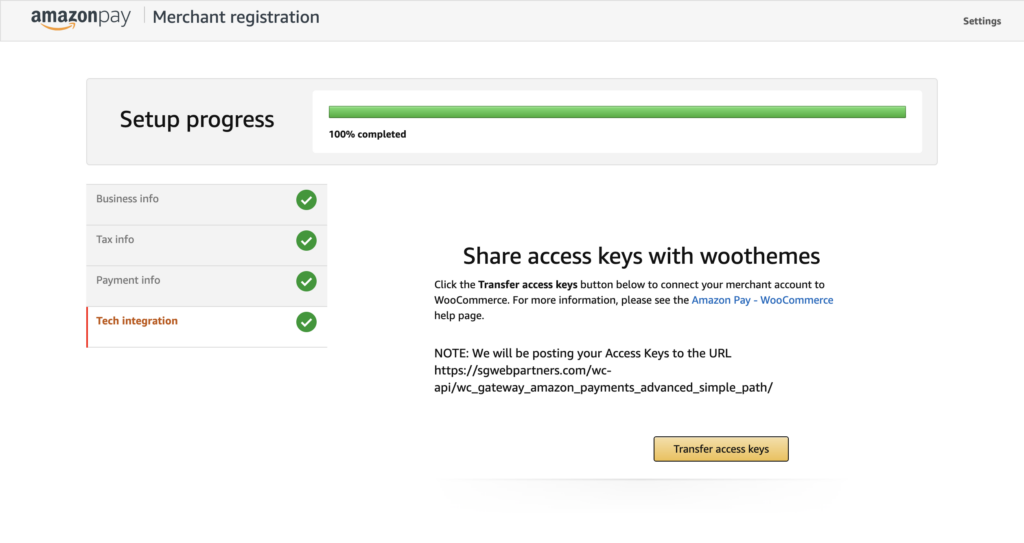
Then, click “Transfer access keys” to connect your merchant account to WooCommerce.
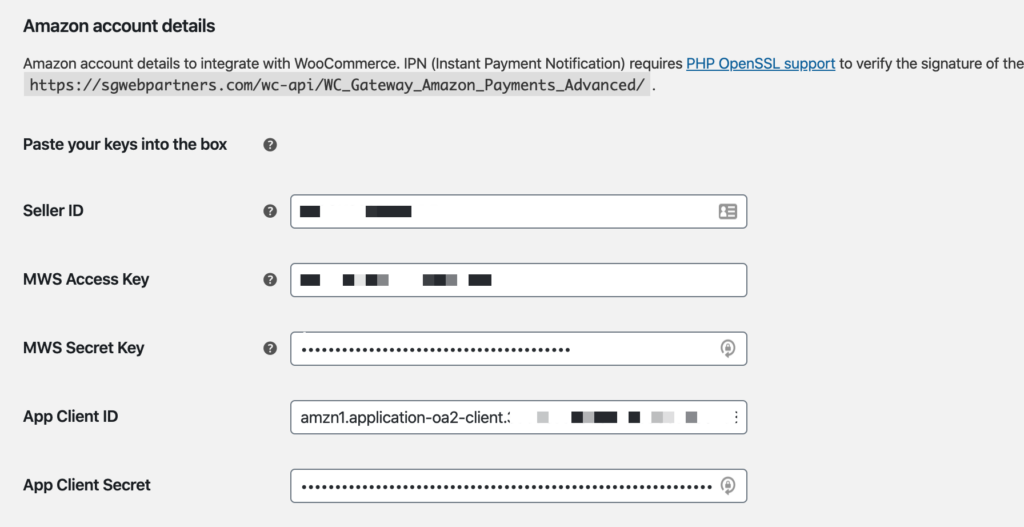
If you navigate back to Amazon Pay on your WooCommerce site, the following fields should be filled in:
- Seller ID
- MWS Access Key
- MWS Secret Key
- App Client ID
- App Client Secret
Finally, check “Enable Amazon Pay & Login with Amazon”.

Save changes.
Step 3
Now, let’s do a test transaction with Amazon Pay. In the payment settings, toggle use sandbox to “yes”.
You can also adjust any other settings. For example, change the button color to Dark gray.
When finished, click Save changes.
Next, go to your Amazon Seller Central dashboard.
Change to “Amazon Pay (Sandbox mode)”.
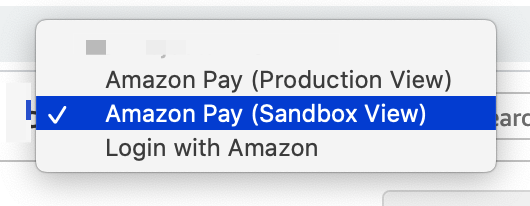
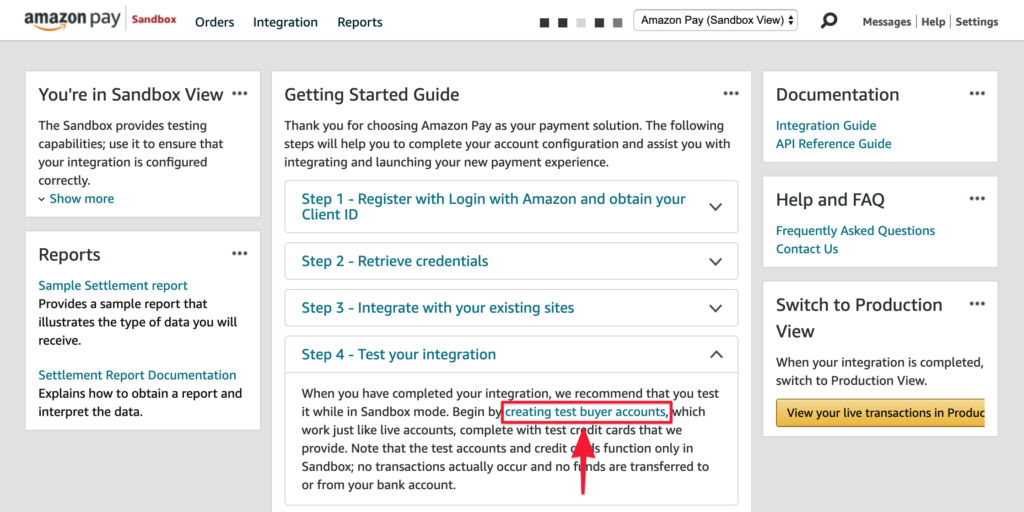
Then, click “create test buyer accounts” and create a test account.
Add Name, Email Address, Password and apply what test shipping addresses should show up.
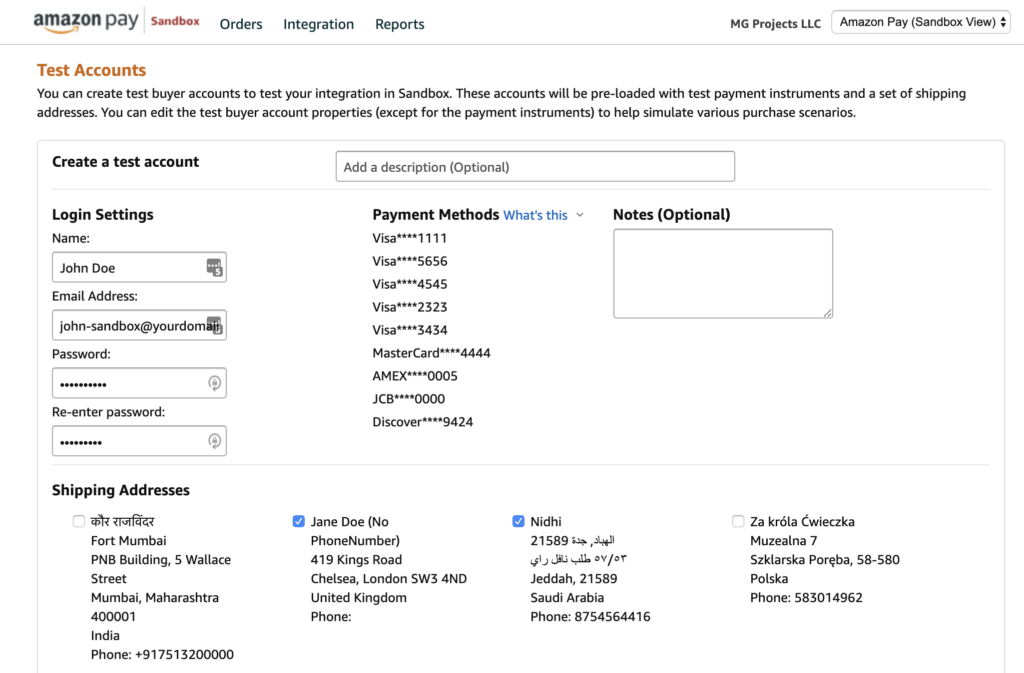
Pro tip: The easiest way to do this is to add append “-sandbox” to your normal email address. If your email is john@yourdomain.com, create a sandbox account as john-sandbox@yourdomain.com. Make sure to replace with your own domain.
When finished, scroll down to the bottom and “Create account”.
Step 4
Next, go to the frontend of your WooCommerce site and add a product to your Cart.
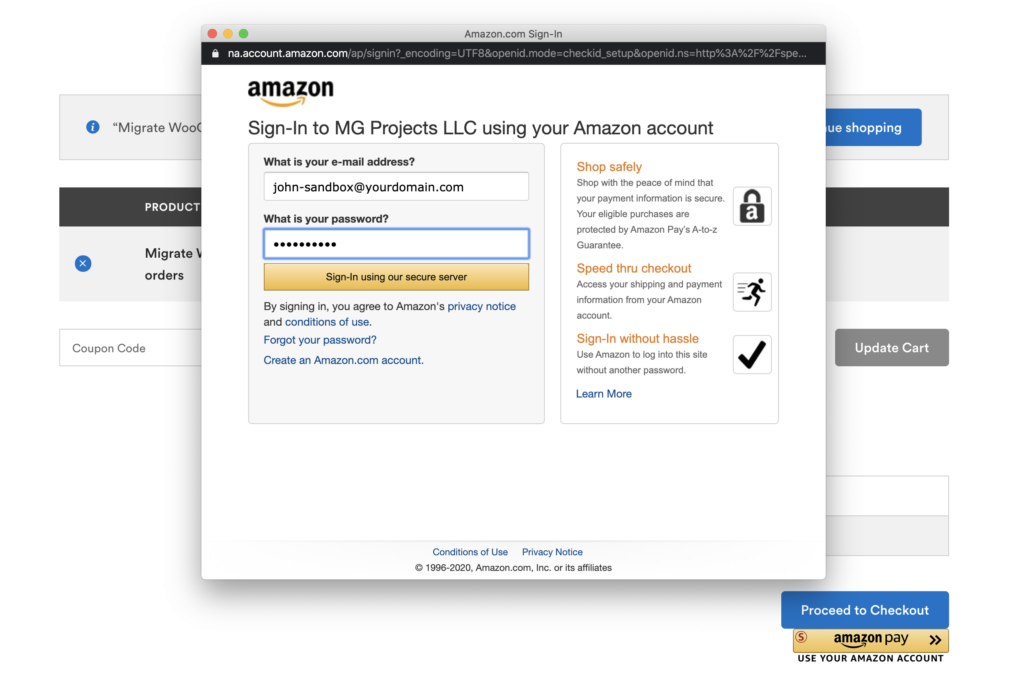
On the Cart page, click the Amazon Pay payment button and enter in the test account’s email address and password.
On the Checkout page, choose your address and click “Place order”.
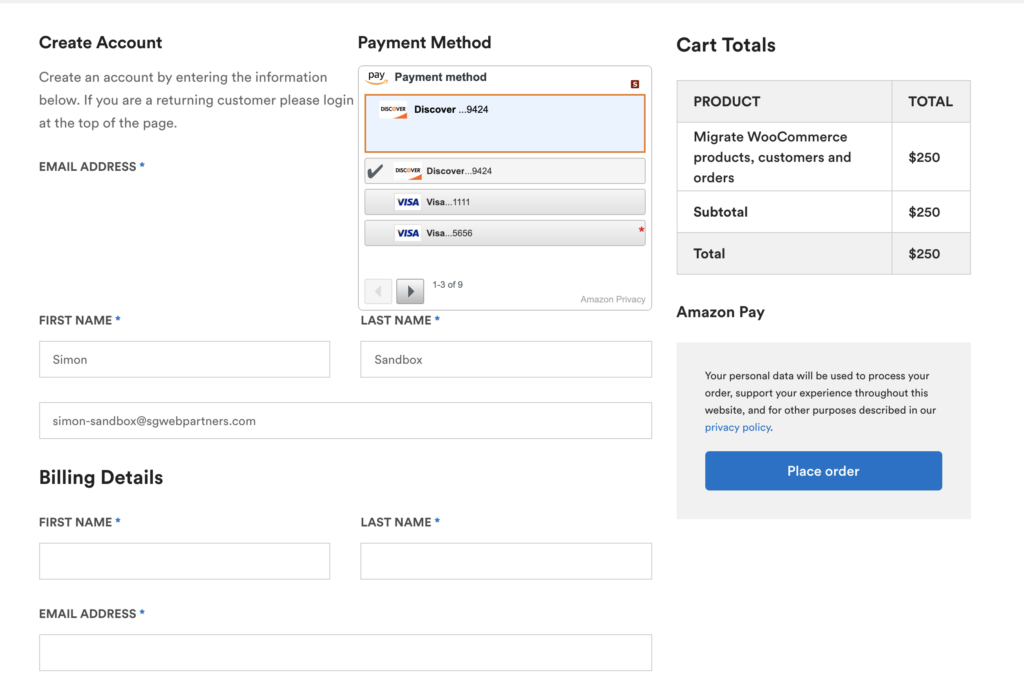
Note: you may have to adjust your Checkout page HTML/CSS.
Finally, go to Orders page in the WooCommerce backend and see the order.
Step 5
Navigate go back to Amazon Pay in your WooCommerce backend. Update use sandbox to “no” to start accepting live transactions on your store.
Amazon Pay does not allow the same account to be used to make a payment and accept a payment on your store. I would recommend asking a friend or co-worker to do a live transaction on your website using their Amazon account.
FAQs
Do I need to have an Amazon Pay Merchant Account?
Yes, you need to have an Amazon Pay Merchant Account. Note, you can use the same email address and password you have currently with Amazon to setup the Merchant Account. You will also need your Company’s bank account number/routing number, Company Tax ID, and a credit card to setup the account.
Does Amazon Pay accept recurring payments?
Yes, Amazon Pay accepts recurring payments and works on WooCommerce Subscriptions.
Will Amazon Pay work in my country?
Amazon Pay is available in the United States, United Kingdom, Germany, France, Italy, Spain, Luxembourg, Netherlands, Sweden, Portugal, Hungary, Denmark. See the full list.
