After reading this guide you’ll have a greater understanding of how to set up Help Scout with your WooCommerce site!
Before you can integrate Help Scout with WooCommerce you have to have to create an account on Help Scout.
If you are more of a visual learner watch my tutorial video below:
With no further delay, let’s jump in!
Step 1: Install the WooCommerce App on Help Scout
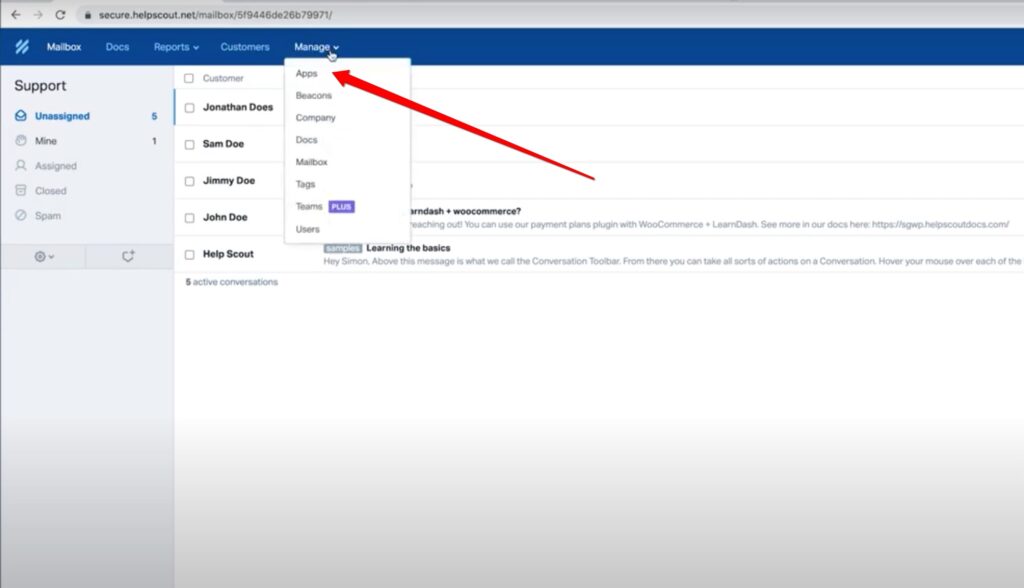
From your Help Scout dashboard, click Manage and then Apps from the dropdown menu shown below:
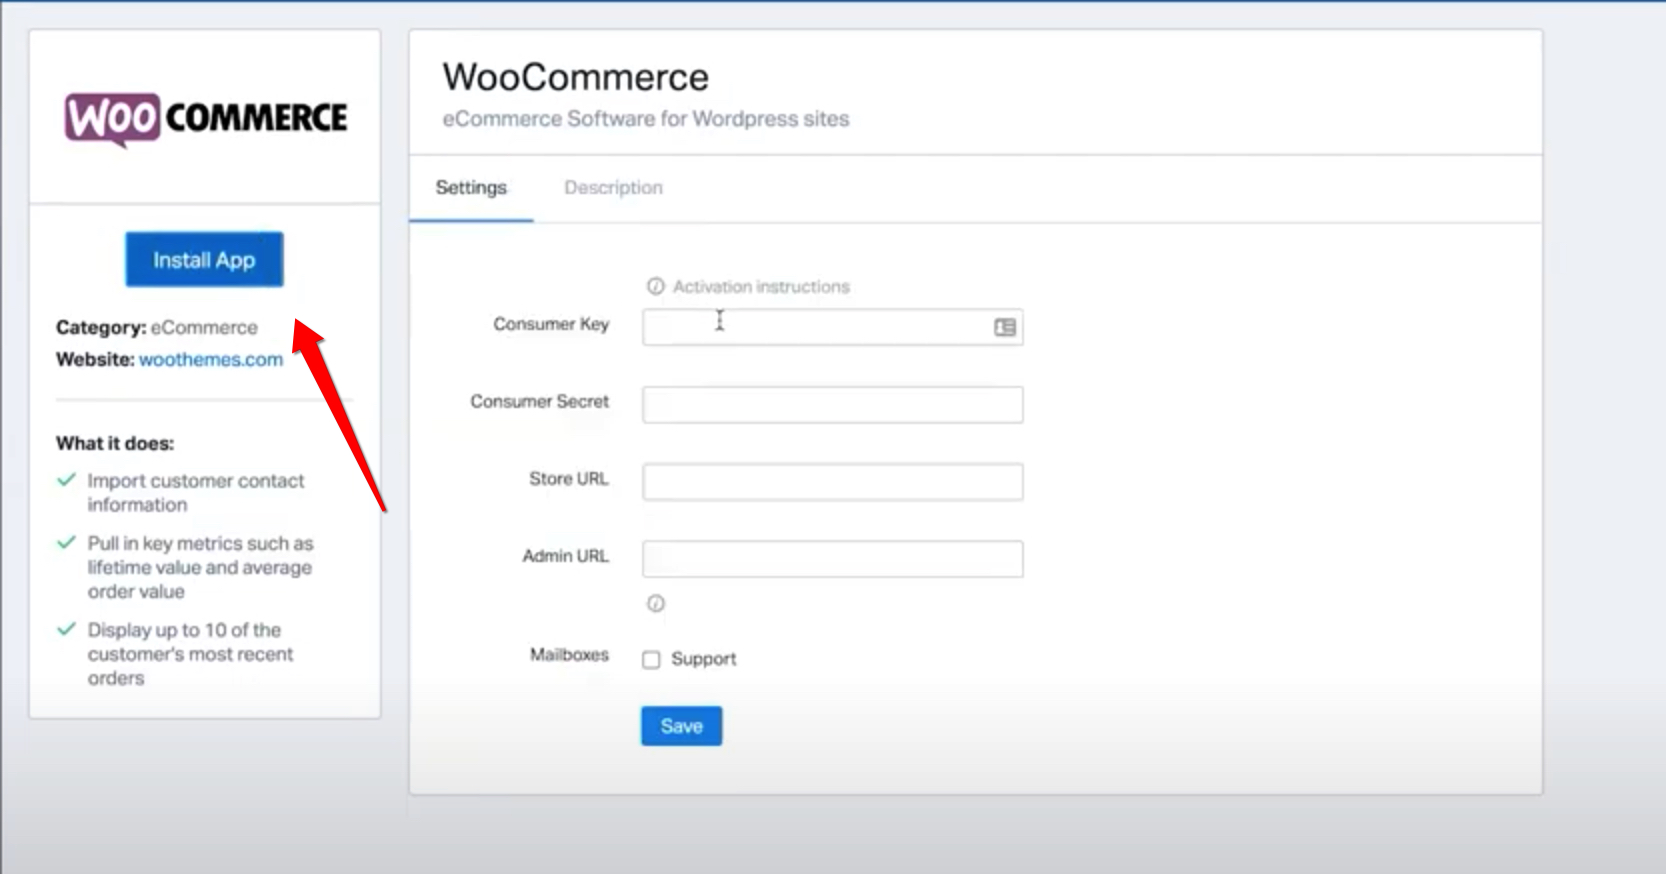
Search for WooCommerce and then Install the App. When you click install, you should be on a screen similar to the one shown below.
Step 2: Retrieving your Consumer Key & Consumer Secret
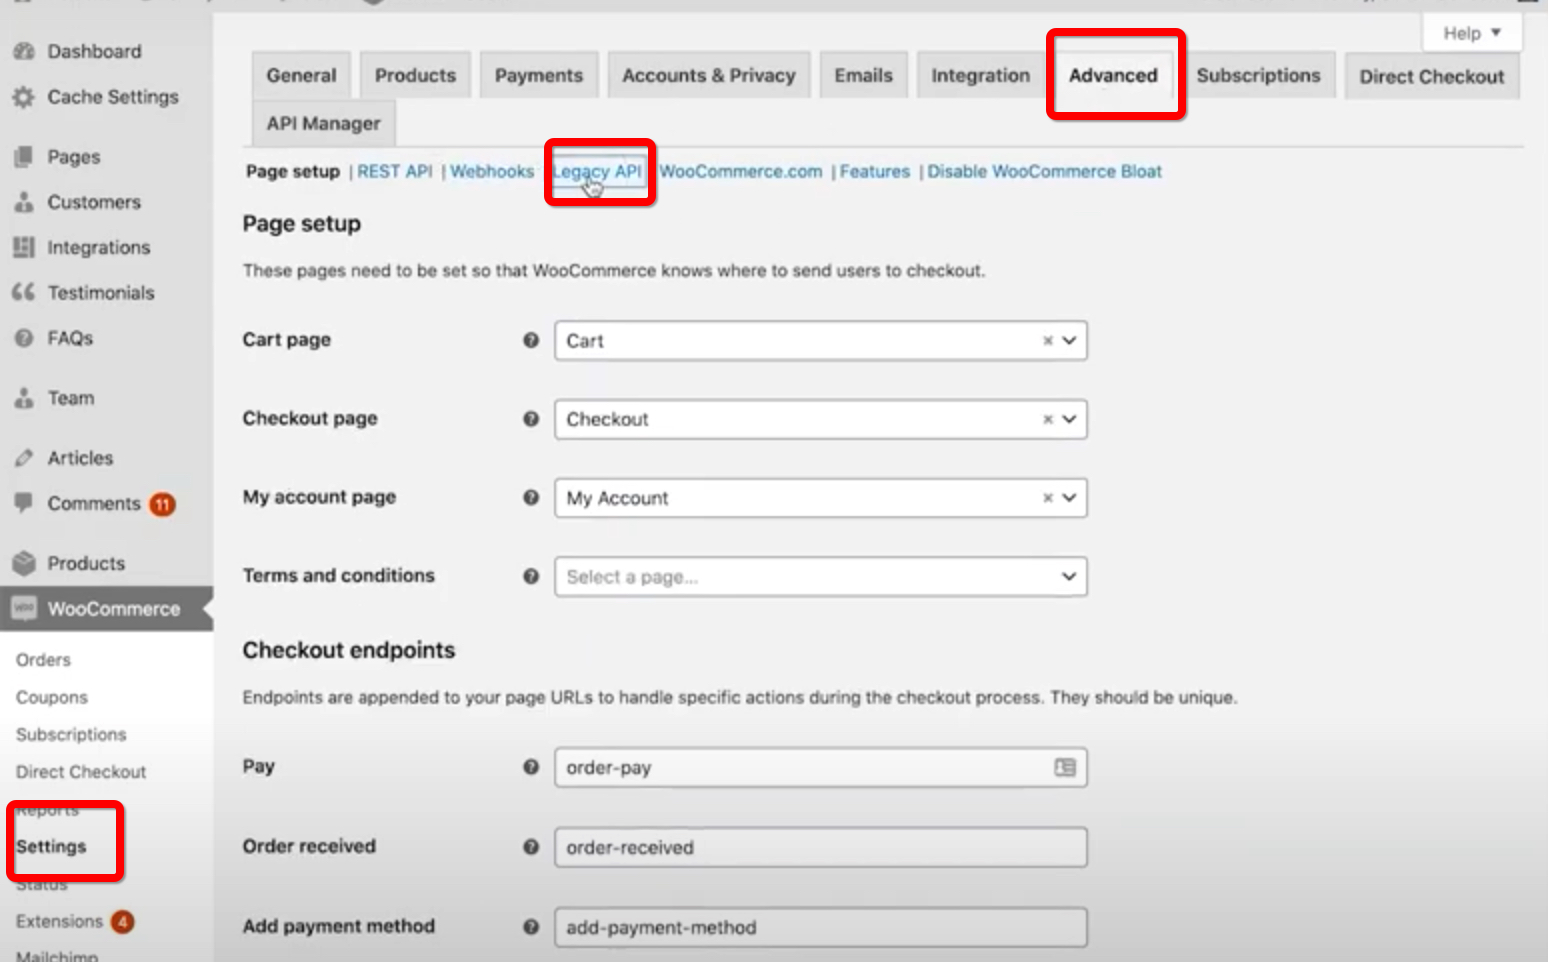
In order to retrieve your Consumer Key and Consumer Secret you’ll need to click on WooCommerce Settings, Advanced and then Legacy API to ensure that ‘legacy Rest API’ is enabled.
The next step is to click on REST API, select Read only permissions and then select a name, for this example we will simply be using Help Scout.
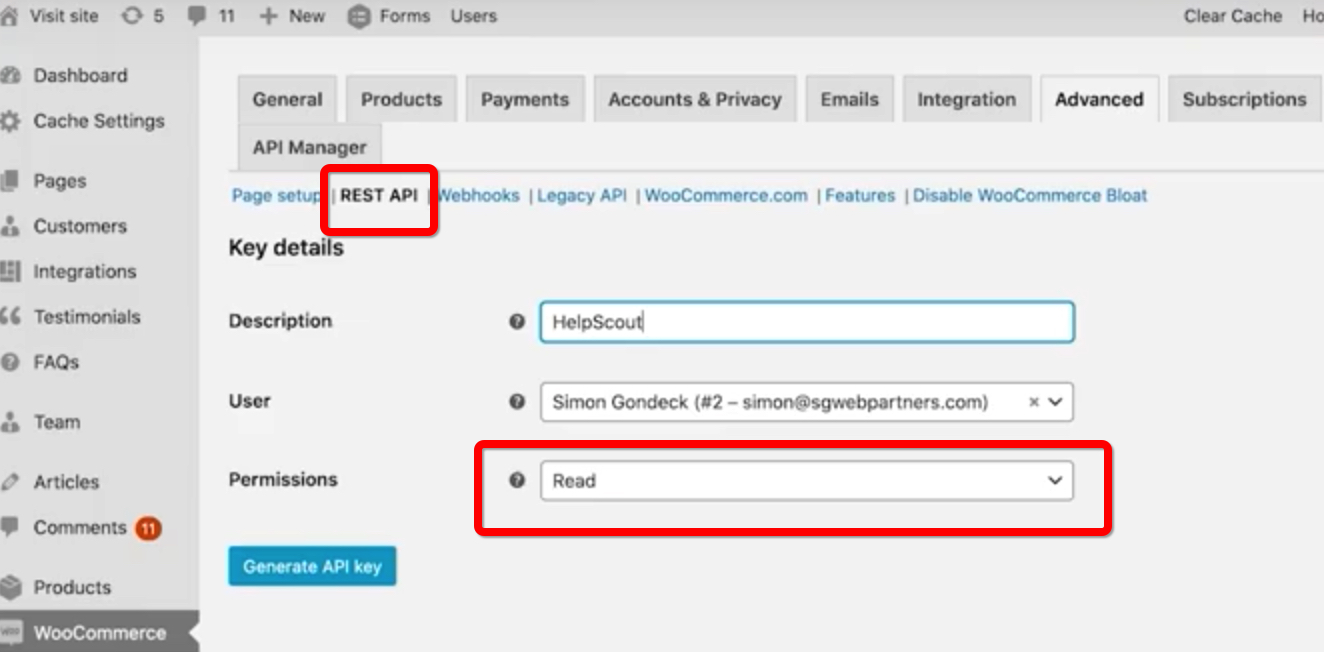
Once an API key has been generated a Consumer Key and Consumer Key will populate with the ability to be copied across to your Help Scout Dashboard. See below:

Copy and paste your Store URL and Admin URL into the labeled boxes and select your Support Mailbox, click Save and you are all ready to get started!
Step 3: Learning to use the Docs function on Help Scout
Understanding how to make use of the Docs tab within Help Scout will help you maximize the benefits of the Help Scout plugin when it is paired with WooCommerce.
Under this Docs tab you can include any outlines that explain answers to common customer service questions that are likely to come up.
For example, under the Getting Started tab shown highlighted above you may want to include a Doc that answers questions about payment options or how long shipping may take once an order has been finalized.
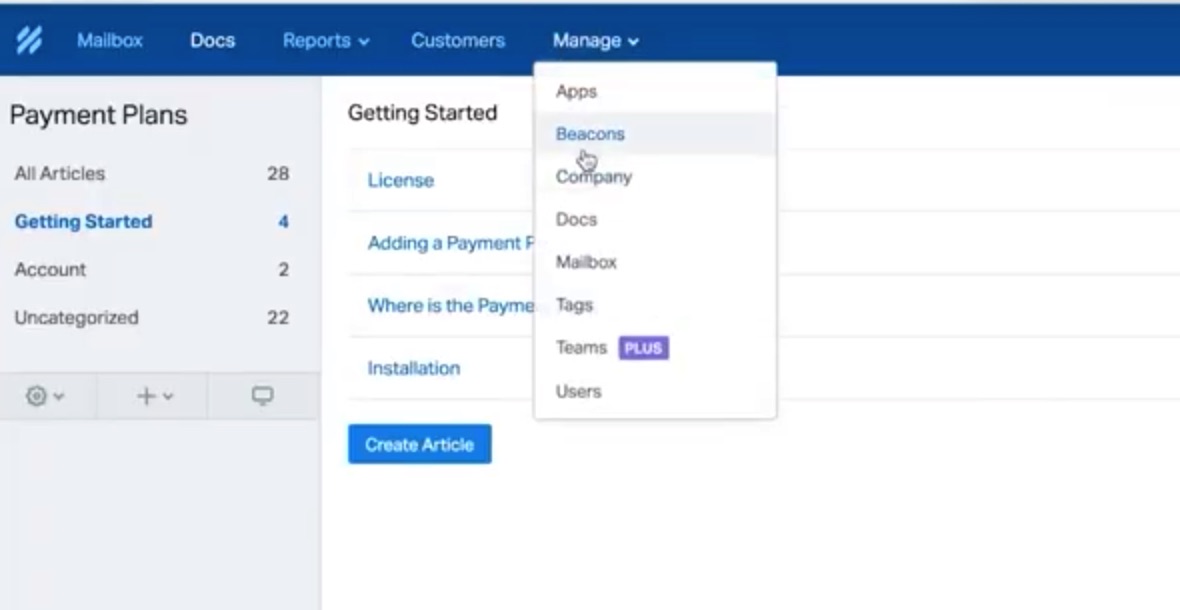
Keep in mind any Docs that are added can show up on your WooCommerce site as a Beacon. To add a Beacon, click on Manage and then Beacons from the dropdown menu, see below:
Once your Beacon has been customized, click Installation and then copy and paste the HTML code to your page.
Step 4: Connecting WooCommerce and Help Scout
In order to begin, ensure you have downloaded and installed the Help Scout plugin for WooCommerce. A link to the Help Scout Plugin can be found in the description of the tutorial video.
From your WooCommerce Dashboard, go to the Plugins Tab and select Add New.
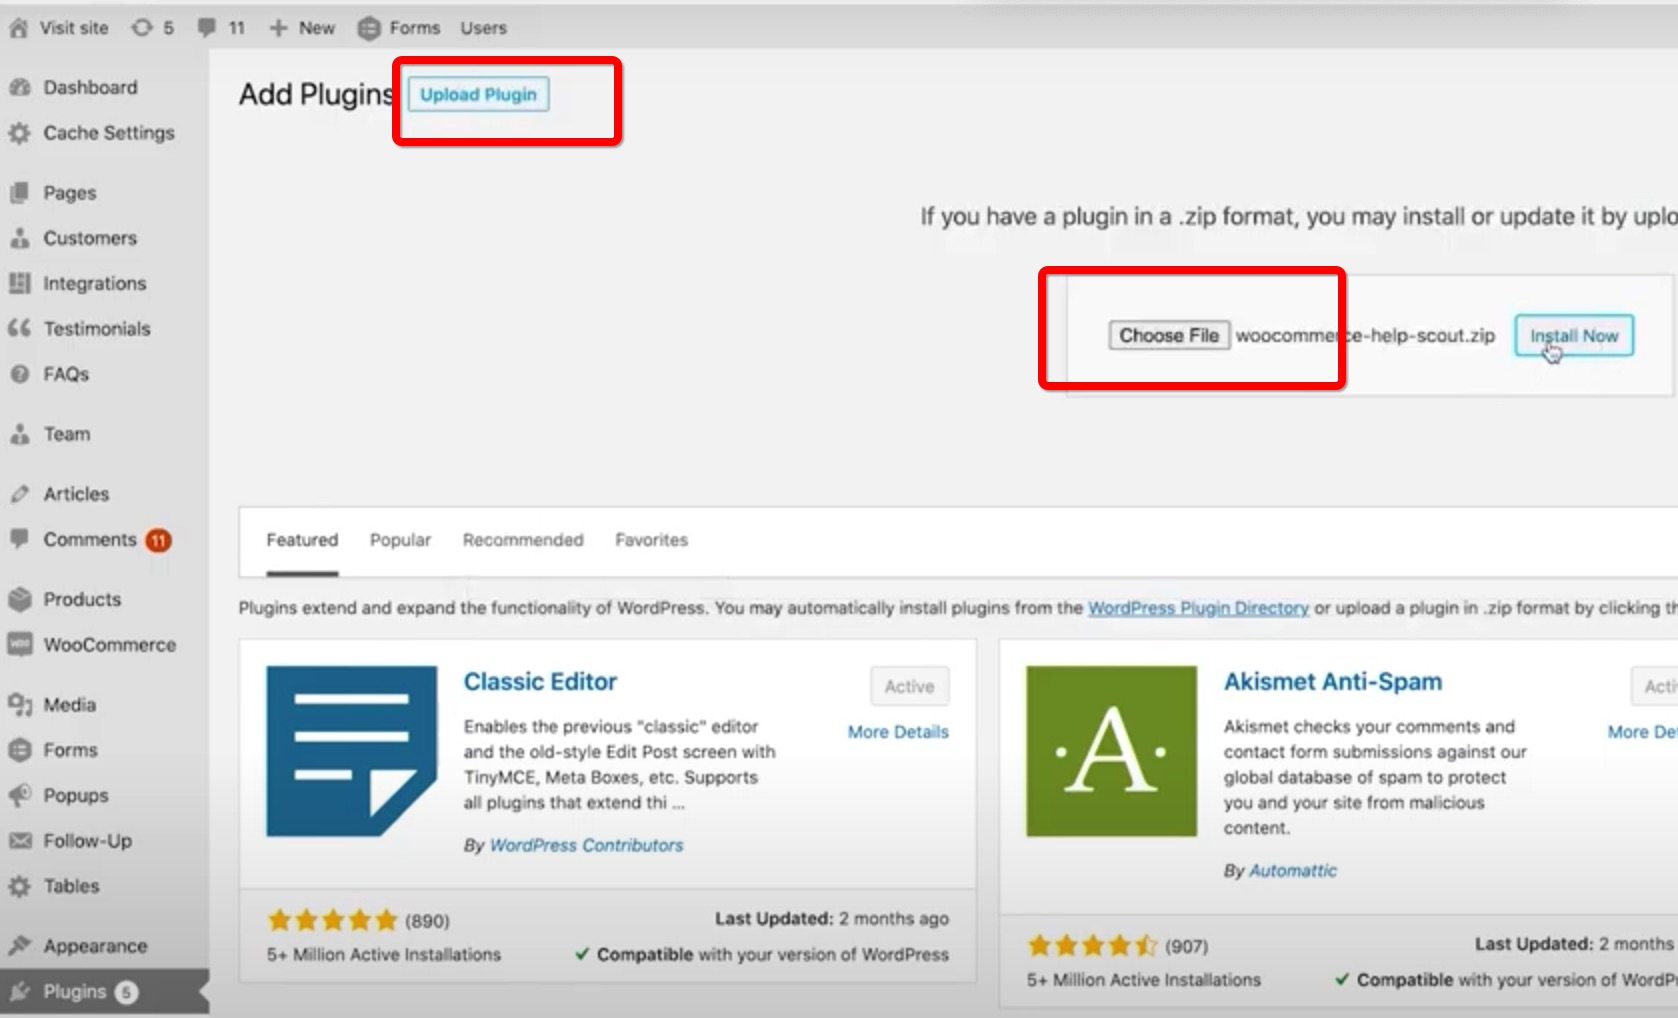
After the Plugin has been uploaded, the next step is to activate the Plugin.
Once activated, you’ll be rerouted back to your WooCommerce Dashboard where you’ll finally be able to connect your Help Scout account!
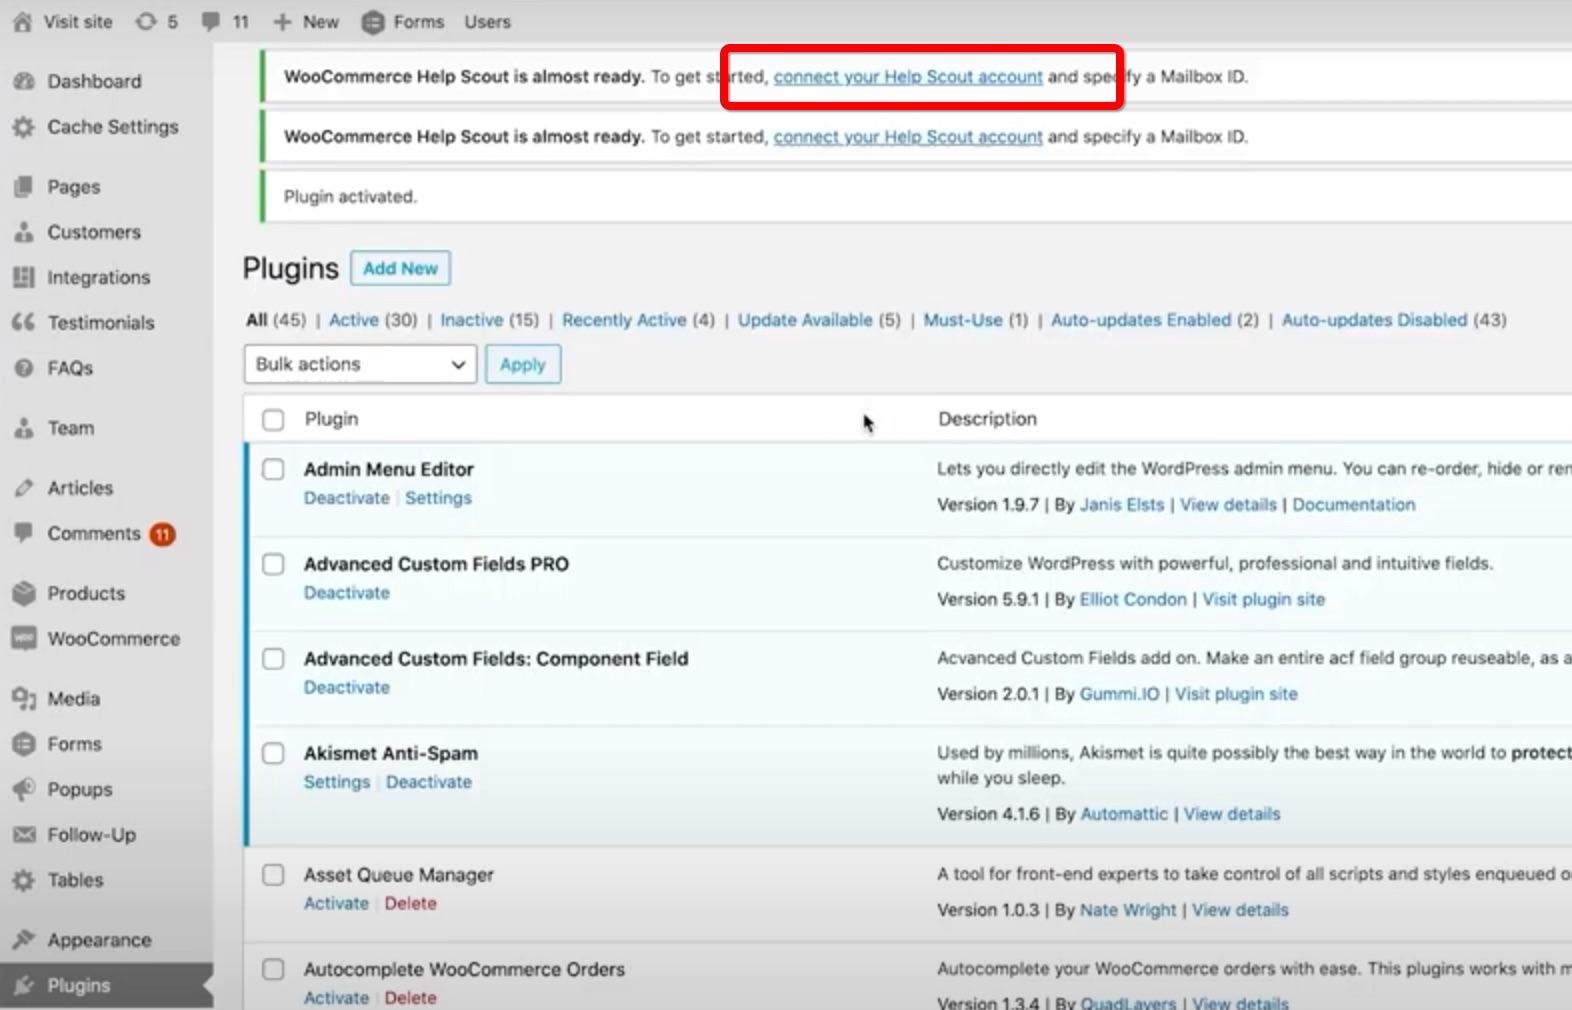
Once you’ve selected ‘connect your Help Scout account’, sign into Help Scout in order to retrieve the necessary APP Key and APP Secret.
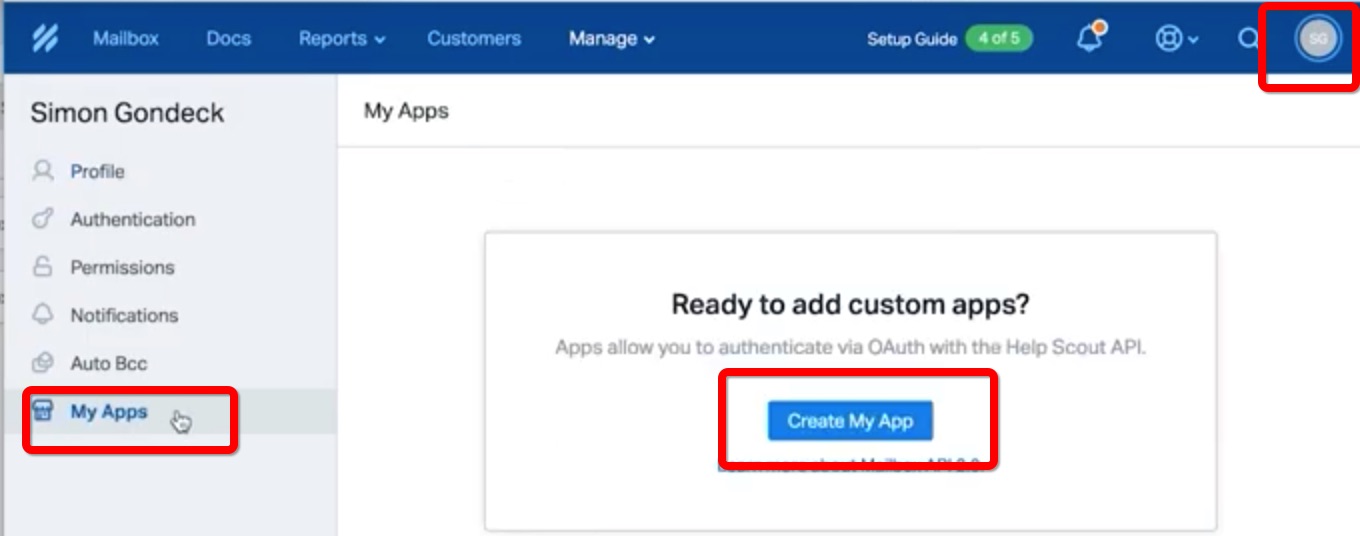
Click Create my App, Create a Name, for this example we will be using Help Scout sgwp for organizational reasons. Then add your redirection URL which can be copy and pasted from your WooCommerce Dashboard, see below:

Click Create and then transfer the App Secret and App Key that were created back to WooCommerce.
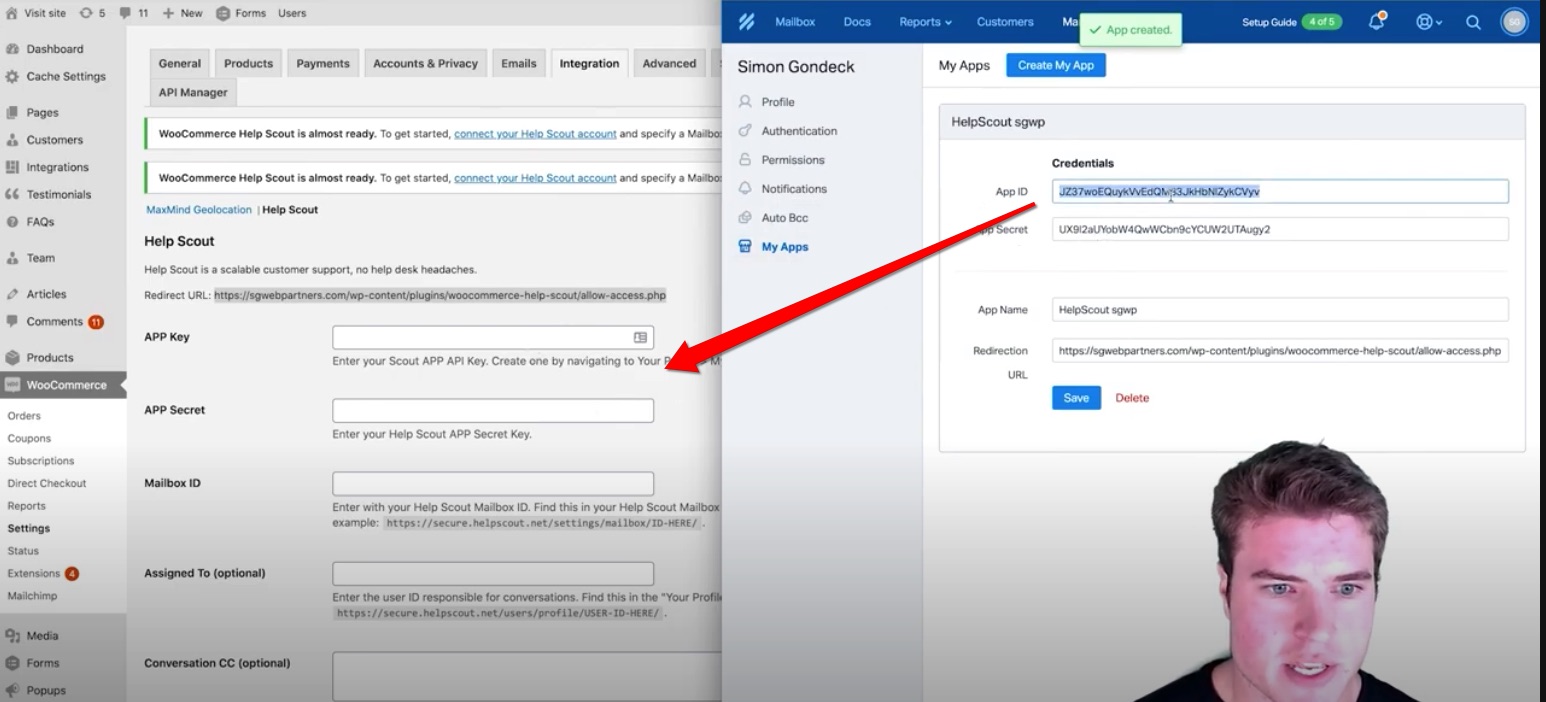
Be sure to click Save throughout the way! Once saved, you’ll need your Mailbox ID. In order to retrieve your Mailbox ID click on the Mailbox tab in Help Scout and then copy and paste the URL.
In order to Assign, click on your Profile in Help Scout and copy and paste the URL the same way you did for the Mailbox ID.
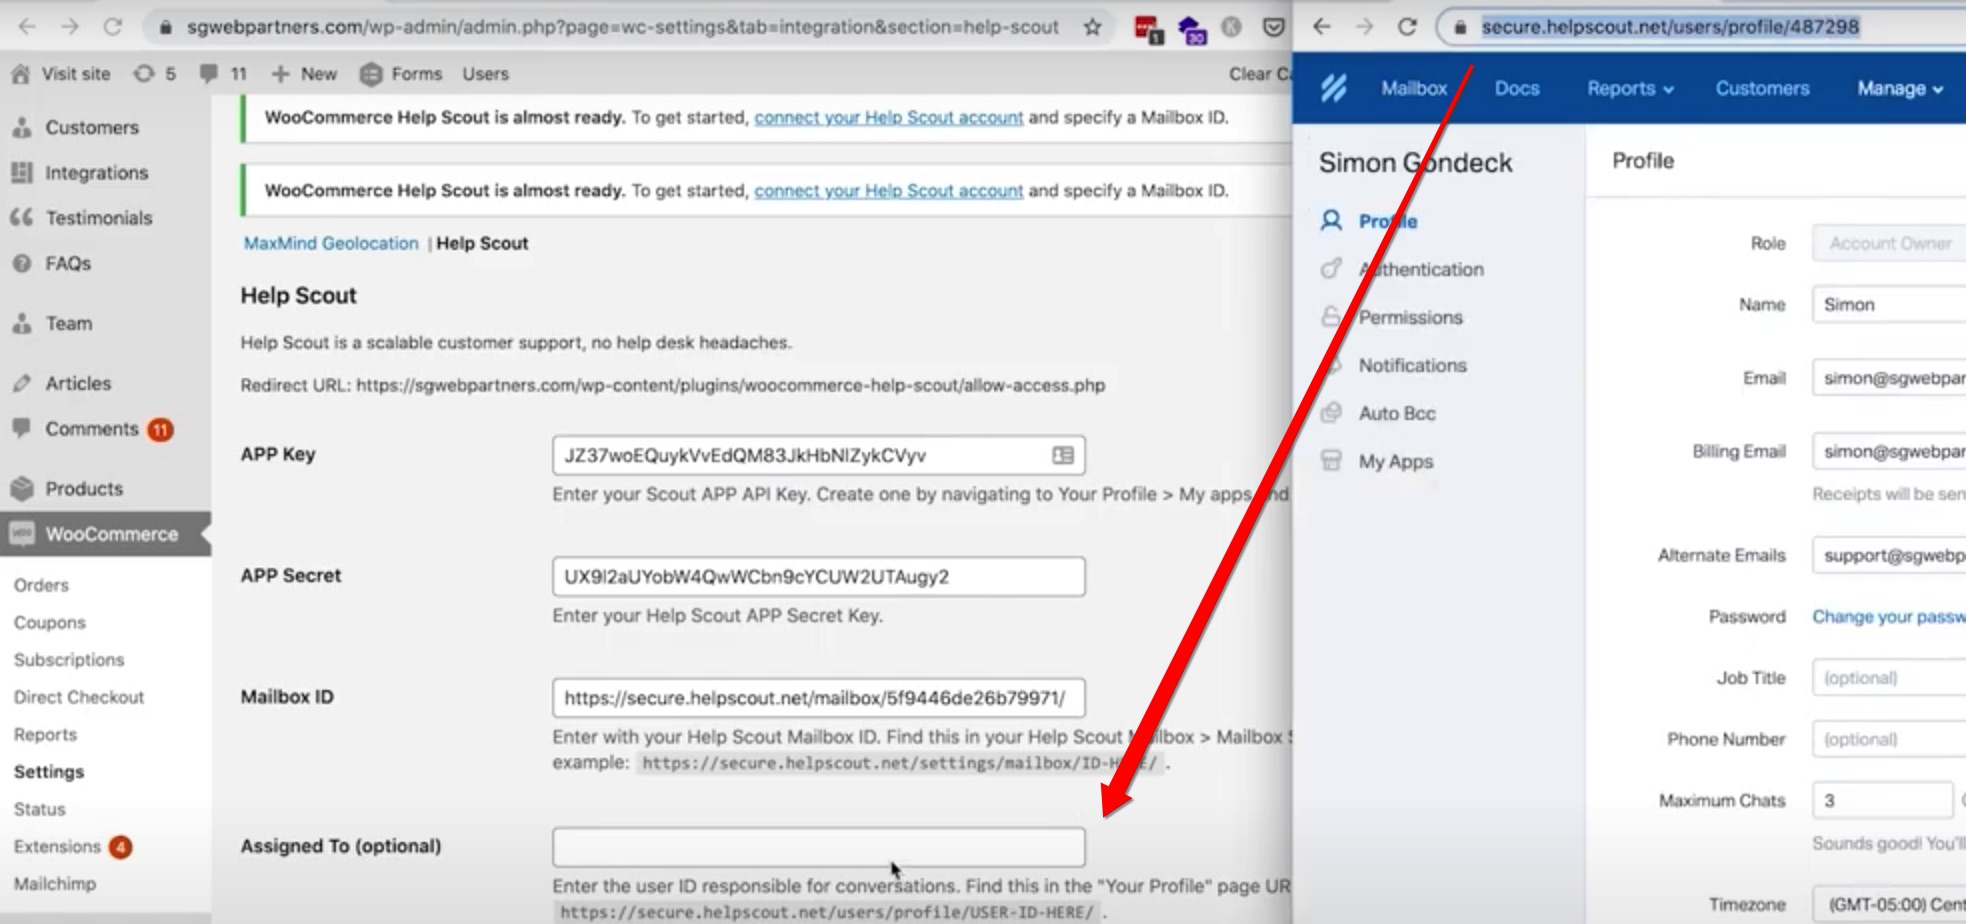
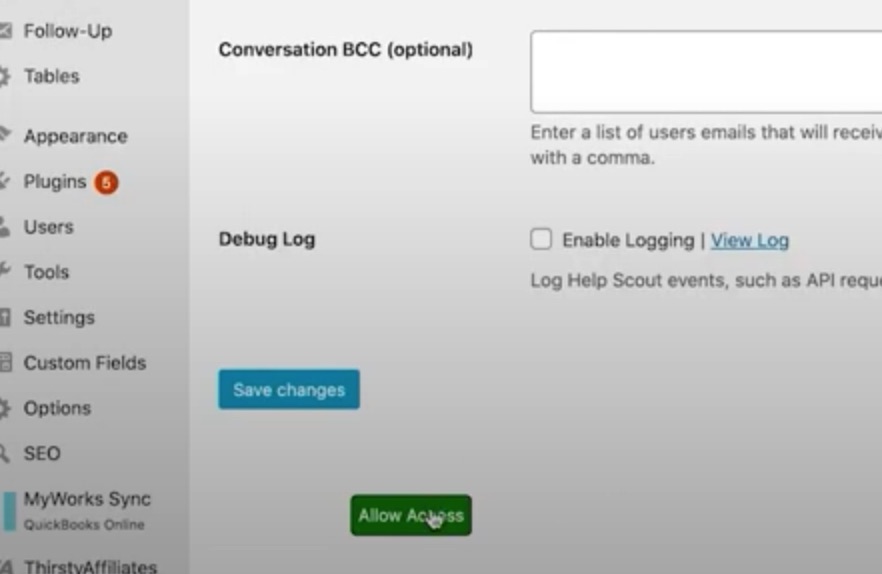
Finally click Save Changes as well as Allow Access, this can be an easy one to miss!
Step 5: Testing to make sure Help Scout is working correctly
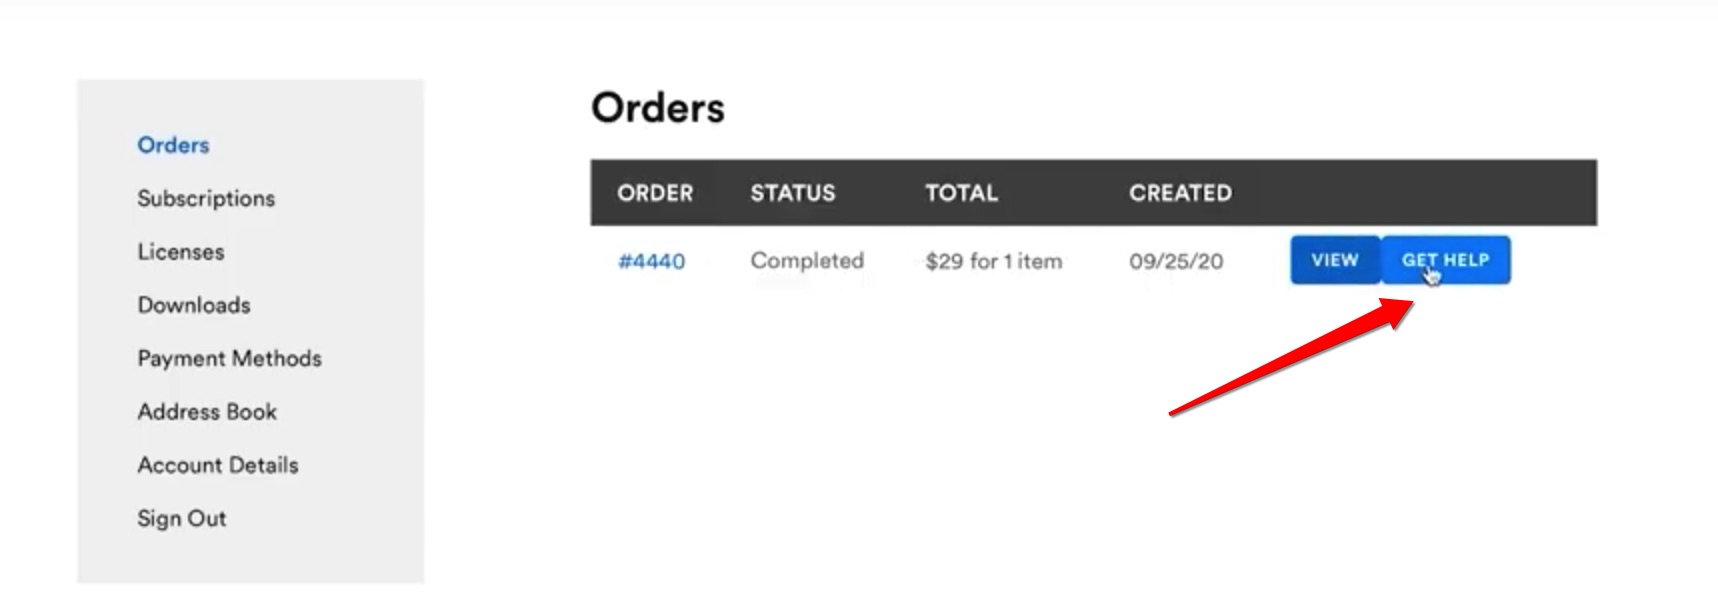
The final step is to make sure that Help Scout is working properly. In order to do this go through a test checkout as is shown in the video tutorial below. Once the test order has been placed, go to your orders tab where you should see a new button that reads ‘Get Help’ that will allow customers to begin the customer service process if need be. If you’ve set up the chat Beacon you will also see a customer service chat Beacon in the bottom right hand corner which will translate messages directly to your Help Scout Mailbox.
Now, from your Help Scout App you’ll be able to one-click to customer profiles as well as reply to questions directly. You’ll even be able to imbed documents in your reply which is one of the great features of Help Scout.
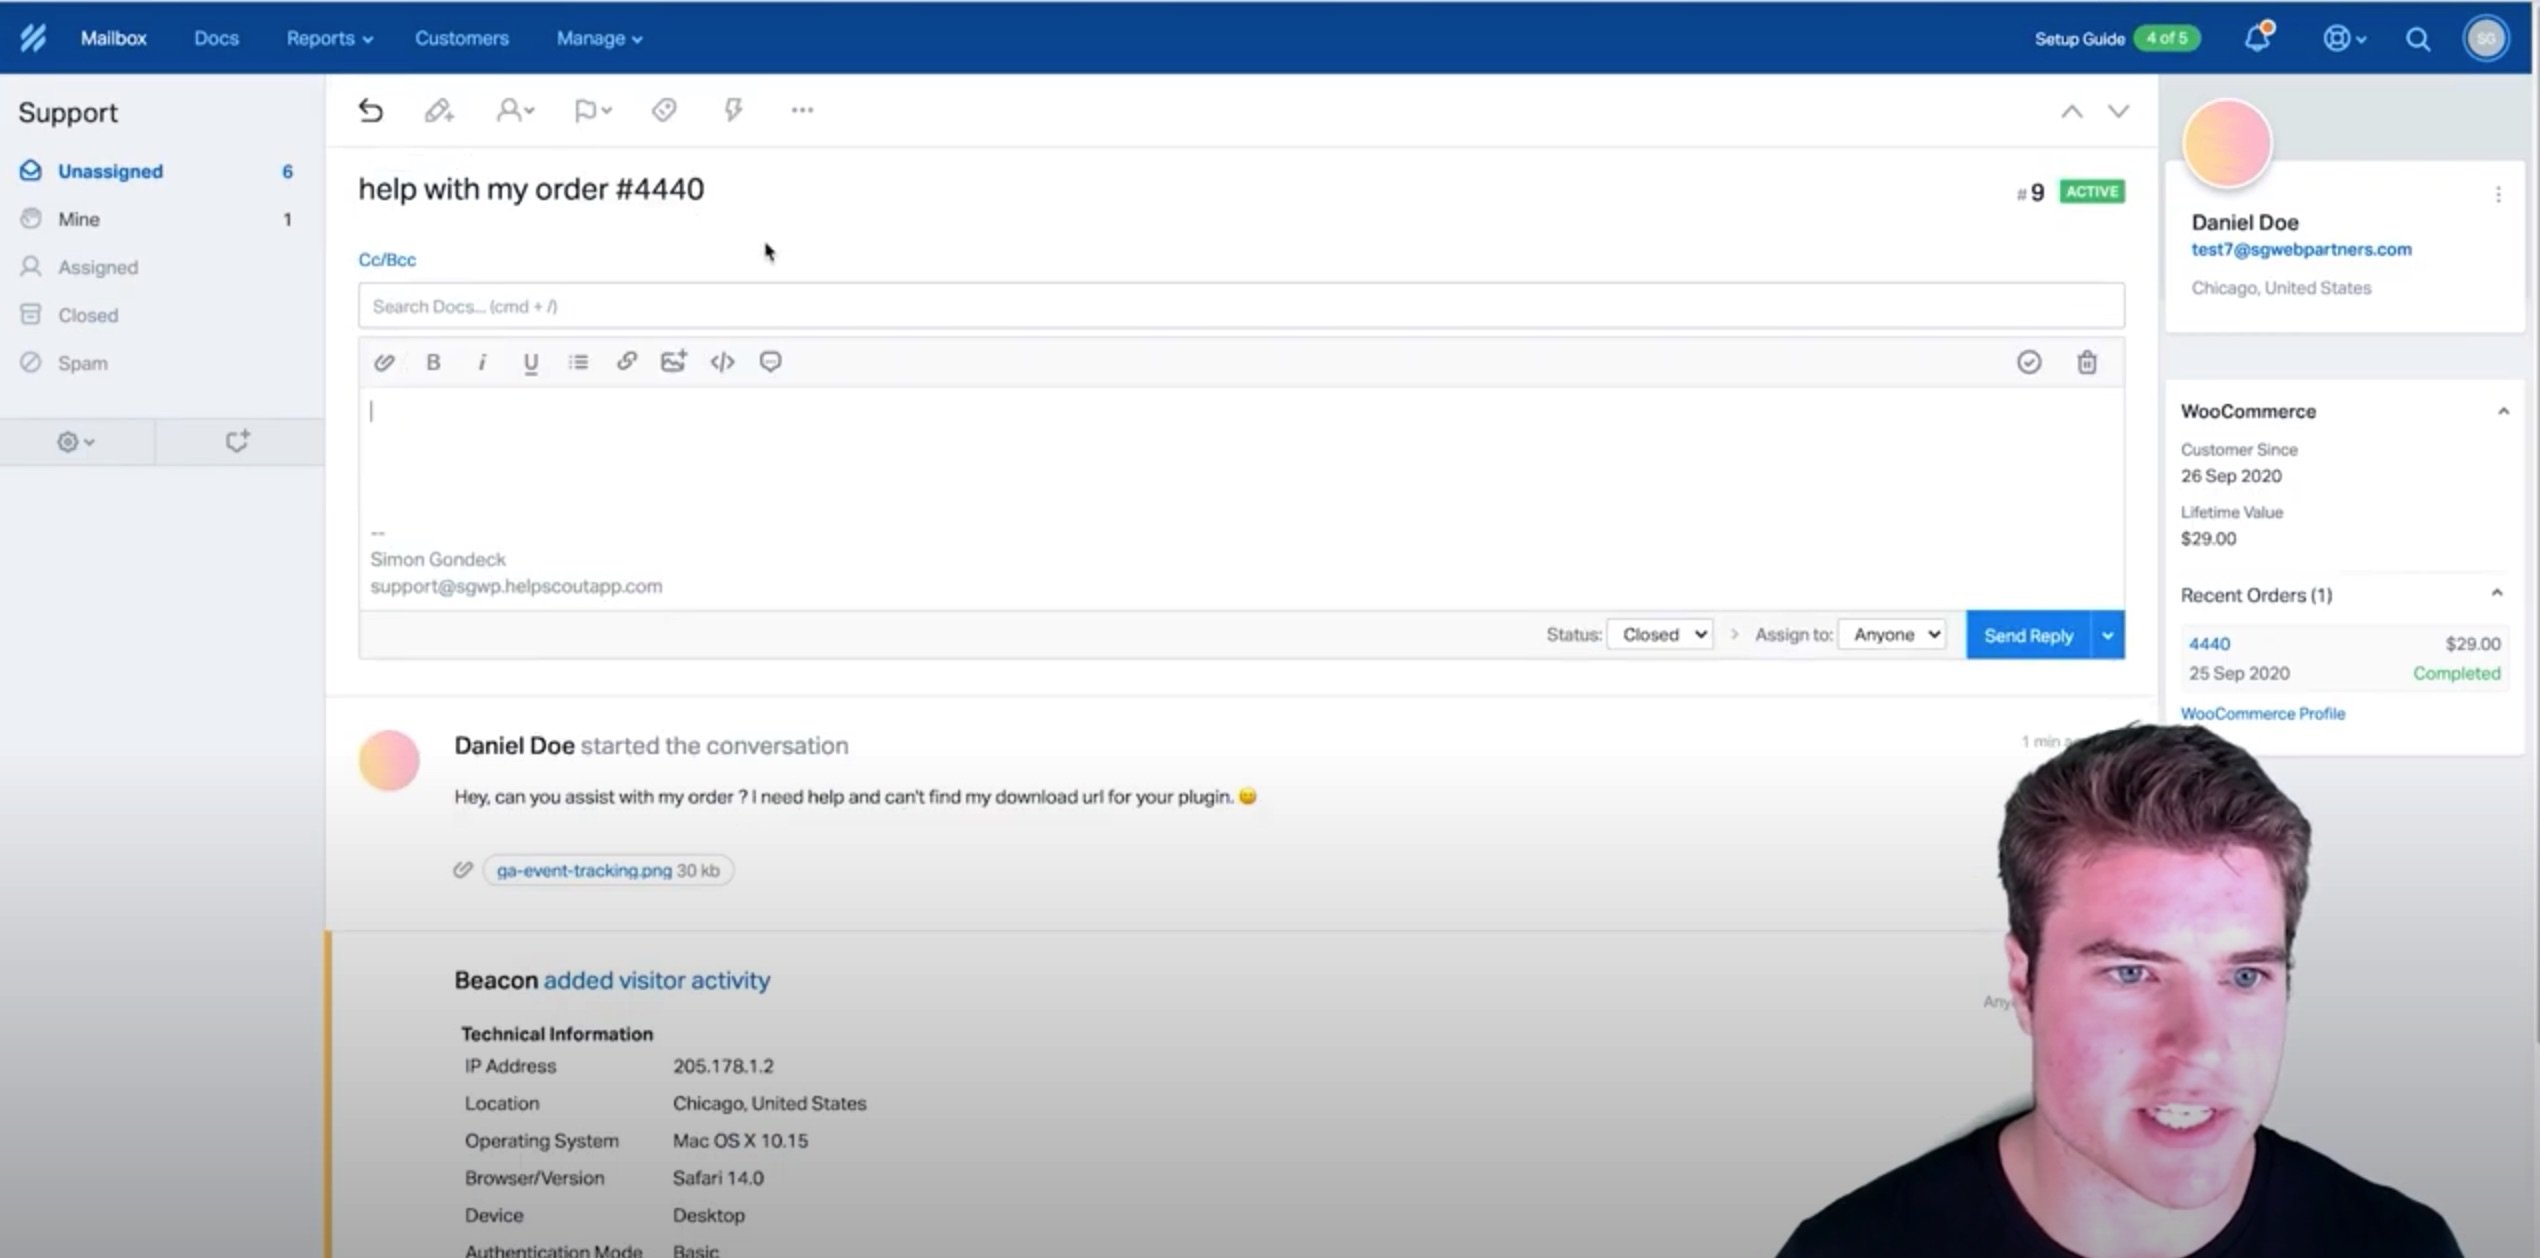
Your Help Scout App through WooCommerce is now successfully set up!
Video Tutorial
If you are a visual learner, use this video.

I followed the instructions but I am getting a 403 error when I try to “Allow Access” from Woocommerce
Hi Maegen, did you ever get this figured out or still having issues?