In this guide, I show you all the steps involved in setting up a simple subscription product in WooCommerce using WooCommerce Subscriptions?
Whether you need to sell physical products such as soap or coffee on a monthly basis, or virtual products such as hosting plans on a yearly fee, you are in good hands.
Let’s begin!
Let’s get started.
Setup a Simple Subscription in WooCommerce
1. Download Plugin
First, download the following plugin: WooCommerce Subscriptions.
Next, upload the .zip file for each plugin to your WooCommerce store. Activate the plugins. Before proceeding, make sure both plugins are not only installed but also activated.
Pro tip: Make sure you are using a payment method that supports automatic recurring payments. This will allow your customer’s billing method run automatically on their next payment date. See the full list of payment gateways that support recurring payments.
2. Create a new Simple Subscription Product
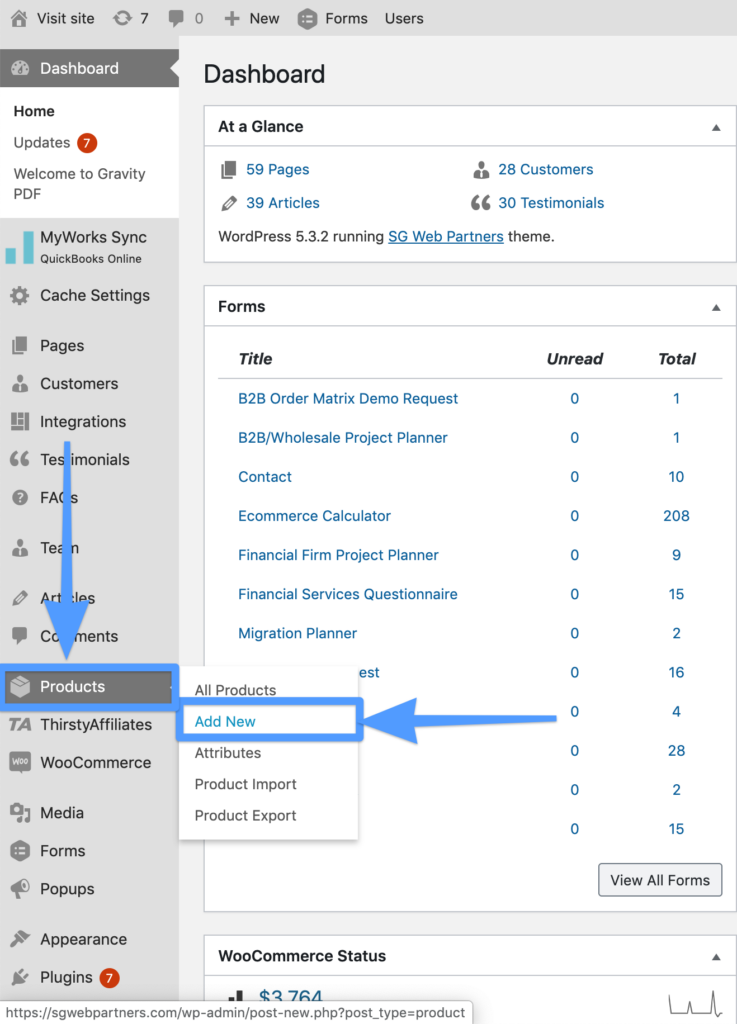
Next from WooCommerce dashboard, click Products > Add New.

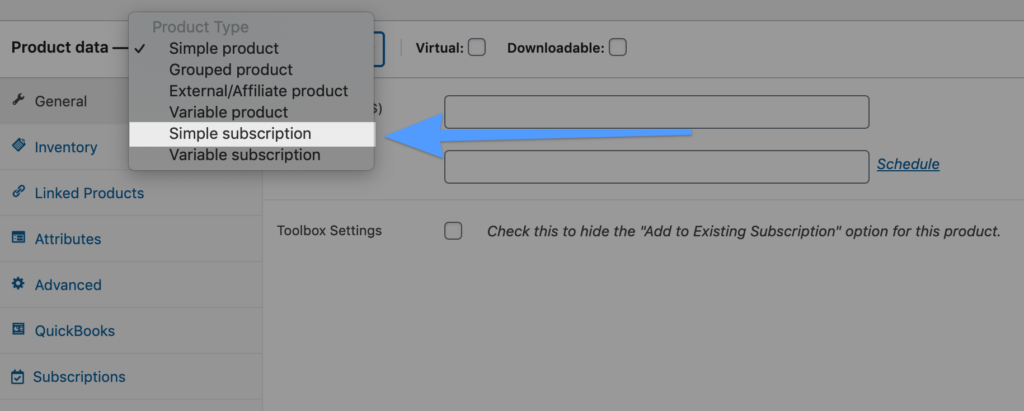
From the product page, scroll down to product data section and select “Simple Subscription” from the dropdown.

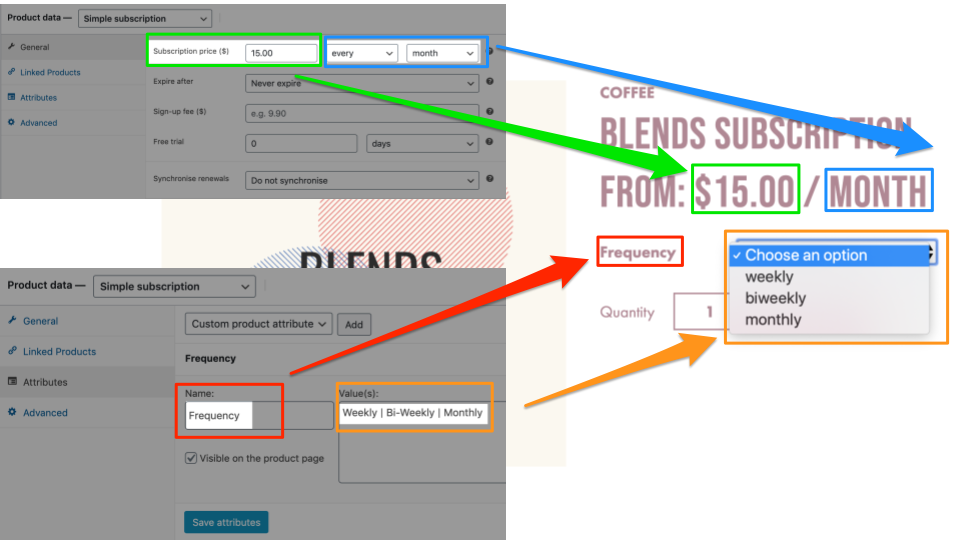
Next, enter in the subscription price and frequency for when to charge customers.

Here is a example of the information we entered for a customer to give you a complete visual for how to insert this information:
- Subscription Price: $15.00
- Charge Customer Frequency: Every Month
- Expire after: Every Month
- Sign-up fee: N/A
- Free Trial: N/A
- Enable/Checkbox: Do Not Synchronise
- Check out my video tutorial here for How to Setup Synchronise Renewals for WooCommerce Subscriptions
3. Add Attribute (Optional)
Next, click “Attributes” and then click “Add”.

Attribute #1 (Optional)
From here, name your attribute, enter in the attribute values, and click the checkbox to enable visibility on the product page. Note, Simple Subscriptions can only have 1 attribute. Thus, if you need to add another subscription please go to my post here: How to setup a variable subscription product in WooCommerce?
Here is a example of the attributes we implemented for a customer to give you a complete visual for how to insert this information:
- Attribute Name: Frequency
- Value(s): Weekly | Bi-Weekly | Monthly
- Enable/Checkbox:
- Visible on the product page

Click save.
Here is a visual for how the back-end data entered looks like on a live product page.

Video Tutorial
If you are more of a visual learner, you can check out the video tutorial as well!
