In this guide, learn how to setup a variable subscription product on your WooCommerce store!
In this example we will be using the WooCommerce Subscriptions plugin to enable recurring payments. Recurring payments will allow customers to subscribe to your products or services on a weekly, monthly, or annual basis. You could also setup your subscription product to be bi-weekly, bi-monthly, every 3 weeks, every quarter, etc.
For example, you may want to offer your subscription product every 2 weeks, every month, and every 2 months. This is all possible with the subscriptions plugin!
If you have any questions let me know in the comments below. If you are more of a visual learner, check out my video tutorials below!
Let’s jump into it!
1. Download WooCommerce Subscriptions
First, download the following plugin: WooCommerce Subscriptions.
Next, upload the .zip file for each plugin to your WooCommerce store. Activate the plugins.
Pro tip: Make sure you are using a payment method that supports automatic recurring payments. This will allow your customer’s billing method run automatically on their next payment date. See the full list of payment gateways that support recurring payments.
2. Create a new Variable Subscription Product
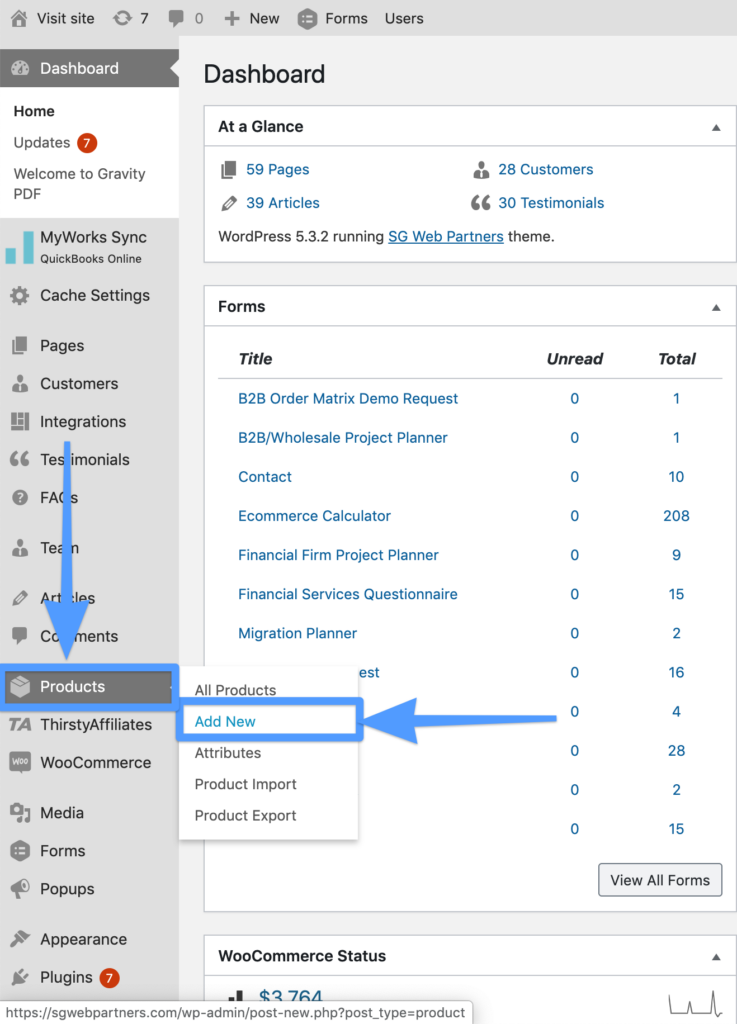
Next from WooCommerce dashboard, click Products > Add New.
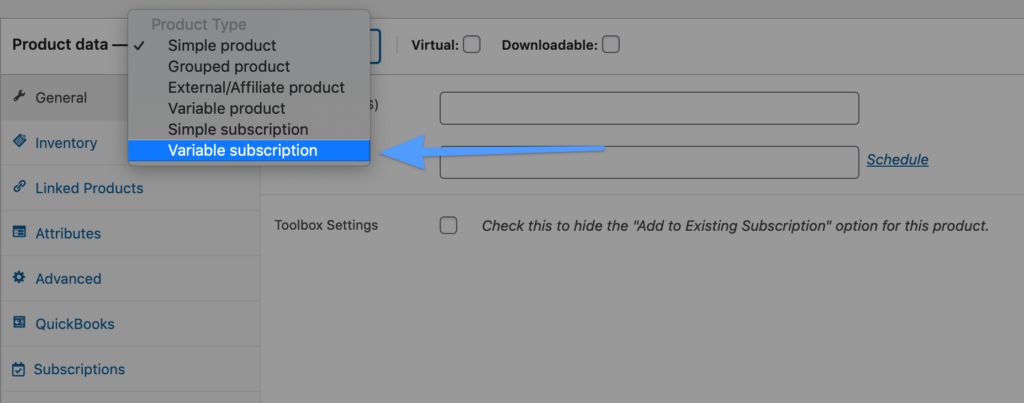
From the product page, scroll down to product data section and select “Variable Subscription” from the dropdown.
3. Add Attributes
Next, click “Attributes” and then click “Add”.

Attribute #1 (Required)
From here, name your attribute, enter in the attribute values, and click the checkbox to enable visibility on the product page and used for variations.
Here is a example of the attributes we implemented for a customer to give you a complete visual for how to insert this information:
- Attribute Name: Billing Frequency
- Value(s): Month | Year
- Enable/Checkbox:
- Visible on the product page
- Used for variations

Click Save.
Pro tip: If you want to add a Bi-Monthly or Bi-Weekly option just added another value in the Attributes tab.
Attribute #2 (Optional)
Next, if necessary, add an additional attribute (i.e. scent, flavor, color, etc.). Follow the same process as before, click “Add” and then entering the attribute information.
Here is a example of the attributes we implemented for a customer to give you a complete visual for how to insert this information:
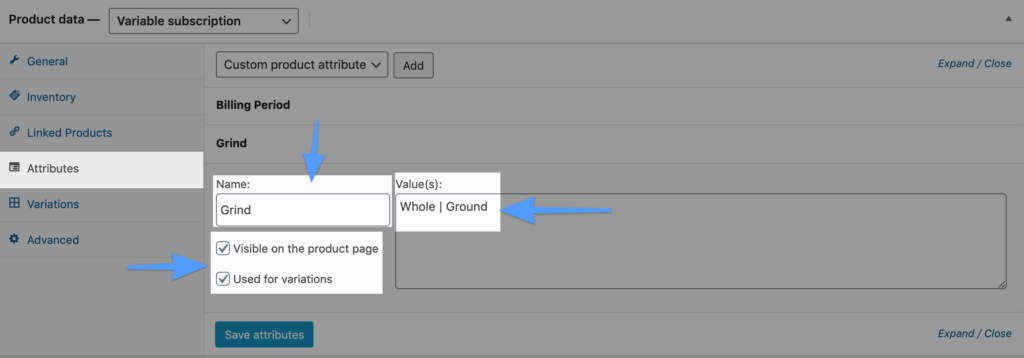
Save attributes and update your product.
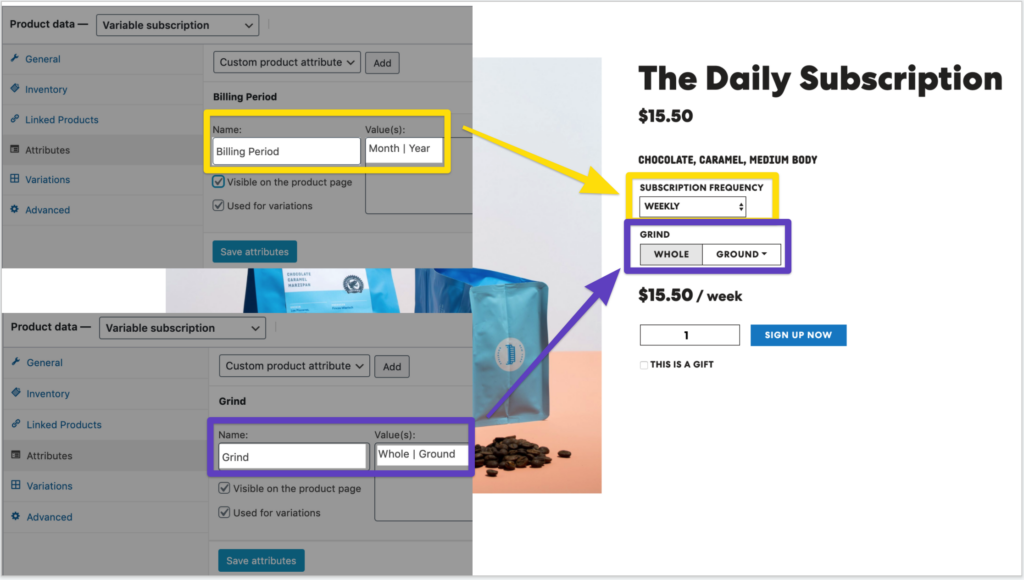
**Important**: My most popular question for variable subscriptions is how to setup multiple attributes. Thus, I provided this screenshot below to show how the product page will look like when each attribute was filled in on the back-end.
4. Create variants from all Attributes
Next, click “Variations” and select “Create variations from all attributes” from the dropdown and select “Go”.

Next, fill in pricing/SKU information for each subscription variation.
Note: you need to fill in the price for each variation, as subscription variations won’t display on your product page if they have no price.
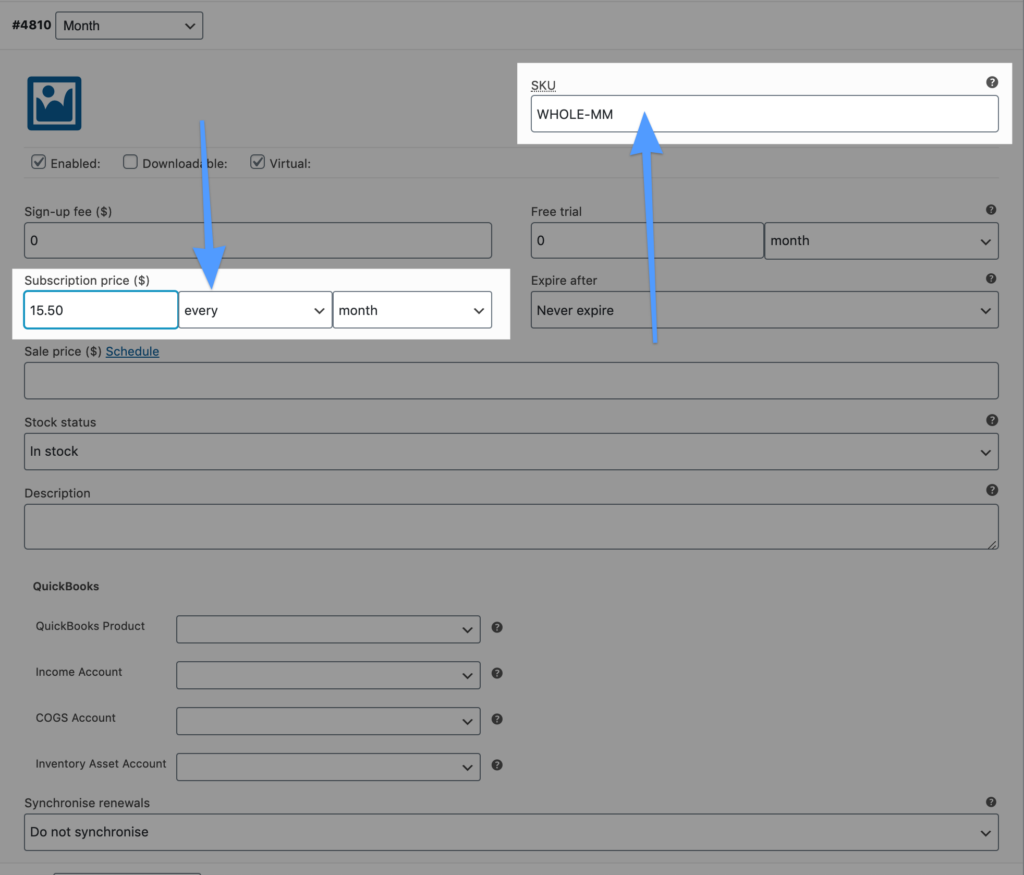
Click save.
5. Summary
You are all set!
When customers visit your product page they will be able to choose between any combination of attributes (i.e. Billing Period/Grind) on a recurring subscription.
Pro tip: Do a test order buying your variable subscription product your actual credit card. It is always beneficial to understand how this works and seeing how your customer receives orders.
Video Tutorials
Video: How to setup WooCommerce Subscriptions?
Video: How to add subscriptions to existing products?
If you want to see the full post, see how to add subscriptions to existing products.

Great video!
I have a model subscription with multiple products.
Small box $3 a month, medium box $6 a month and large box $9 a month.
I want the customers be able to combine any of the boxes above with any quantity to the cart one page..
So lets say a customer wants to order 5 small boxes ($15) 3 medium boxes ($18) and 4 large boxes ($36) total monthly subscription $69 a month.
Can it be done with this plugin?
Thanks!