In this guide, learn how to setup PayPal Checkout for your WooCommerce store.
Before we begin you need to make sure that you have downloaded the official PayPal Checkout plugin from the WooCommerce marketplace.
To clarify, this is not for PayPal Standard. This is for PayPal Checkout. Ensure this plugin is installed, active, and setup correctly!
To use PayPal Checkout, you must have a PayPal business account.
If you are more of a visual learner, follow along to my tutorial video below where I outline everything in the steps below.
Let’s jump into it!
Table of Contents
Setup PayPal Express Checkout
- Enable PayPal Checkout in WooCommerce
- Get NVP/SOAP Integration (Classic) credentials
- Add your brand’s logo
- Advanced Settings
- Checkout Button Settings
- Single Product Button Settings
Step 1: Enable PayPal Checkout in WooCommerce
The first step is to go to your WordPress dashboard, hover over WooCommerce, and go to the Settings.
Next, click the Payments tab.
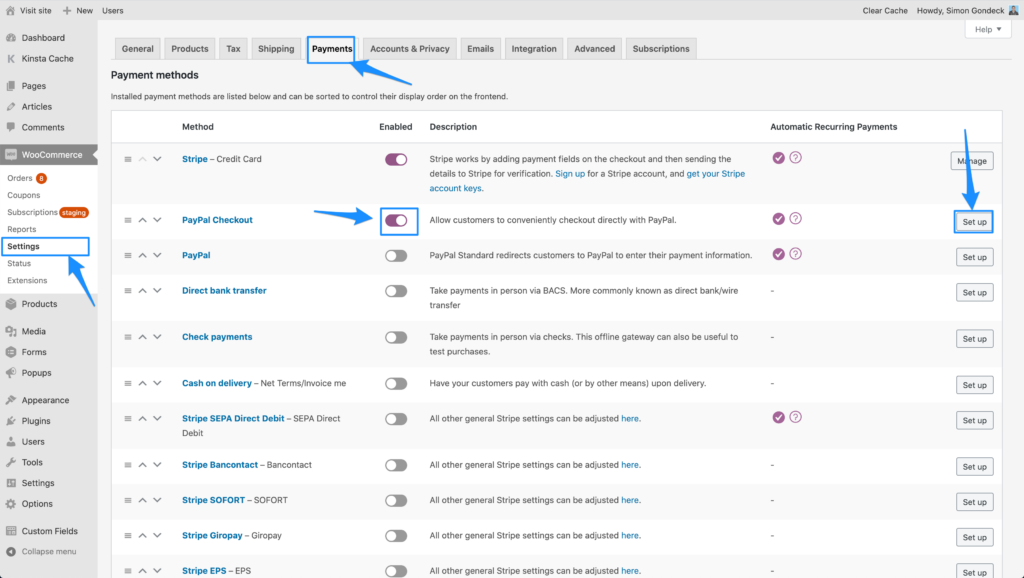
Then, enable the PayPal Checkout payment method and click Setup.
Next, click the checkbox to enable Enable the PayPal Checkout Payment Gateway and select ‘Live’ from the Environment dropdown.
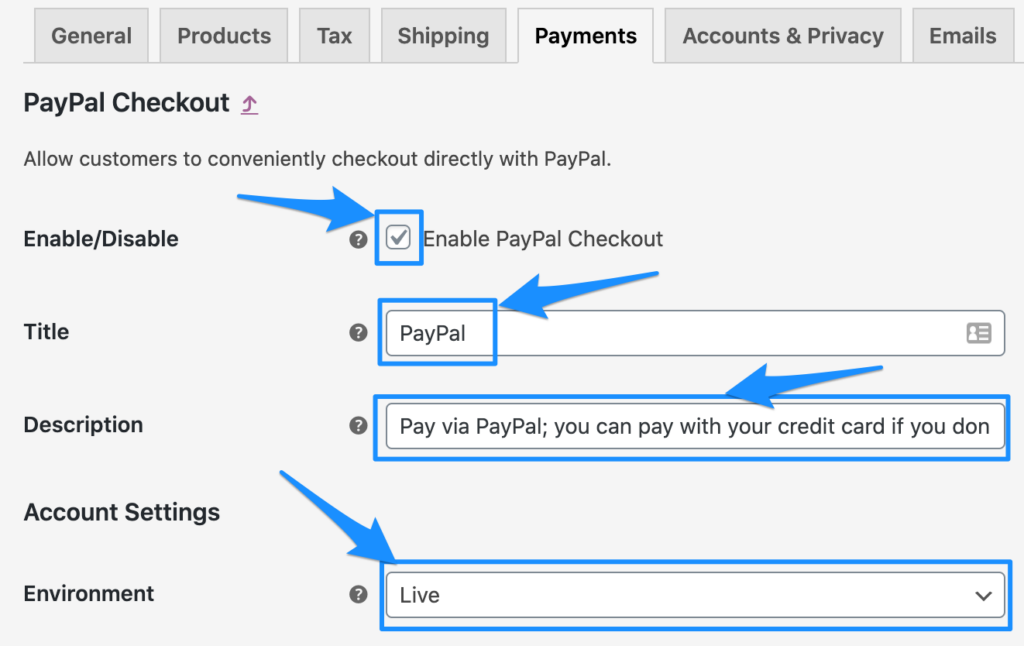
Note: select Live to accept payments and Sandbox to test payments.
Step 2: Get NVP/SOAP Integration (Classic) credentials
Next, open up a new tab and go to PayPal.com. Sign in to PayPal.
On your PayPal dashboard, click the “Settings” icon in the top right hand corner and then “Website Payments” under the Products & Services sidebar menu. Then, click “Update” on API Access.
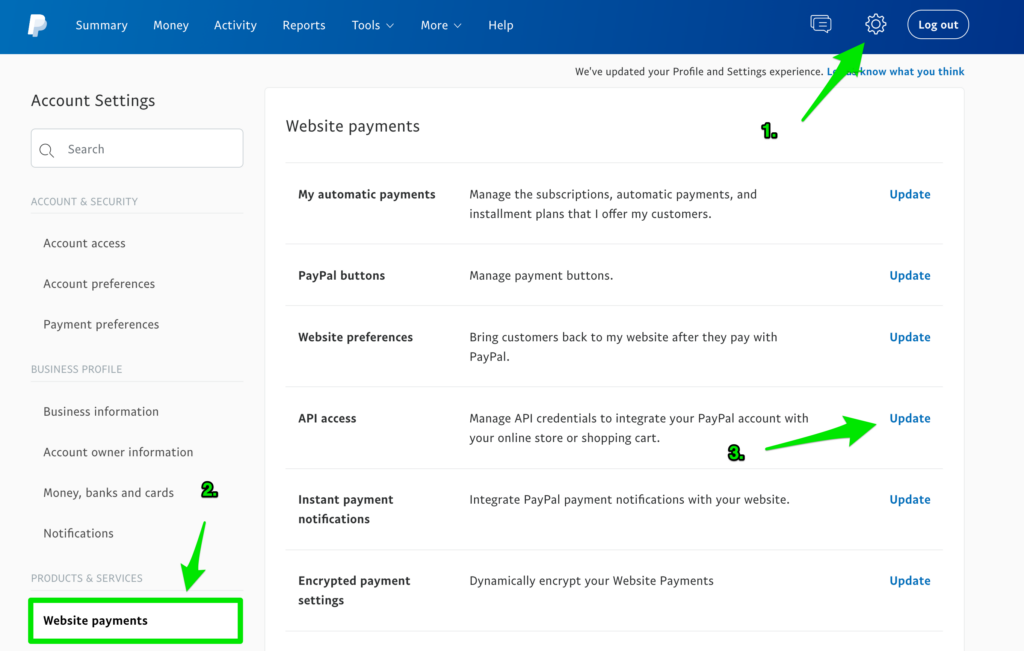
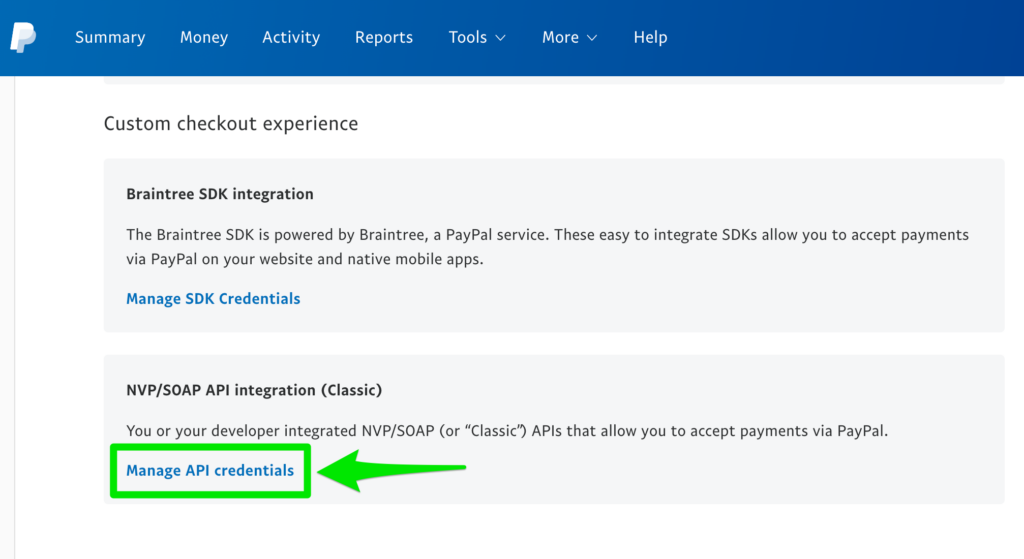
Next, scroll down to “NVP/SOAP Integration (Classic)” heading and click “Manage API credentials”.
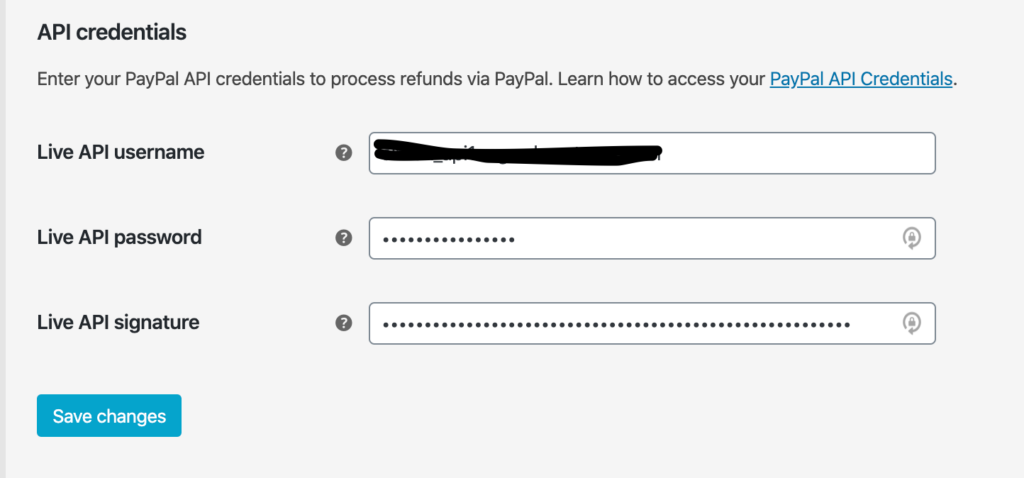
Then, you will have to view your API Username, API Password, and Signature.
Copy these values in PayPal and paste these values in the API credentials section in WooCommerce.
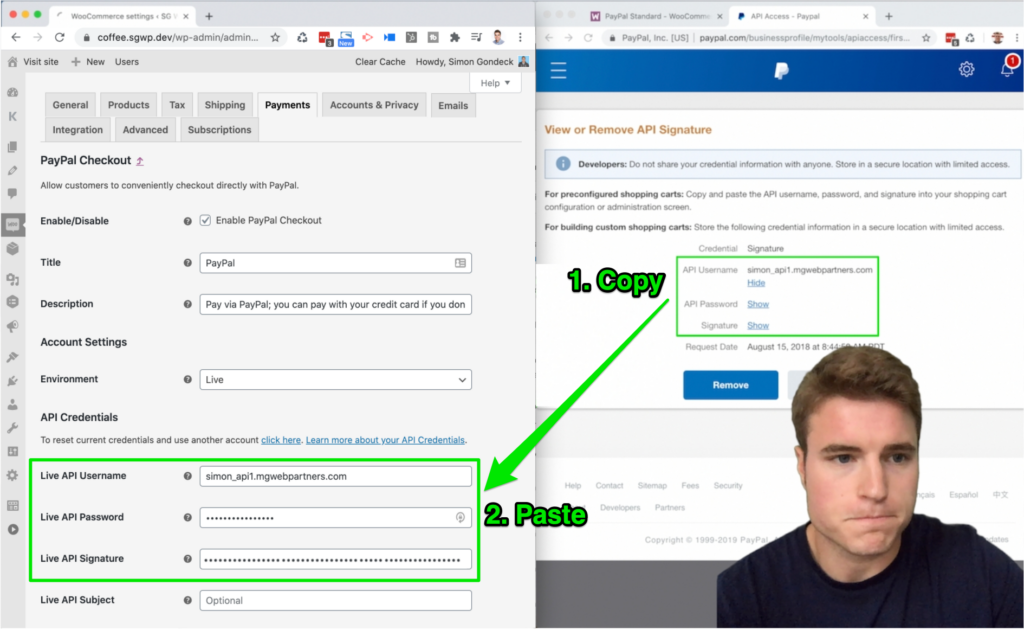
Finally, don’t forget to click ‘Save Changes’ in WooCommerce.
Step 3: Add your brand’s logo
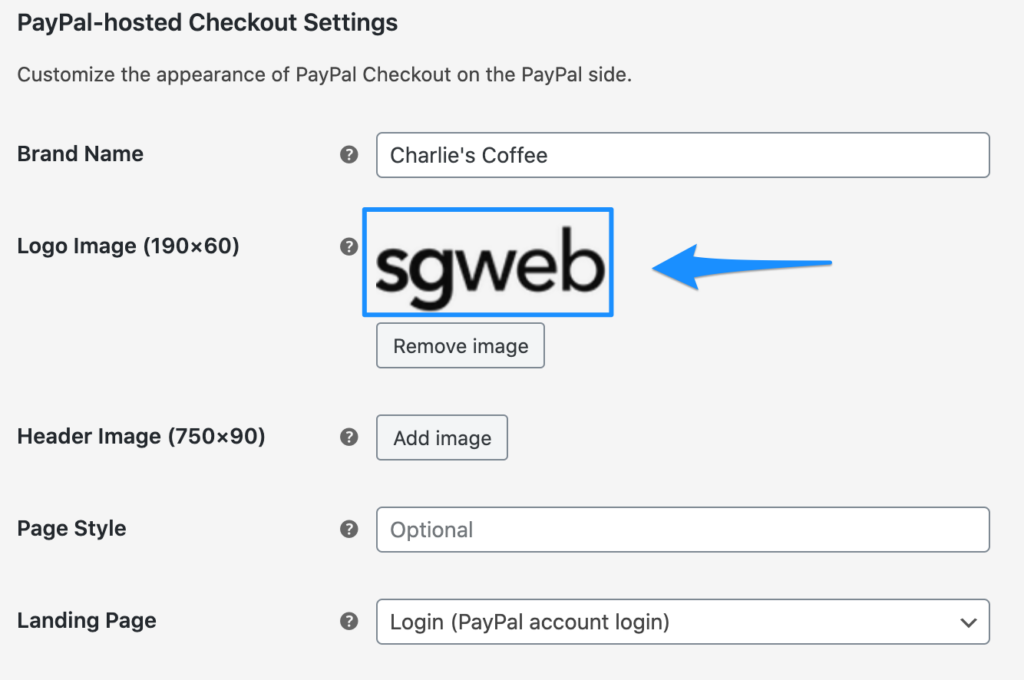
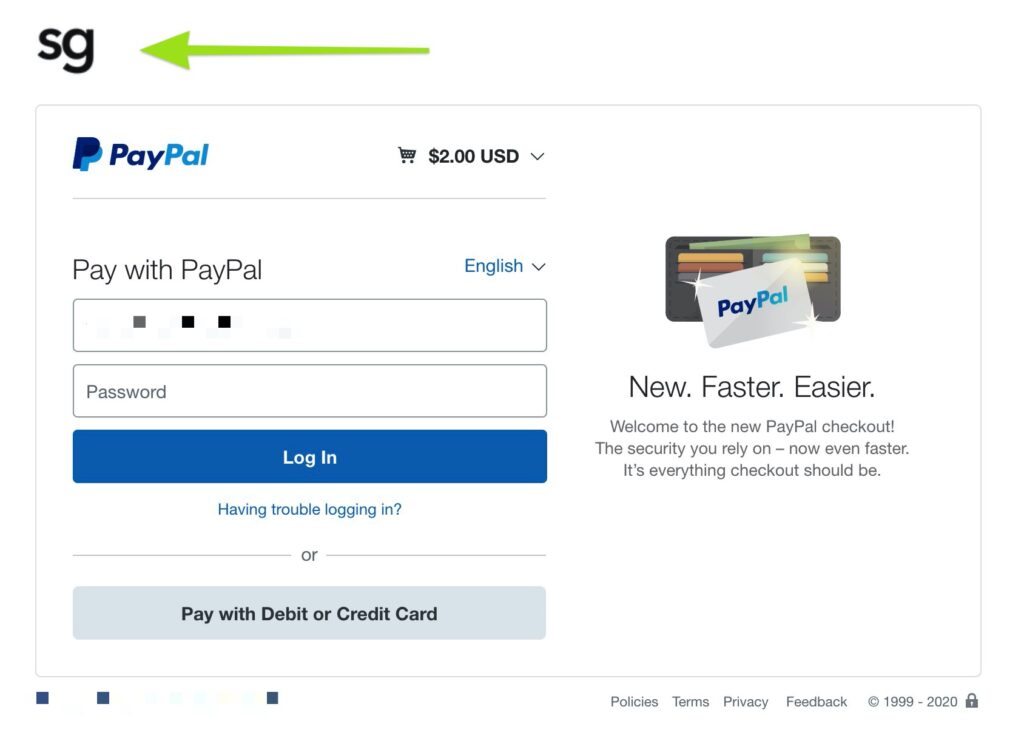
Upload your brand’s logo to the Media Library in WordPress/WooCommerce. PayPal Checkout recommends dimensions of 190 pixels x 60 pixels. You could also do 50 pixels x 50 pixels (this is what I do!).
Next, in your PayPal Checkout settings in WooCommerce, upload the logo. Save changes.
Finally, do a live transaction on your site using PayPal Checkout. Is your brand’s logo showing up?
Step 4: Advanced Settings
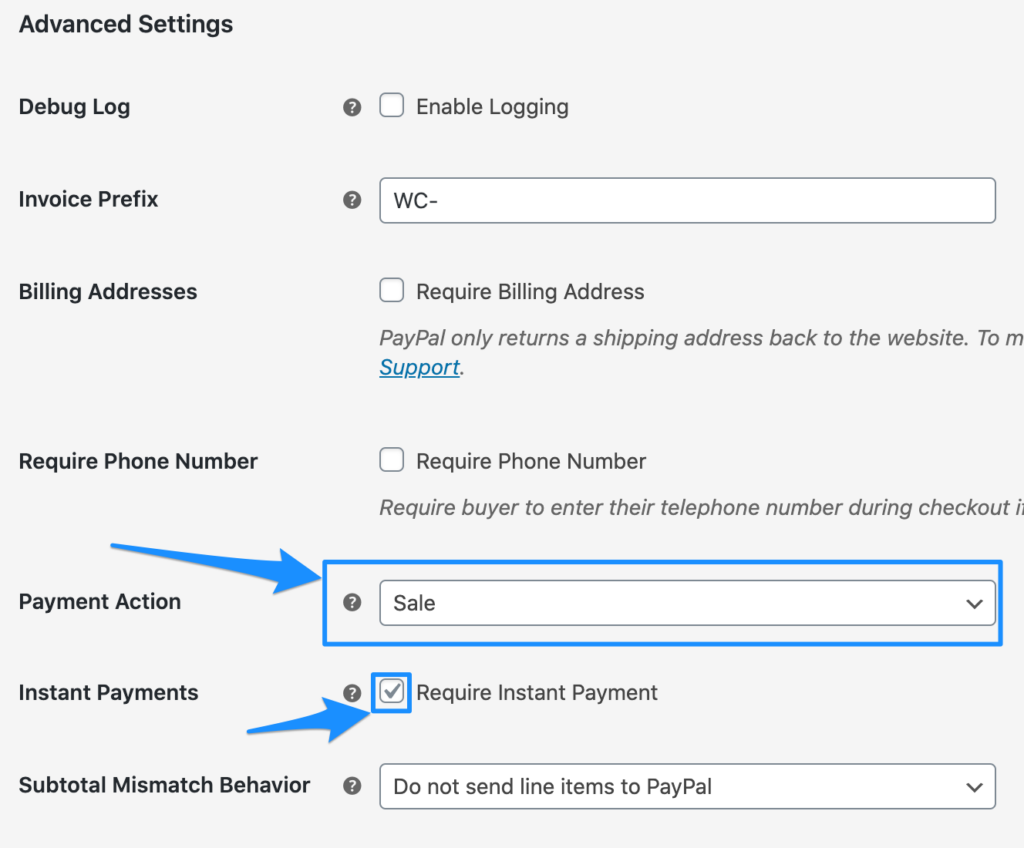
Next, under Advanced Settings, make sure to select ‘Sale’ from the Payment Action dropdown.
The reason why you want to select ‘Sale’, is that ‘Sale’ captures funds immediately, while ‘Authorize’ only verifies the availability of funds that the customer has.
Further, enable ‘Require Instant Payment’. This means that the customer must use a payment method that allows immediate capture (i.e. no checks allowed).
Step 5: Checkout Button Settings
Next, navigate to the Checkout Button Settings.
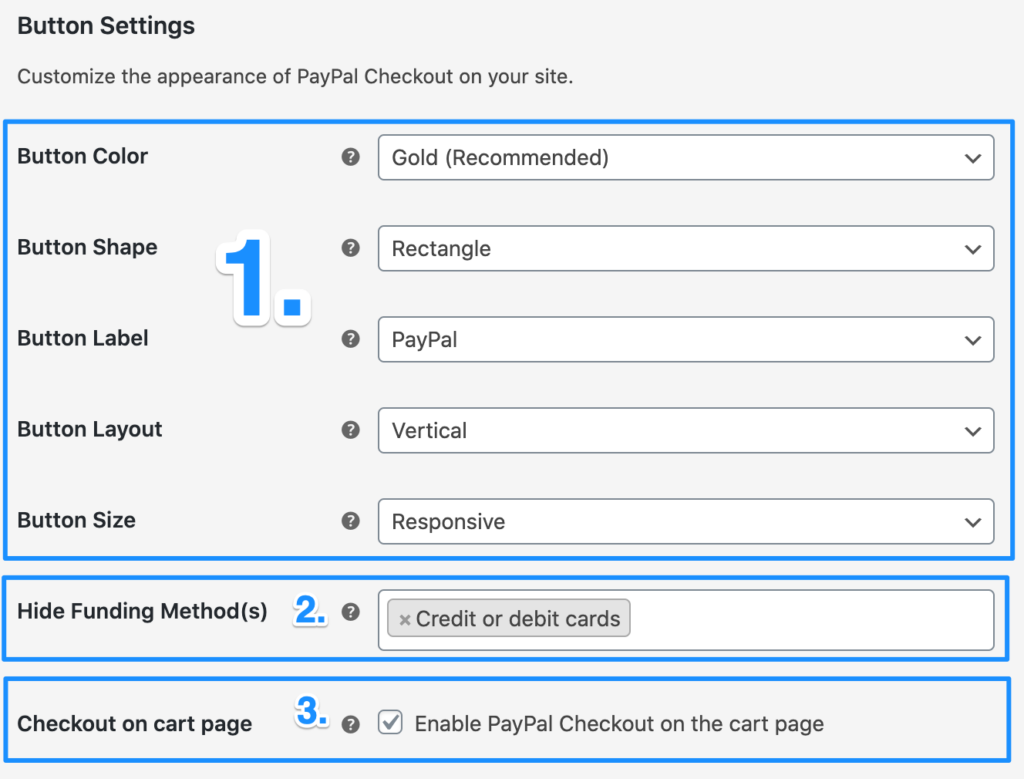
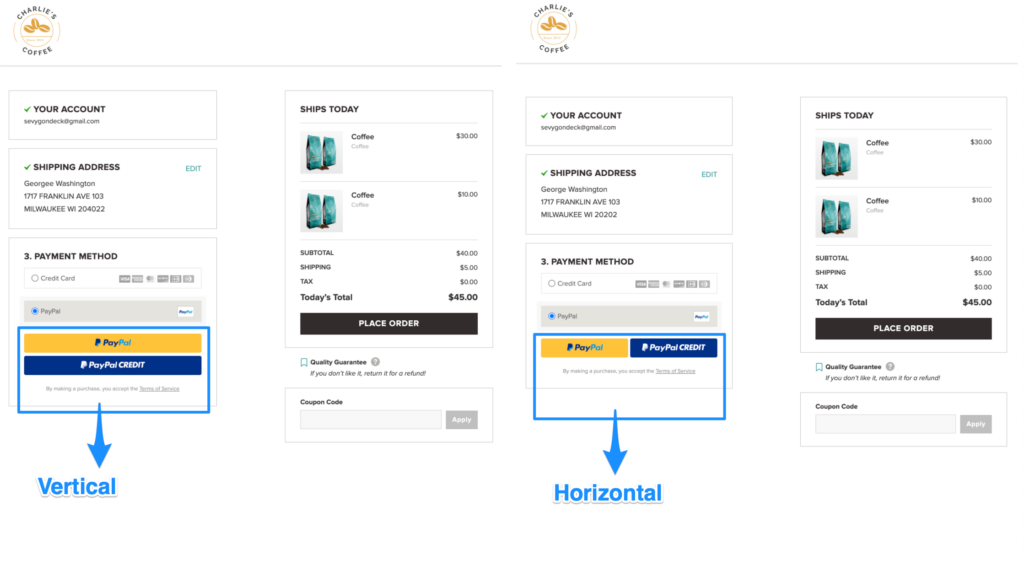
First, select your preferred appearances for Button Color, Button Shape, Button Label, Button Layout, and Button Size. For example, below I have provided an example of the difference between a ‘Horizontal’ vs. ‘Vertical’ Button Layout.
Second, under ‘Hide Funding Method(s), select ‘Credit or debit cards’. Note, I would recommend hiding credit and debit cards if you have other payment gateways such as Authorize.net and Stripe for collecting credit card information.
Third, under ‘Checkout on cart page’, Enable PayPal Checkout on the cart page if you would like the PayPal Checkout button to be located on both the cart and checkout page. Note, if you don’t have a cart page, just disregard.
Scroll down to the bottom of the page and click ‘Save changes’.
Step 6: Single Product Button Settings
Next, navigate to the Single Product Button Settings.
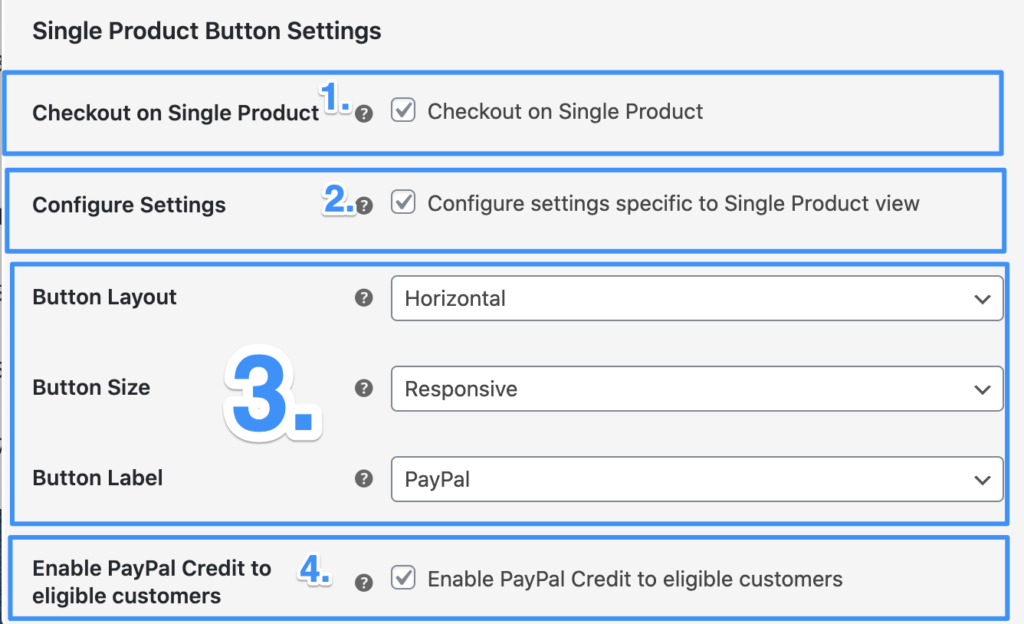
First, under ‘Checkout on Single Product’, select ‘Checkout on Single Product’.
Second, under ‘Configure Settings’, select ‘Configure settings specific to Single Product view’.
Third, select your preferred appearances for Button Layout, Button Size, and Button Label.
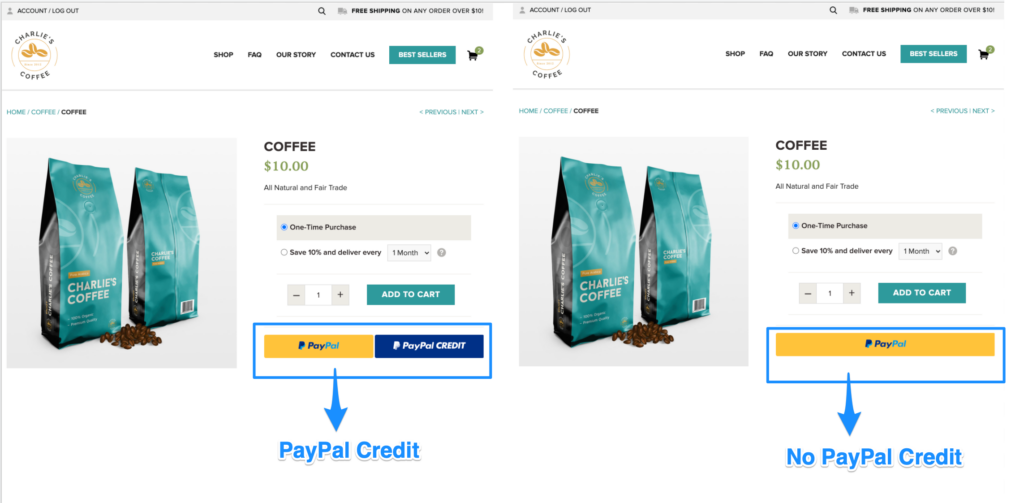
Fourth, under ‘Enable PayPal Credit to eligible customers’, Enable PayPal Credit to eligible customers Checkout on the product page if you would like the PayPal Checkout button to be located on the product page. I would recommend not enabling this button. For example, below I have provided an example of the difference between having the PayPal Credit button enabled, and not enabled.
Lastly, scroll down to the bottom of the page and click ‘Save changes’.
How to setup PayPal sandbox account on WooCommerce?
On your WordPress dashboard, hover over WooCommerce and click Settings.
Next, click the Payments tab and click Manage next to PayPal.
Under Advanced Options, find “PayPal sandbox” and click “Enable PayPal sandbox”.
If you scroll to the bottom of your PayPal settings page, you will notice we need to insert our Sandbox API username, Sandbox API password, and Sandbox API signature.
To get these we need to go to your PayPal Developer account and Sign In.
On your PayPal Developer Dashboard, under the Sandbox menu click Accounts.
Then, on the Sandbox Test Accounts page, click Create Account and create a Business Account.
After creating your Business Account, hover over the Manage tab and click “Profile” to see your Account Details. Toggle the tab to “API Credentials”.
Then, copy and paste the Username, Password, and Signature into your WooCommerce PayPal sandbox settings.
Click Save changes.
Your sandbox account is all set up. The next step is to create a sandbox personal account to test transactions.
If you are having trouble, follow along to this video tutorial below.
how would you add code to the standard paypal to get a different button in woocommerce
Hi Simon. Thanks for the hard work you have put forth in making these videos. I am getting an error after I click the paypal button. 10002 – You do not have permissions to make this API call. I have enabled API in our paypal account. Any suggestions?
I fixed it, never mind! Thnaks for the videos!
Glad too hear Steve! Thank you for watching 🙂
Harika, Thank you teacher 🙂
Glad it was helpful!