
In this guide, learn how to setup Square on your WooCommerce store.
Before we begin you need to make sure that you have downloaded the official Square plugin from the WooCommerce marketplace.
Ensure this plugin is installed, active, and setup correctly!
If you are more of a visual learner check out the video I created below.
Let’s jump into it!
How to setup Square on WooCommerce?
- Connect your site to Square
- Enable Square in WooCommerce
- Test that Square is working
- How to debug issues
- How to setup Square sandbox account on WooCommerce?
- Video Tutorial
1. Connect your site to Square
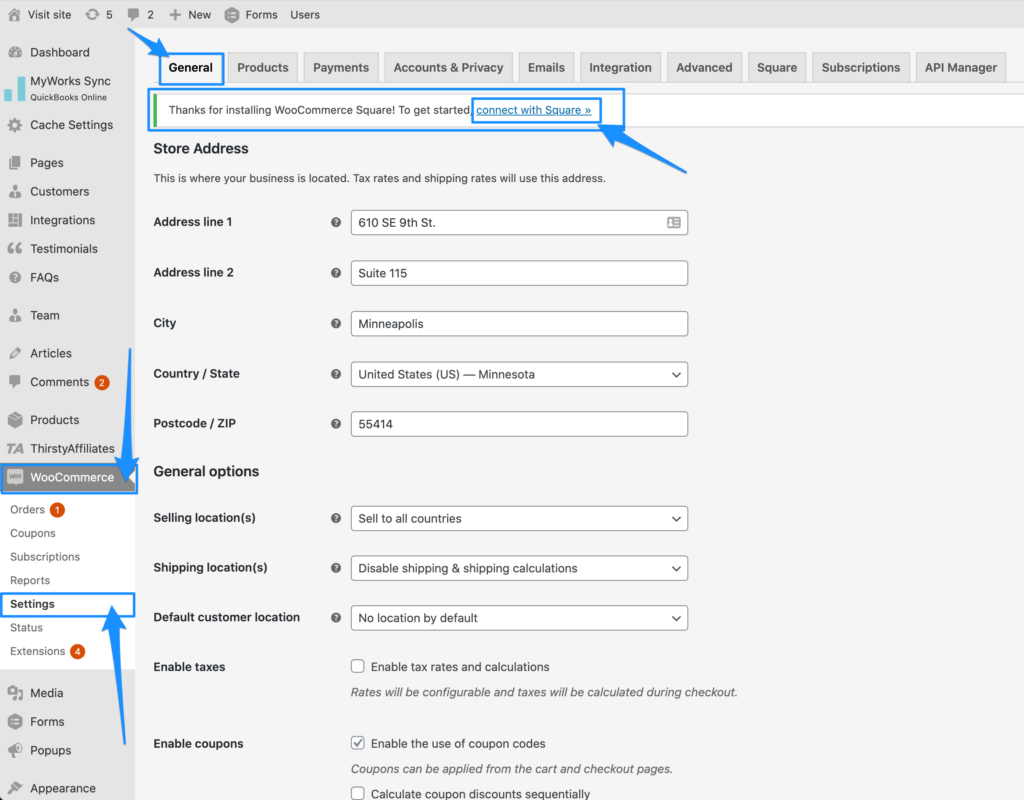
To begin using WooCommerce Square, you first need to connect your site to Square. First, navigate to your WordPress dashboard, hover over WooCommerce, and go to the Settings.
Next, make sure the General tab is toggled.
Finally, click connect with Square underlined text.
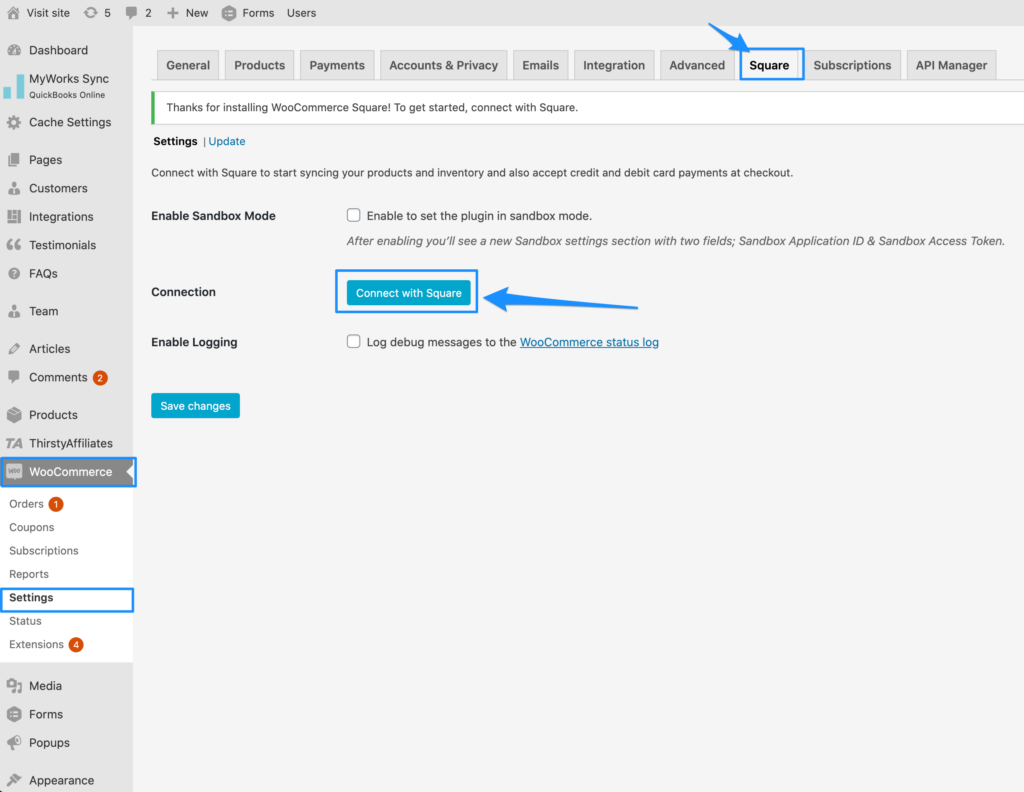
Next, you will be brought to the Square tab. From here, select the blue button that says Connect with Square.
If you have not created a Square account yet, create an account before proceeding. You will need an account to connect to your site
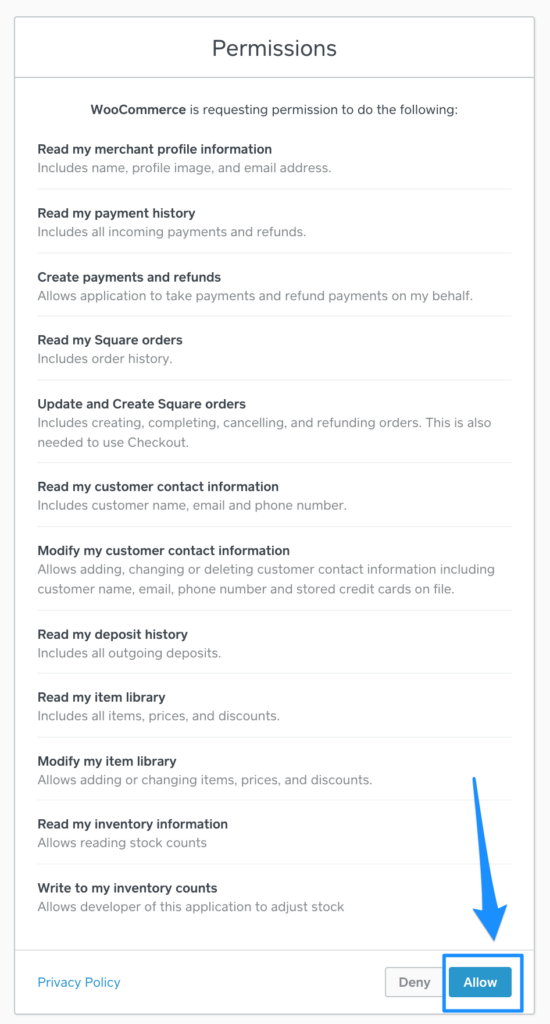
To connect your site to Square, you will need to login to your Square account. You will be brought to the square login page and after signing in, to the permissions screen. Click allow on the permissions screen.
Congrats, you have just authenticated Square on your WooCommerce site. Click Redirect Me to navigate back to your site.

Now, you will be able to configure the Square settings from WooCommerce. Make sure to select what Business location and Product system of record you would like to choose, as well as enable Sync inventory and/or Handle missing products.
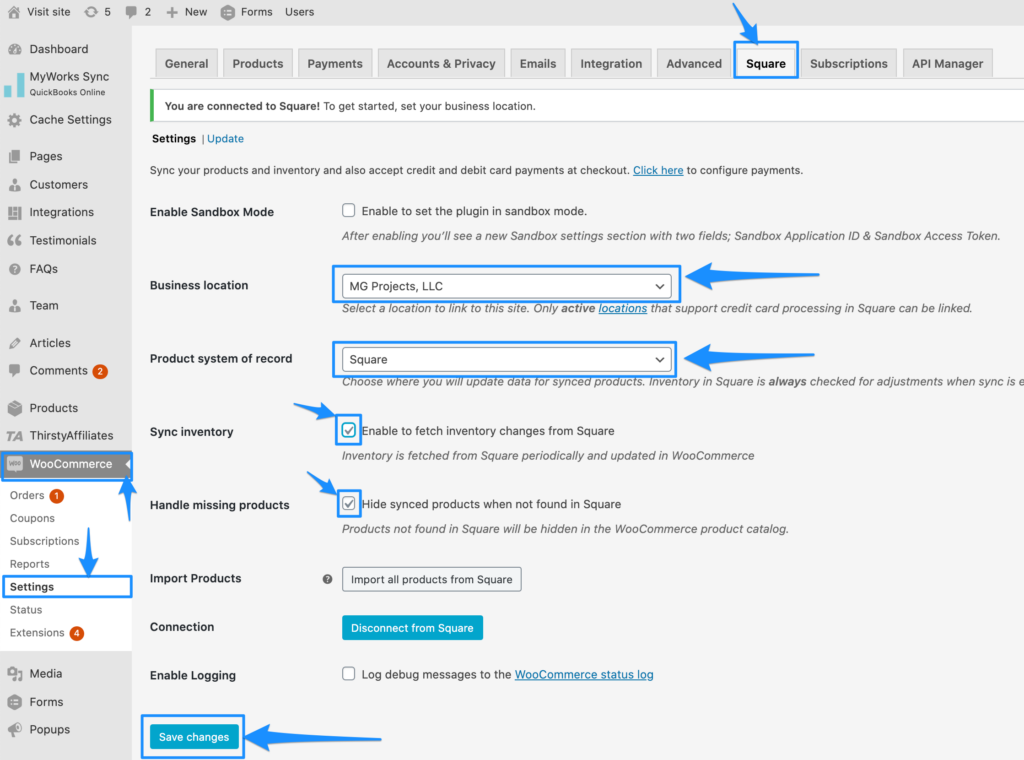
Don’t forget to click ‘Save Changes’ in WooCommerce.
2. Enable Square in WooCommerce
The first step is to go to your WordPress dashboard, hover over WooCommerce, and go to the Settings.
Next, click the Payments tab.
Finally, click the checkbox to enable Square Payment Method and click Set up.
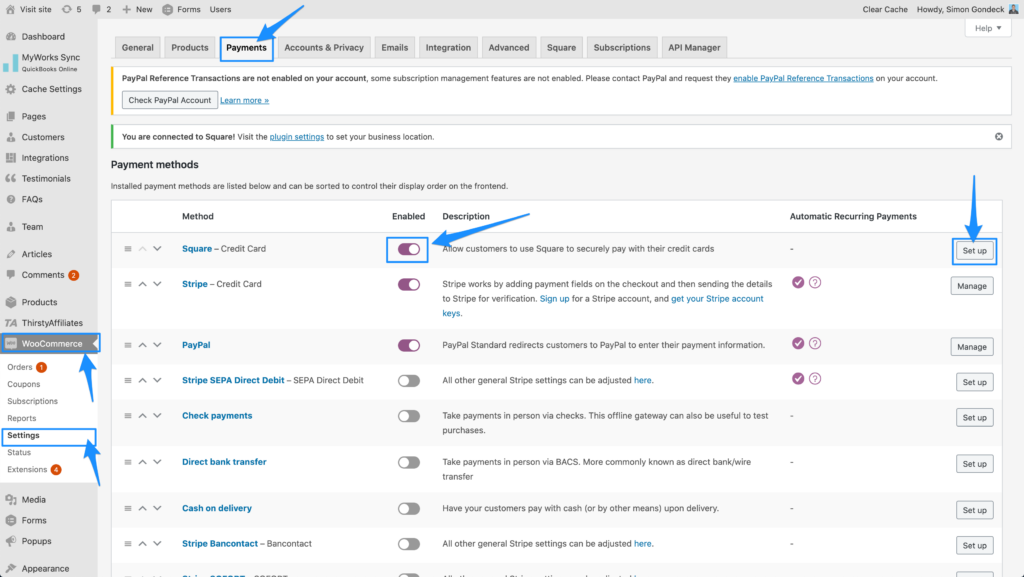
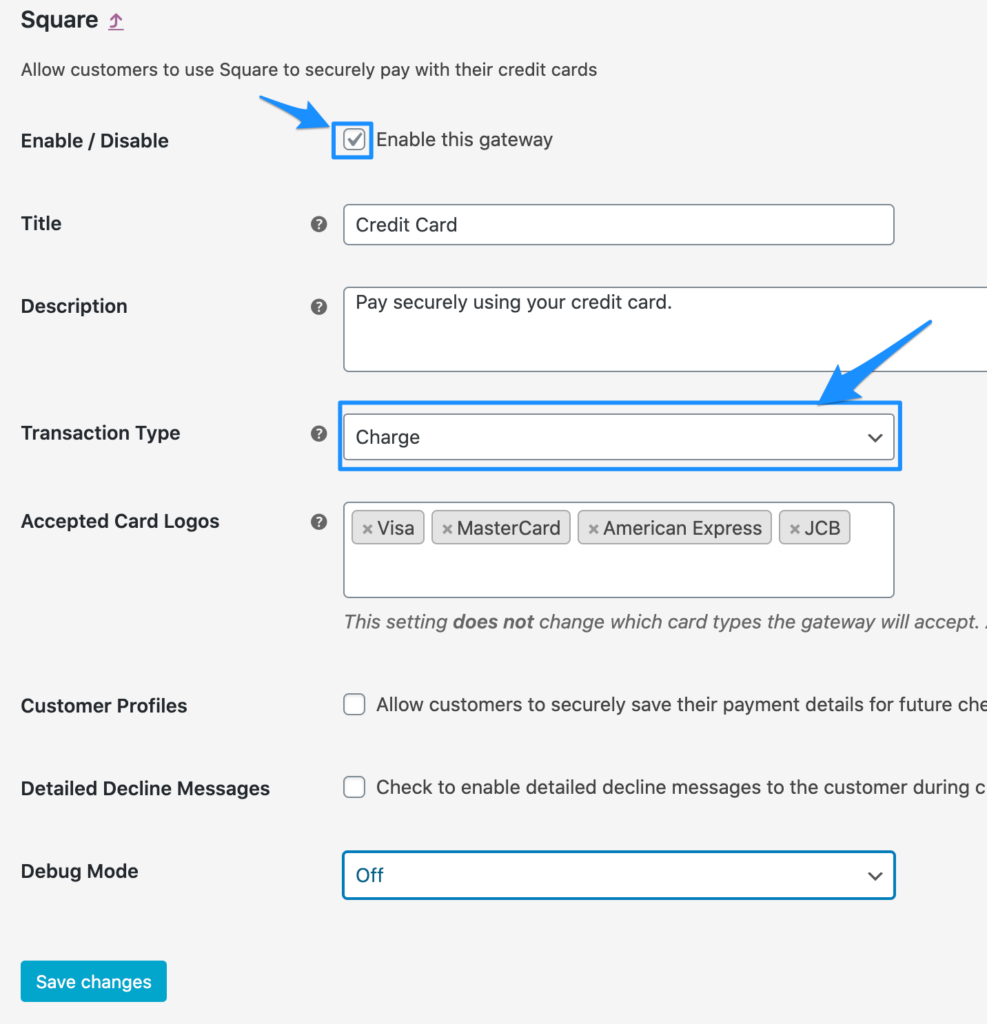
Next, click the checkbox to enable the Square Payment Gateway, select ‘Charge’ from the Transaction type dropdown, and don’t forget to click ‘Save Changes’ in WooCommerce.
3. Test that Square is working
Finally, do a live transaction on your site using Square. Open up a browser on your phone or computer and go to your website and add one of your products to Cart.
You should see the option to pay with a credit card.
If you do not see this option, you may also have to clear your cache.
Pro tip: Update 1 product in your store to be $1 and do a real transaction using Square to make sure everything is working!
How to debug issues?
Go to WooCommerce → Settings → Payments → Square. Then, enable “Detailed Declined Messages” checkbox. Next, save the plugin settings. Now, open up a private window or incognito window in your browser (File → New Private Window). Go through the Checkout process again.
What does the error message show?
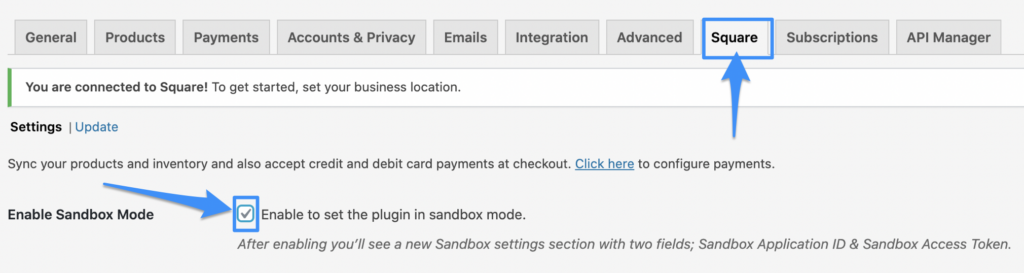
How to setup Square sandbox account on WooCommerce?
Go to WooCommerce Settings.
Next, click the Square tab.
Under Enable Sandbox Mode click “Enable to set the plugin in sandbox mode”.
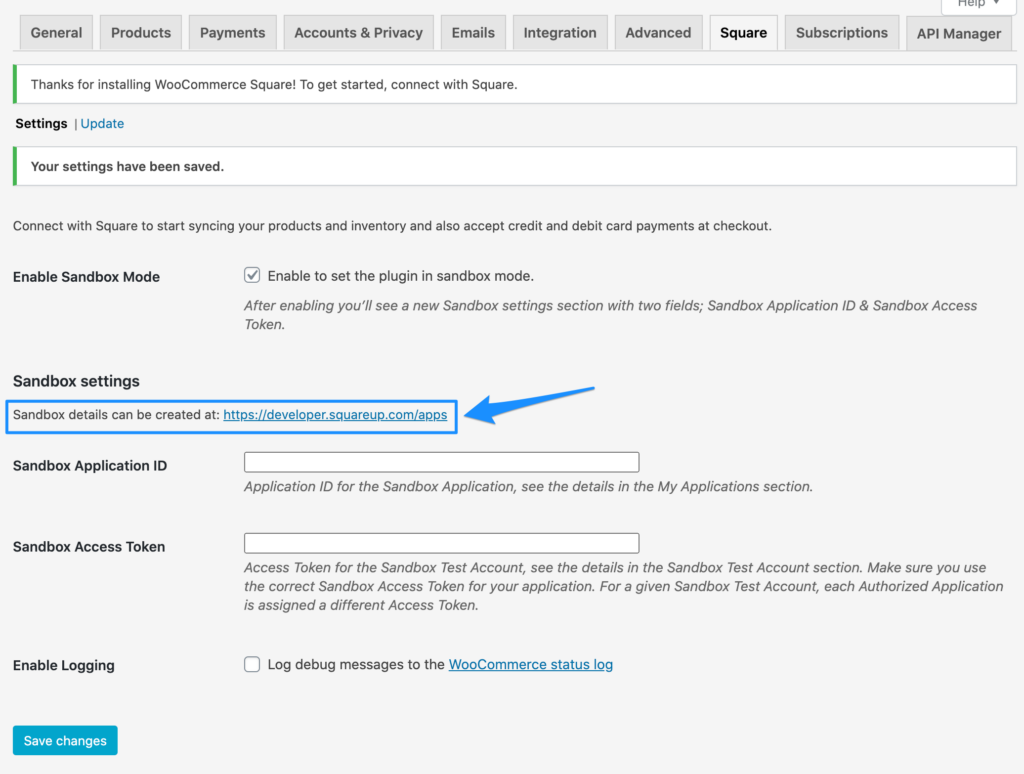
After enabling sandbox mode, scroll down to your Square settings page, you will notice we need to insert our Sandbox Application ID and Sandbox Access Token.
To get these credentials we need to create a Square Developer account.
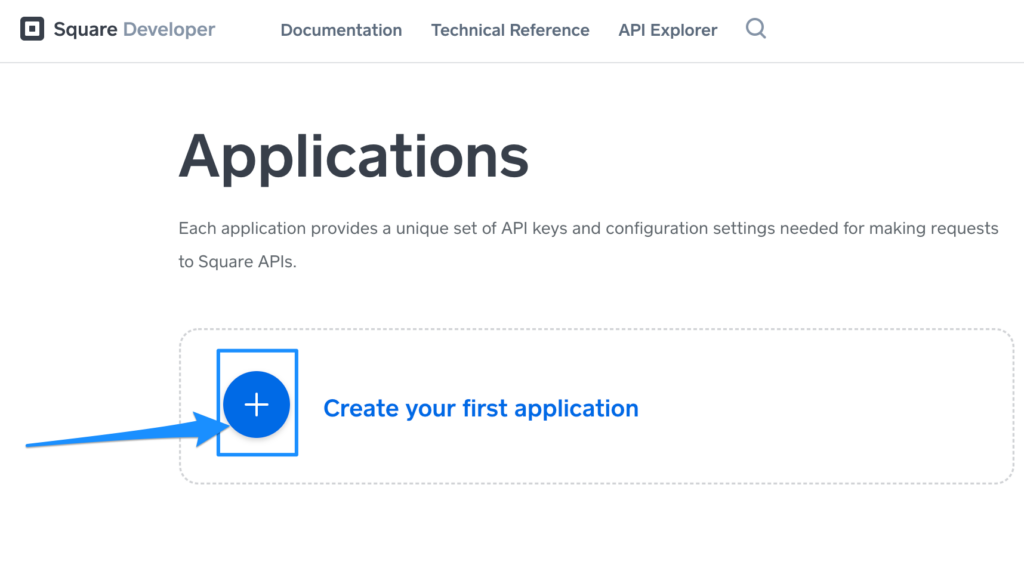
On your Square Dashboard, click the plus icon to create a new app, name your app (i.e. I named mine ‘WooCommerce Testing Site Sandbox’), and then. click save.
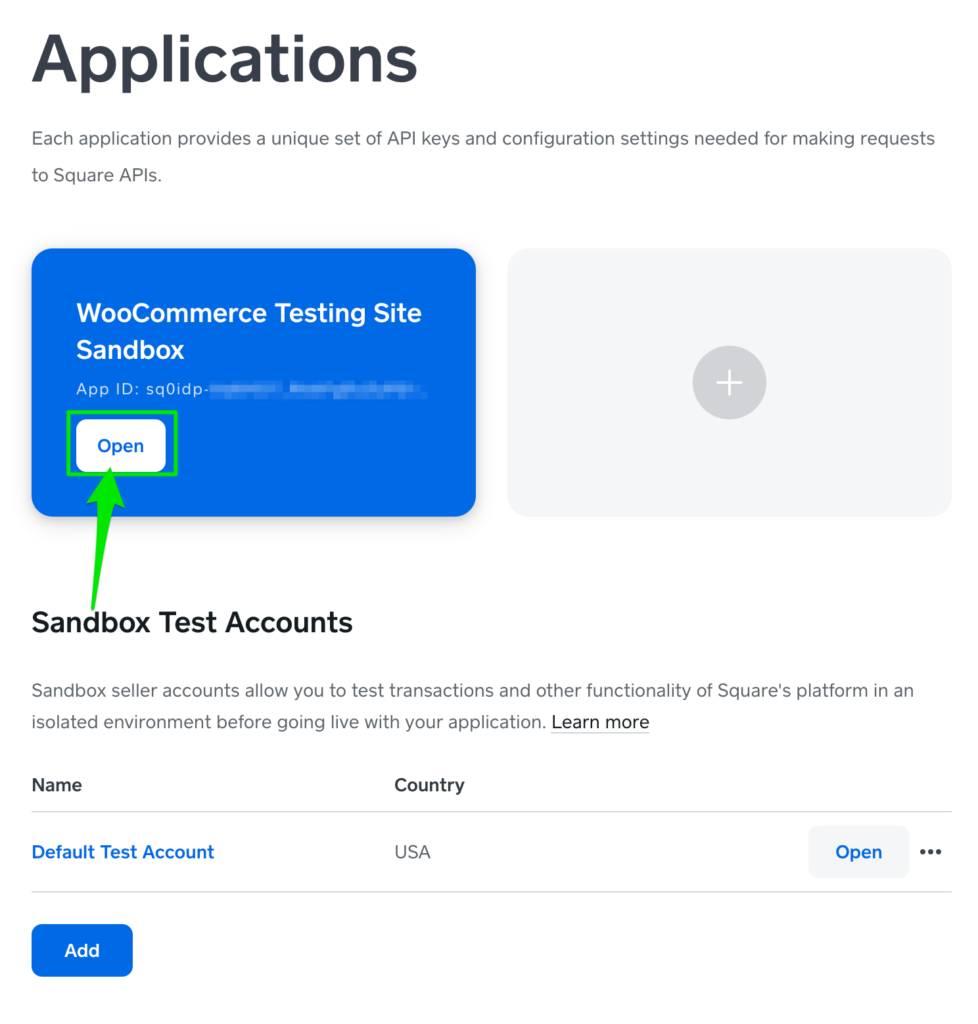
Next, click Open and should. be able to see your Sandbox Application ID and Sandbox Access Tokens.
Next, copy and paste the new Sandbox Application ID and Sandbox Access Token into your WooCommerce Square settings.
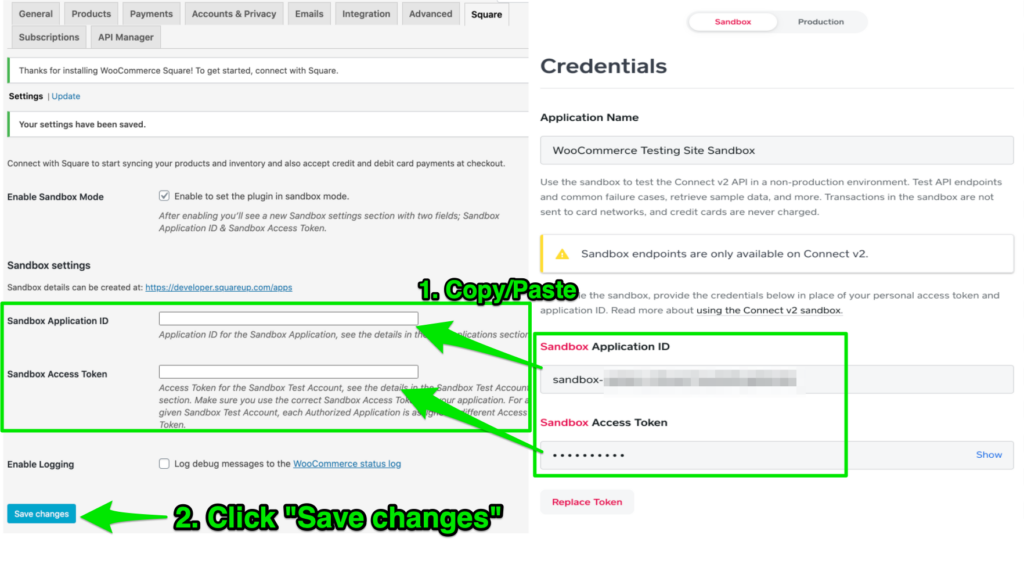
Click Save changes.
Finally, be sure to set the Business Location to ‘Default Test Account’.
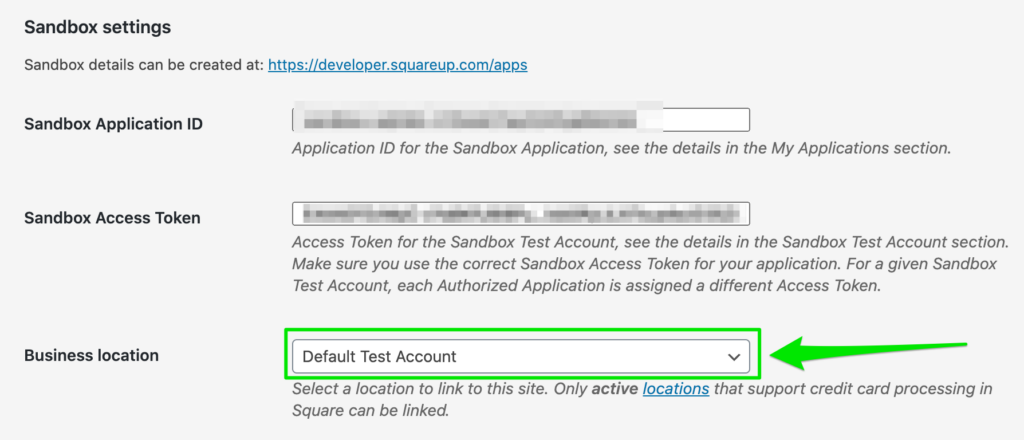
Your Square sandbox account is all set up. You now can use to do test transactions!
What credit cards are accepted with Square?
Square works with any US-issued and most internationally-issued magstripe or chip cards incluuding Visa, MasterCard, Discover Discover, American Express, UnionPay logo, and JCB.
How do I set it for Off-Site payment processing?
Hi Simon,
Do you know how to make it Capture the card info? I can see where to set it to Charge or Authorize but the Capture option is not available? A Square rep told me I can do this but didn’t explain how.
Hi Simon
Hope you are good!
I have a problem with my woocommerce square, i put all my my credit cards and when i click “place order” only loading.
do i need to do a verify into my square account?
Please Help Me!
Hello simon business location square not showing up on WooCommerce
Can you help me please ?
i thing you did not verify you identity (employees too..) in your square account
Hello friend
I have spent three days trying to test a payment webhook, but it’s imposibble to get my location from Square. I have opened three different square accounts but I don’t know how to enable “support credit card processing” in my sandbox environments.
Only active locations that support credit card processing in Square can be linked. I’m lost
Regards
Boris
Hi Simon – Great post. I did exactly what you specify above, however, Square is still not accepting payment from Woocommerce. This is the message it gave me in the order status screen. “Square Payment Failed (Status code INVALID_ENUM_VALUE: “ is not a valid enum value for `Country` (line 1, character 527)) Order status changed from Pending payment to Failed.”
Do you know what went wrong here?
Hi Daniel, go to WooCommerce > Settings > General and make sure you added the same country as you added in Square. After doing this can you retry doing a payment and see what you get?